Sep 042022
 

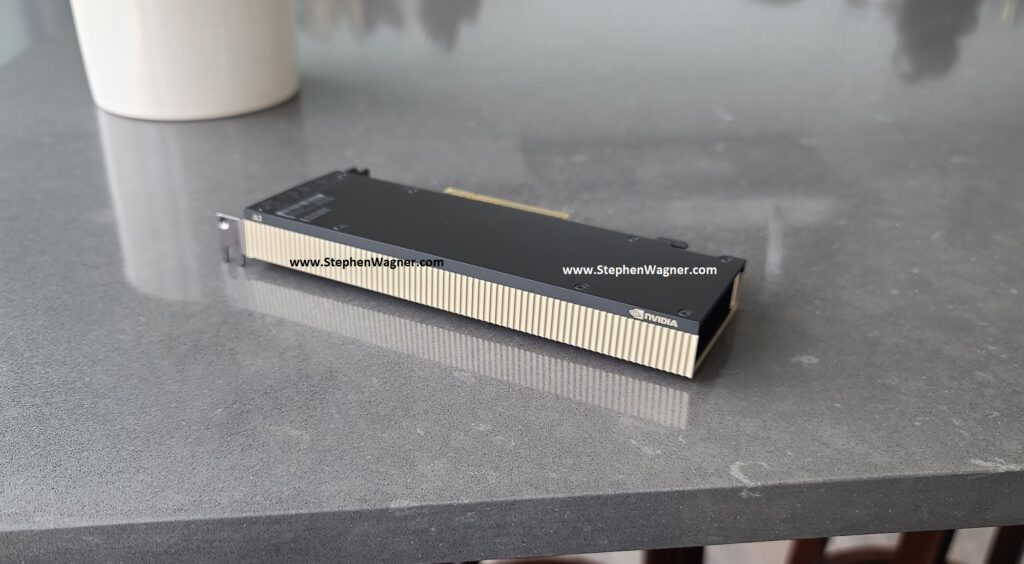
When either directly passing through a GPU, or attaching an NVIDIA vGPU to a Virtual Machine on VMware ESXi that has more than 16GB of Video Memory, you may run in to a situation where the VM fails to boot with the error “Module ‘DevicePowerOn’ power on failed.”. Special considerations are required when performing GPU or vGPU Passthrough with 16GB+ of video memory.

This issue is specifically caused by memory mapping a GPU or vGPU device that has 16GB of memory or higher, and could involve both the host system (the ESXi host) and/or the Virtual Machine configuration.

In this post, I’ll address the considerations and requirements to passthrough these devices to virtual machines in your environment.

In the order of occurrence, it’s usually VM configuration related, however if the recommendations in the “VM Configuration Considerations” section do not resolve the issue, please proceed to reviewing the “ESXi Host Considerations” section.

Please note that if the issue is host related, other errors may be present, or the device may not even be visible to ESXi.

VM GPU and vGPU Configuration Considerations

First and foremost, all new VMs should be created using the “EFI” Firmware type. EFI provides numerous advantages in device access and memory mapping versus the older style “BIOS” firmware types.

VM Firmware type EFI

To do this, create a new virtual machine, navigate to “VM Options”, expand “Boot Options”, and confirm/change the Firmware to “EFI”. I recommend this for all new VMs, and not only for VMs accessing GPUs or vGPUs with over 16GB of memory. Please note that you shouldn’t change an existing VM, and should do this on a fresh new VM.

With performing GPU or vGPU Passthrough with 16GB+ of video memory, you’ll need to create a couple of entries under “Advanced” settings to properly configure access to these PCIe devices and provide the proper environment for memory mapping. The lack of these settings is specifically what causes the “Module ‘DevicePowerOn’ power on failed.” error.

Under the VM settings, head over to “VM Options”, expand “Advanced” and click on “Edit Configuration”, click on “Add Configuration Params”, and add the following entries:

pciPassthru.use64bitMMIO=”TRUE”
pciPassthru.64bitMMIOSizeGB=32

Example below:

VM GPU and vGPU Memory Settings for 16GB or higher memory mapping

You’ll notice that while our GPU or vGPU profile may have 16GB of memory, we need to double that value, and set it for the “pciPassthru.64bitMMIOSizeGB” variable. If your card or vGPU profile had 32GB, you’d set it to “64”.

Additionally if you were passing through multiple GPUs or vGPU devices, you’d need to factor all the memory being mapped, and double the combined amount.

ESXi GPU and vGPU Host Considerations

On most new and modern servers, the host level doesn’t require any special configuration as they are already designed to pass through such devices to the hypervisor properly. However in some special cases, and/or when using older servers, you may need to modify configuration and settings in the UEFI or BIOS.

If setting the VM Configuration above still results in the same error (or possibly other errors), than you most likely need to make modifications to the ESXi hosts BIOS/UEFI/RBSU to allow the proper memory mapping of the PCIe device, in our case being the GPU.

This is where things get a bit tricky because every server manufacturer has different settings that will need to be configured.

Look for the following settings, or settings with similar terminology:

  • “Memory Mapping Above 4G”
  • “Above 4G Decoding”
  • “PCI Express 64-Bit BAR Support”
  • “64-Bit IOMMU Mapping”

Once you find the correct setting or settings, enable them.

Every vendor could be using different terminology and there may be other settings that need to be configured that I don’t have listed above. In my case, I had to go in to a secret “SERVICE OPTIONS” menu on my HPE Proliant DL360p Gen8, as documented here.

After performing the recommendations in this guide, you should now be able to passthrough devices with over 16GB of memory.

Additional Resources:

Sep 042022
 

With VMware ESXi 6.5 and 6.7 going End of Life on October 15th, 2022, many of you are looking for options to update hosts in your homelab, especially in my case putting ESXi 7.0 on HP Proliant DL360p Gen8 servers.

As far as support goes, HPE last provided a custom installer for ESXi for versions 6.5 U3 which was released December of 2019. This was the “last Pre-Gen9 custom image” released, as ESXi 7.0 on the DL360p Gen8 is totally unsupported.

Update: Check out my post covering ESXi 8.0 on HPE Proliant DL360p Gen8 servers!

ESXi 6.7 or higher on the Gen8 Servers

The jump from 6.5 to 6.7 was a little easier, as you could use the 6.5 custom installer, and then upgrade to 6.7. For the most part, as long as the hardware itself was supported, you were in pretty good shape.

Additionally, with the HPE vibsdepot loaded in to VMware Update Manager (now known as Lifecycle Manager), you could also keep all the HPE drivers and agents up to date.

ESXi 7.0 on the Gen8 Servers

Some were lucky enough to upgrade their current installs to 7 with no or limited problems, however the general consensus online was to expect problems. There were some major driver changes, which I think at one point led to an advisory to perform a fresh install, even if you had a fully supported configuration with newer generation servers such as the Proliant Gen9 and Gen10 servers, when upgrading from older versions.

In my setup, I have the following:

  • 2 x HPE Proliant DL360p Gen8 Servers
    • Dual Intel Xeon E5-2660v2 Processors in each server
    • USB and/or SD for booting ESXi
    • No other internal storage
  • External SAN iSCSI Storage

Concerns and Considerations

My main concern is to not only have a stable and functioning ESXi 7 instance, but I also, if possible would like to have the HPE drivers, agents, and integrations with iLO.

You must consider that while this is completely unsupported, you do need to make sure that the components of your current configuration are supported, such as the processor and PCIe cards, even if the server as a whole is not supported.

Make sure you reference your hardware on the VMware Compatibility Guide (HCL).

In my case, my processors were supported, however my RAID controller was not. So theoretically, since I’m not using my RAID controllers, I should be fine.

The process – Installing ESXi 7.0

I was able to install ESXi 7.0 on my HPE Proliant Gen8 servers, by performing the following steps.

  1. Download the Generic ESXi installer from VMware directly.
    1. Link: Download VMware vSphere
  2. Download the “HPE Custom Addon for ESXi 7.0”.
    1. Link: HPE Custom Addon for ESXi 7.0 U3 for July 2022
  3. Boot server, install using the Generic Installer downloaded above.
  4. Mount NFS or iSCSI datastore.
  5. Copy HPE Custom Addon for ESXi zip file to datastore.
  6. Enable SSH on host (or use console).
  7. Place host in to maintenance mode.
  8. Run “esxcli software vib install -d /vmfs/volumes/datastore-name/folder-name/HPE-703.0.0.10.9.1.5-Jul2022-Addon-depot.zip” from the command line.
  9. The install will run and complete successfully.
  10. Restart your server as needed, you’ll now notice that not only were HPE drivers installed, but also agents like the Agentless management agent, and iLO integrations.

You’ll now have a functioning instance.

HP Proliant DL360p Gen8 running ESXi 7.0

In my case everything was working, except for the “Smart Array P420i” RAID Controller, which I don’t use anyways.

Additionally, if you have a vCenter instance running, make sure that you add the HPE vibsdepot repo to your Lifecycle Manager. After you add the repo, create a baseline, and attach the baseline to the host, go ahead and proceed to scan, stage, and remediate the server which will then further update all the HPE specific drivers and software.

Aug 142022
 
HP Printer on VDI

When it comes to troubleshooting login times with non-persistent VDI (VMware Horizon Instant Clones), I often find delays associated with printer drivers not being included in the golden image. In this post, I’m going to show you how to add a printer driver to an Instant Clone golden image!

Printing with non-persistent VDI and Instant Clones

In most environments, printers will be mapped for users during logon. If a printer is mapped or added and the driver is not added to the golden image, it will usually be retrieved from the print server and installed, adding to the login process and ultimately leading to a delay.

Due of the nature of non-persistent VDI and Instant Clones, every time the user goes to login and get’s a new VM, the driver will then be downloaded and installed each of these times, creating a redundant process wasting time and network bandwidth.

To avoid this, we need to inject the required printer drivers in to the golden image. You can add numerous drivers and should include all the drivers that any and all the users are expecting to use.

An important consideration: Try using Universal Print Drivers as much as possible. Universal Printer Drivers often support numerous different printers, which allows you to install one driver to support many different printers from the same vendor.

How to add a printer driver to an instant clone golden image

Below, I’ll show you how to inject a driver in to the Instant Clone golden image. Note that this doesn’t actually add a printer, but only installs the printer driver in to the Windows operating system so it is available for a printer to be configured and/or mapped.

Let’s get started! In this example we’ll add the HP Universal Driver. These instructions work on both Windows 10 and Windows 11 (as well as Windows Server operating systems):

  1. Click Start, type in “Print Management” and open the “Print Management”. You can also click Start, Run, and type “printmanagement.msc”.
    Launch Print Management
  2. On the left hand side, expand “Print Servers”, then expand your computer name, and select “Drivers”.
    Print Management Drivers
  3. Right click on “Drivers” and select “Add Driver”.
    Print Management Add Driver
  4. When the “Welcome to the Add Printer Driver Wizard” opens, click Next.
    Add Printer Driver Wizard
  5. Leave the default for the architecture. It should default to the architecture of the golden image.
  6. When you are at the “Printer Driver Selection” stage, click on “Have Disk”.
    Print Management Add Printer Driver Location
  7. Browse to the location of your printer driver. In this example, we navigate to the extracted HP Universal Print Driver.
    Browse Printer Driver Location
  8. Select the driver you want to install.
    VDI Select Printer Driver to Install
  9. Click on Finish to complete the driver installation.
    Finish installing Instant Clone Printer Driver

The driver you installed should now appear in the list as it has been installed in to the operating system and is now available should a user add a printer, or have a printer automatically mapped.

Screenshot of Printer Driver installed on non-persistent VDI Instant Clone golden image
Printer Driver installed on Non-Persistent Instance Clone Golden Image

Now seal, snap, and deploy your image, and you’re good to go!

Aug 132022
 
Azure AD

Many of you may be not aware of the Azure AD Connect 1.x End of Life on August 31st, 2022. What this means is that as of August 31st, 2022 (later this month), you’ll no longer be able to use Azure AD Connect 1.4 or Azure AD Connect 1.6 to sync your on-premise Active Directory to Azure AD.

It’s time to plan your upgrade and/or migration!

This is catching a lot of System Administrators by surprise. In quite a few environments, Azure AD connect was implemented on older servers that haven’t been touched (except for Windows Updates) in the years that they’ve been running, because Azure AD Connect “just works”.

Azure AD Connect End of Life

Azure AD Connect has to major releases that are being used right now, being 1.x and 2.x.

Windows Server 2022 Logo

Version 1.x which is the release going end of life is the first release, generally seen installed on older Windows Server 2012 R2 systems (or even earlier versions).

Version 2.x which is the version you *should* be running, does not support Windows Server 2012. Azure AD Connect 2.x can only be deployed on Windows Server 2016 or higher.

Click here for more information on the Azure AD Connect: Version release history.

Azure AD Connect Upgrade and Migration

For a lot of you, there is no easy in-place upgrade unless you have 1.x installed on Windows Server 2016 or higher. If you are running 1.x on Server 2016 or higher, you can simply do an in-place upgrade!

If you’re running Windows Server 2012 R2 or earlier, because 2.x requires Server 2016 or higher, you will need to migrate to another system running a newer version of Windows Server.

However, the process to migrate to a newer server is simpler and cleaner than most would suspect. I highly recommend reviewing all the Microsoft documentation (see below), but a simplified overview of the process is as follows:

  1. Deploy new Windows Server (version 2016 or higher)
  2. Export Configuration (JSON file) from old Azure AD Connect 1.x server
  3. Install the latest version of Azure AD Connect 2.x on new server, load configuration file and place in staging mode.
  4. Enable Staging mode on old server (this stops syncing of old server)
  5. Disable Staging mode on new server (this starts syncing of new server)
  6. Decommission old server (uninstall Azure AD Connect, unjoin from domain)

I highly recommend reviewing Microsoft’s Azure AD Connect: Upgrade from a previous version to the latest for the full process, as well as Microsoft’s Import and export Azure AD Connect configuration settings.

As always, I highly recommend having an “Alternative Admin” account on your Azure AD. If you lose the ability to sync or authenticate against Azure AD, you’ll need a local Azure AD admin account to connect and manage and re-establish the synchronization.

Aug 102022
 

As we approach the date, I wanted to write a post sharing Why I’m looking forward to VMware Explore 2022 and share what I hope to get from the conference and experience.

As most of you know, VMware Explore 2022 (formerly known as VMware VMworld) is taking place this month in San Francisco at the Moscone Center August 29th, 2022 to September 1st, 2022.

VMware Explore 2022 Conference Logo

If you haven’t gotten your ticket, you can sign up here: https://www.vmware.com/explore/us.html

As some of you know, I regularly write about virtualization technologies, in particular VMware. VMware products are not only involved in the work that I do, but part of a personal hobby and passion. I was an early adopter of Virtualization, and on top of that, VDI (Virtual Desktop Infrastructure) has become a personal obsession of mine.

Because of the content I’ve written online, I’ve had the pleasure of helping others with these technologies. Over the years this has brought me new friendships, business customers, and given me a sense of participation in the larger community, ultimately leading to me achieving my VMware vExpert status, as well as being a part of the VMware vExpert EUC sub program.

Even though I’ve been in tech since becoming an adult, I’ve actually never had the opportunity to visit a large-scale conference in person in my entire life. VMware Explore 2022 will be my first in-person tech conference!

I'm going to VMware Explore Conference

So why am I going? What do I hope to get from it? What are my reasons for attending?

Essentially there’s 3 big reasons why I’m going to be attending:

  • Community
  • Knowledge
  • Business

Let’s dive in to each one…

Community

As mentioned above, I’ve had the pleasure of being a part of the VMware vExpert program for the past couple years. During this time, it has helped my content reach new audiences, I’ve had the chance to converse and talk with the top industry experts, I’ve also had the chance to learn more about the technologies I love, and it’s given a sense of belonging and participating in something “big”.

VMware vExpert BadgevExpert Badge

Blogging has been a passion of mine for as long as I can remember, with the first post on this blog going back to April 11th, 2010. Blogging has allowed me to not only share my knowledge, but also participate and contribute to the community. This has helped me meet new people, network, learn even more, and also help others pursue their passions and goals with technology.

Attending VMware Explore 2022 will help me take this a step further to actually meet some of those in the community face to face. I love meeting new people, and this will allow me to engage with those who have stumbled across my blog, and it will also allow me to meet those who are leaders with the community and hopefully even learn some new things from them.

I’ve already started working on my list of people to meetup with!

Knowledge

In addition to the knowledge I hope to learn from others in the community, VMware Explore 2022 has over 600 technical sessions (some even hosted by fellow vExperts) where you can learn more about the technologies you use everyday, as well as technologies you’re considering or planning on using in the future.

VMware Explore Content Catalog

The full content catalog for VMware Explore 2022 can be found here: https://event.vmware.com/flow/vmware/explore2022us/content/page/catalog

In particular, a few products and solutions I want to increase my knowledge with are:

  • VMware Workspace One
  • VMware Horizon Cloud Service
  • VMware vSphere+

In addition to the above, I’m sure I’ll be expanding my knowledge on things I wasn’t even planning on… You could say the point of the conference is to “Explore”!

Business

VMware products and solutions have been an important part of the solutions and offerings my business provides. In addition, those products and solutions are also the foundations of many businesses and organizations key IT infrastructure.

These conferences are great to network, discuss business, find new potential clients and vendors, and also connect with those that you already do business with!

In the last 4 years the amount of international consulting I’ve been providing has increased exponentially on a year over year basis. And while it’s been amazing experience and I’ve had the chance to help many organizations with their VMware infrastructure, the only complaint I have is that I can’t meet face-to-face and shake hands with those customers as much as I’d like to. We have Zoom and Teams, but it’s not the same thing…

One thing I’m really looking forward to, is finally meeting quite a few of those customers face-to-face for the first time. I’m sure we’ll even have a few stories after attending a few (or many) of the VMware Explore parties that happen during that week.

Additionally, many major vendors sponsor VMware Explore and will have booths at the event, so I’m looking forward to meeting and shaking hands with some of my favorite vendors!

All in all, I think it’s going to be a great time and I’m really excited to attend. I hope to see you there!