This weekend I configured Azure AD Connect for pass through authentication for my on-premise Active Directory domain. This was a first for me and extremely easy to do, however there was a few issues with my firewall and SSL content filtering and scanning rules which was blocking the connection. I figured I’d create a post providing some information you’ll need to get this setup and running quickly.
In my environment, I have a Sophos UTM firewall which provides firewall services (port blocking), as well as HTTP and HTTPs scanning and filtering (web filtering).
The Problem
After running the Azure AD Connect wizard, all went good however there was an error at the end of the wizard notifying that synchronization was configured but is not occurring due to firewall. It provided a link for more information (that actually didn’t really contain the information needed).
While this issue is occurring, you’ll notice:
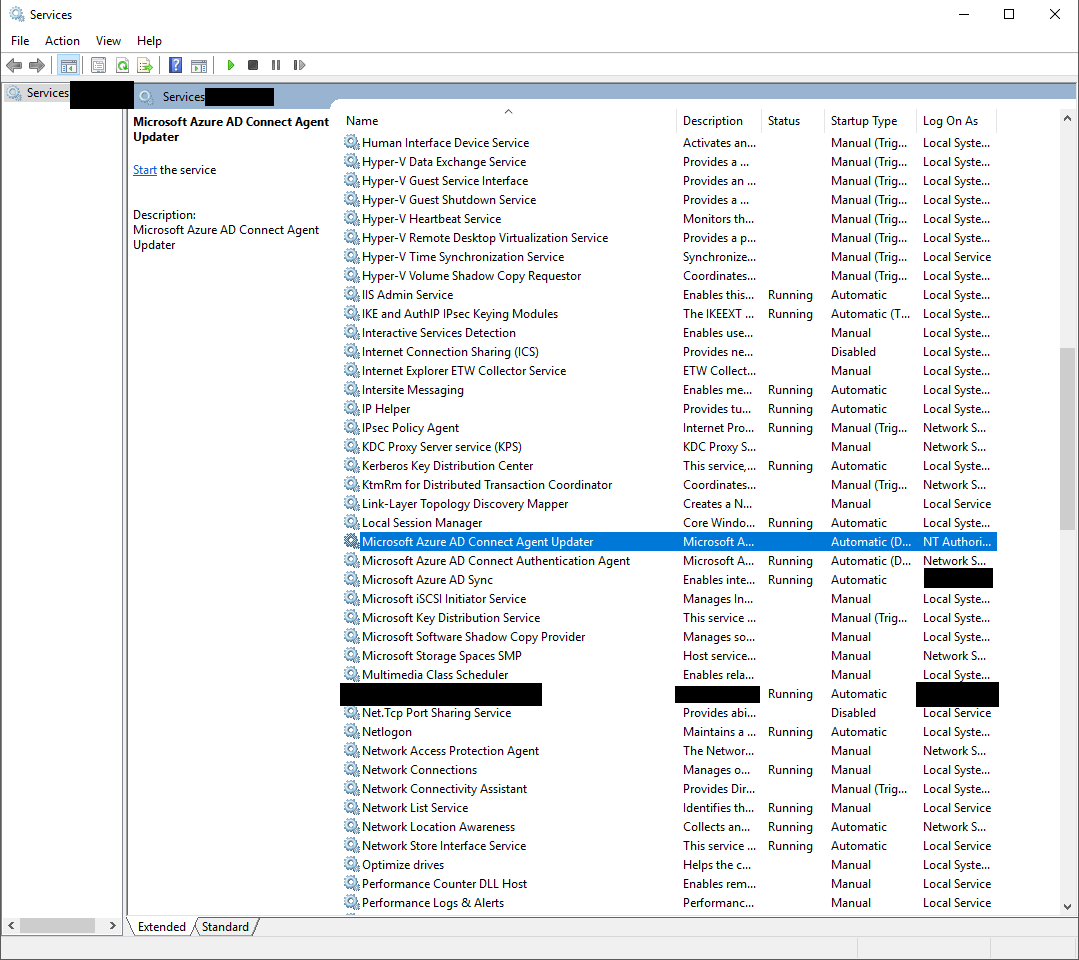
-Azure AD Connect in the Azure portal is reporting that pass-through authentication is Enabled, however after expanding the item, the Authentication Agent reports a status of Inactive on your internal domain controllers.
-In the Event log, under “Applications and Services Logs”, then “Microsoft”, then “AzureADConnect”, then “AuthenticationAgent”, and finally “Admin”, you’ll see the following error event:
Event ID: 12019

Source: Microsoft Azure AD Connect Authentication Agent (Microsoft-AzureADConnect-AuthenticationAgent)

Event:
The Connector stopped working because the client certificate is not valid. Uninstall the Connector and install it again. Request ID: '{WAJAJAJA-OHYA-YAAA-YAAAA-WAKAKAKAKAKAKAK}'
This event log above is due to the SSL and HTTPs content filtering.
-Azure Pass-Through authentication won’t work
The Fix
After doing some research, I came up with the following list of ports and hosts you’ll need to allow unfiltered to a specific list of hosts.
Ports
The following ports are used by Azure AD Connect:
Port 443 – SSL
Port 5671 – TCP (From the host running the Azure AD Connect to Internet)
Hosts (DNS Hosts)
Here’s the host list:
*blob.core.windows.net
*servicebus.windows.net
*adhybridhealth.azure.com
*management.azure.com
*policykeyservice.dc.ad.msft.net
*login.windows.net
*login.microsoftonline.com
*secure.aadcdn.microsoftonline-p.com
*microsoftonline.com
*windows.net
*msappproxy.net
*mscrl.microsoft.com
*crl.microsoft.com
*ocsp.msocsp.com
*www.microsoft.com
If you’re running a Sophos UTM like I am, you’ll need to create an HTTP(s) scanning exception and then import this list in to a rule “Matching these URLs”:
^https?://([A-Za-z0-9.-]*\.)?blob.core.windows.net/
^https?://([A-Za-z0-9.-]*\.)?servicebus.windows.net/
^https?://([A-Za-z0-9.-]*\.)?adhybridhealth.azure.com/
^https?://([A-Za-z0-9.-]*\.)?management.azure.com/
^https?://([A-Za-z0-9.-]*\.)?policykeyservice.dc.ad.msft.net/
^https?://([A-Za-z0-9.-]*\.)?login.windows.net/
^https?://([A-Za-z0-9.-]*\.)?login.microsoftonline.com/
^https?://([A-Za-z0-9.-]*\.)?secure.aadcdn.microsoftonline-p.com/
^https?://([A-Za-z0-9.-]*\.)?microsoftonline.com/
^https?://([A-Za-z0-9.-]*\.)?windows.net/
^https?://([A-Za-z0-9.-]*\.)?msappproxy.net/
^https?://([A-Za-z0-9.-]*\.)?mscrl.microsoft.com/
^https?://([A-Za-z0-9.-]*\.)?crl.microsoft.com/
^https?://([A-Za-z0-9.-]*\.)?ocsp.msocsp.com/
^https?://([A-Za-z0-9.-]*\.)?www.microsoft.com/
The exception I created skips:
- Authentication
- Caching
- Antivirus
- Extension Blocking
- MIME type blocking
- URL Filter
- Content Removal
- SSL Scanning
- Certificate trust check
- Certificate date check
After creating the exceptions, I restarted the “Microsoft Azure AD Connect Authentication Agent”. The errors stopped and Azure AD Pass-through started to function correctly! Also the status of the Authentication Agent now reports a status of active.
 VMware vSphere 6.7 Download Link