In this post, I’ll be going over how to add additional and/or alternative UPN suffixes to your Active Directory. I’ll also be going over why you may require this inside of your environment.
This is also a follow up post to the article here: https://www.stephenwagner.com/2016/09/23/outlook-2016-exchange-2013-password-prompts-upn-and-samaccountname-troubles/ as Microsoft has deleted the KB 243629 article which contained the original instructions.
Why
There is a number of reasons why you may want to do this:
- You’re migrating to a newer version of Microsoft Outlook 2016, and require the users UPN to match the users e-mail address for auto-configure to function.
- Your internal domain is is a “domain.local” domain, however you want users to log in with a “domain.com” domain.
- You are implementing a line of business application or other piece of software that requires user’s UPNs to match their e-mail addresses.
- You’re performing a migration.
How
Let’s get to it! Here’s how to add an alternative UPN suffix to an Active Directory domain:
- Log on to your domain controller.
- Open “Active Directory Domains and Trusts”
- On the left hand side of the new window, right click on “Active Directory Domains and Trusts”, and select “Properties” (as shown below).
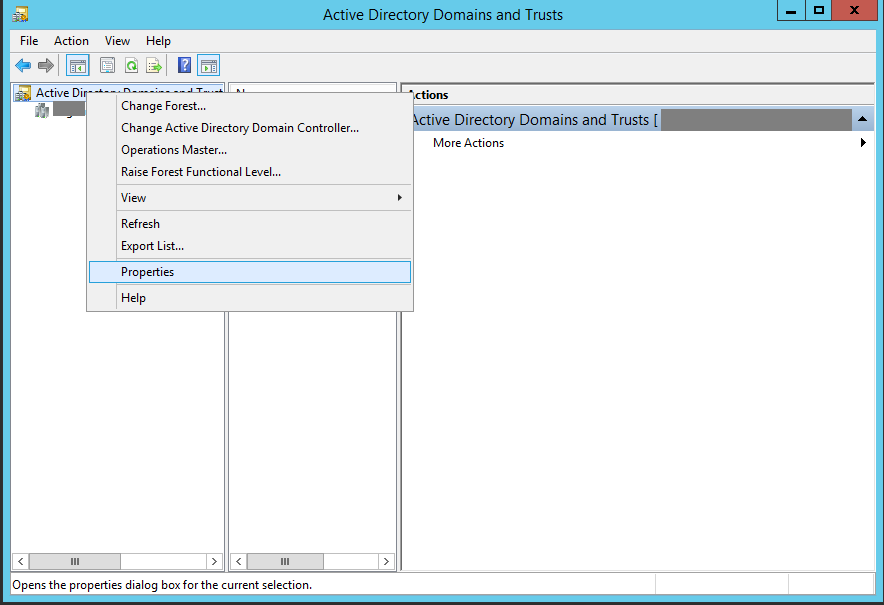
Active Directory Domains and Trusts Window
- Type in your new domain suffix in to the “Alternative UPN suffixes” box, and then click “Add”. As shown below.
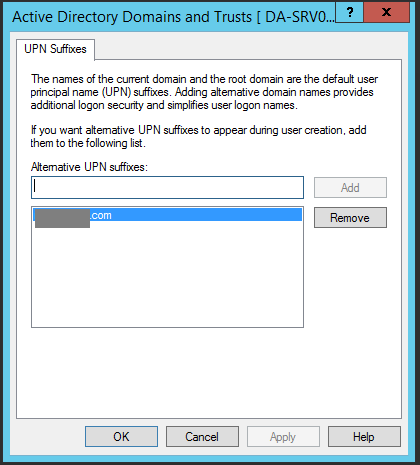
Add Alternative UPN suffix
- Click “Apply” and then close out of the windows.
The new UPN suffix should be available via “Active Directory Users and Computers” and you should be able to set it to users.
You can also configure the user accounts via the Exchange Administration Center (EAC). See below for an example:
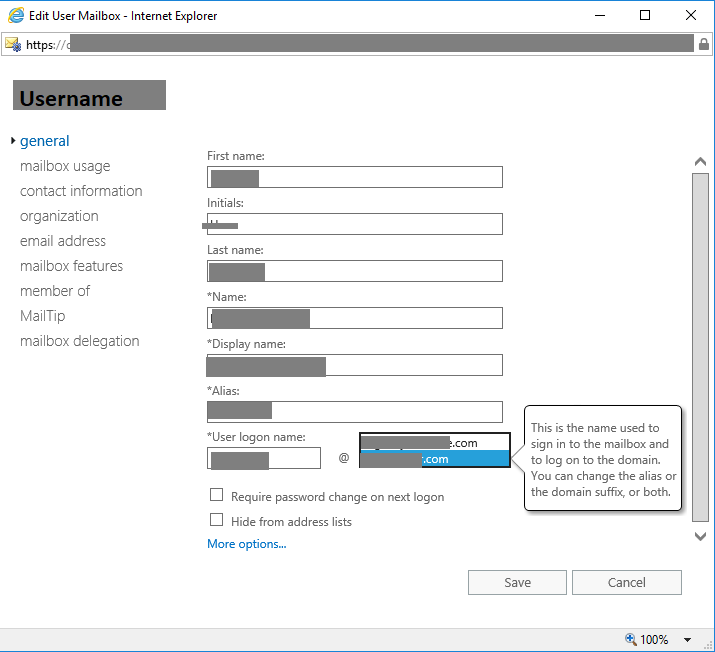
Exchange Administration Center UPN Suffix