Just a reminder to my readers that in addition to IT consulting services, I also provide emergency IT consulting services. I’m available weekends and holidays, and I’m also available to travel.
Numerous readers have utilized my services in the past, and some do on a frequent and regular basis.
Remote IT Consulting
In a bind and need help fast? Feel free to reach out. I can connect remotely, provide assistance with issues, implementations, migrations, hardware, software, licensing, and pretty much anything that’s been discussed in this blog or relating to Information Technology.
On-Site IT Consulting Services
I’m also available for assistance on-site and in person, with the ability to travel. Have a remote site that has a major IT issue? Give me a shout!
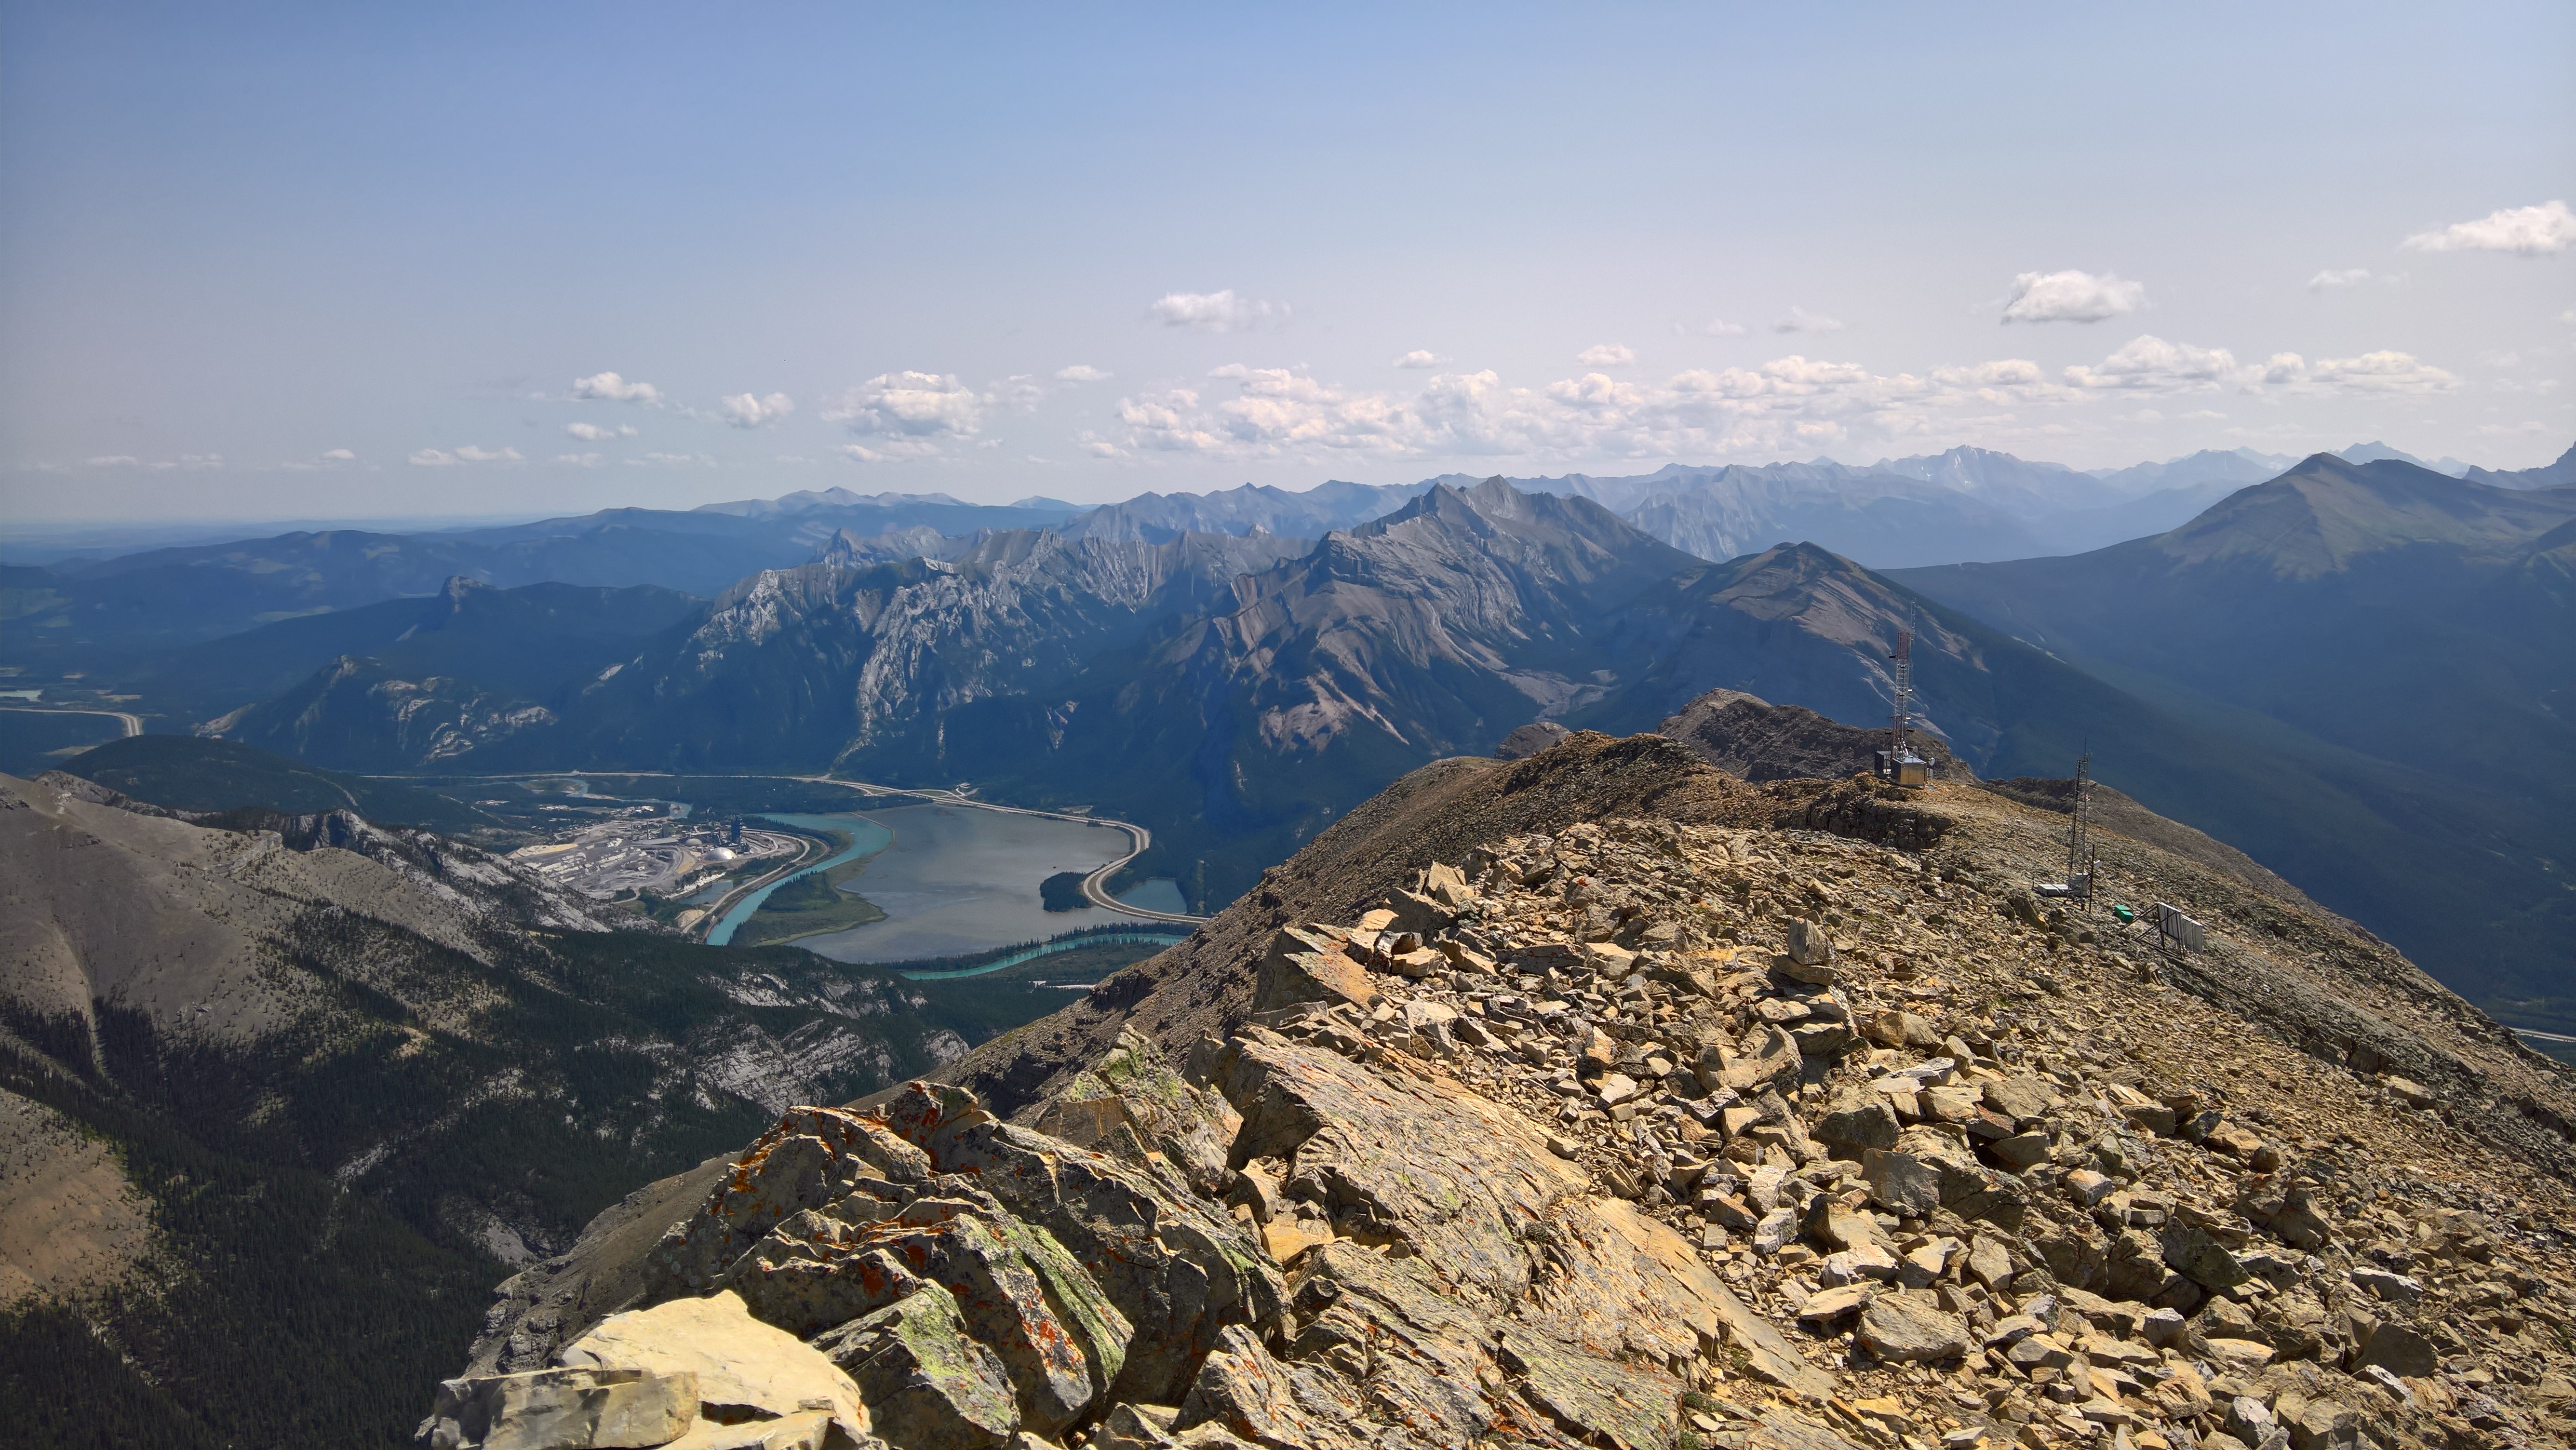
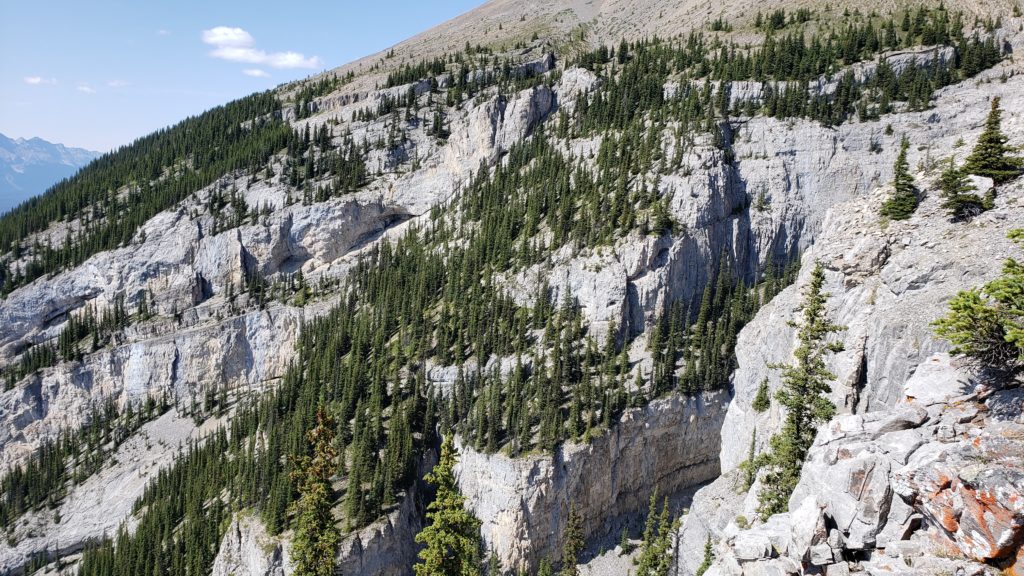
Earlier this month, we decided to hike and climb Grotto Mountain. Grotto Mountain is just outside of Canmore, Alberta, with it’s trail head starting right by the Alpine club. This was my 3rd time doing the hike, and 1st for my friend. This was however the first time I’ve done the complete loop, ascending the ACC route, and descending the hard route.
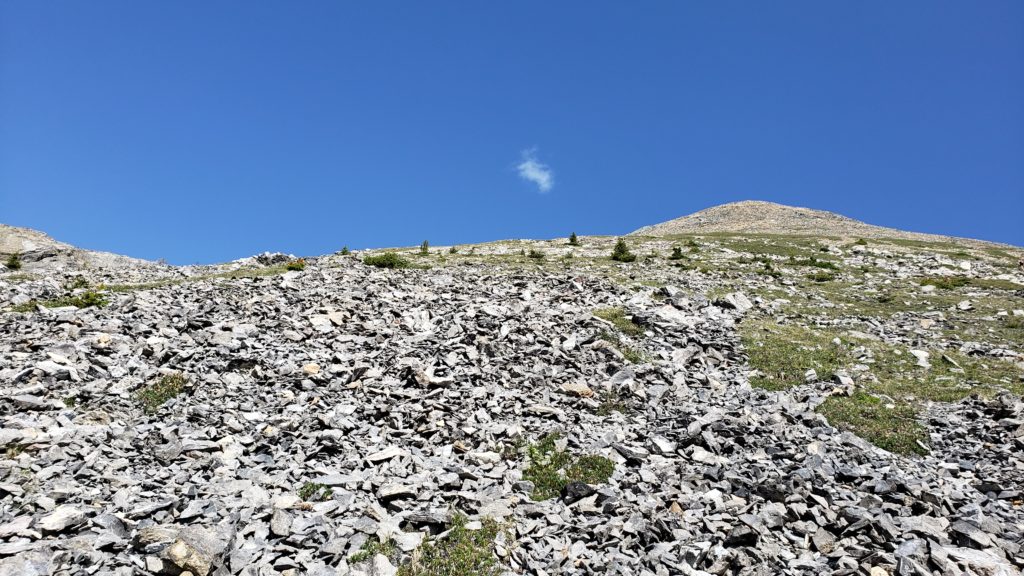
While we completed the loop in a clockwise manner, I highly recommend against this. From the summit down, it was extremely difficult to find the trail, even with a downloaded map and GPS. Not only will you get lost, but it’s also incredibly difficult (probably one of the most difficult descents I’ve done simply because I kept slipping).
I’d highly recommend doing the loop in a counter-clockwise method. While this trail is “safe”, it is difficult and challenging requiring lots of stamina and cardio work. Things can get a little risky on the hard route.
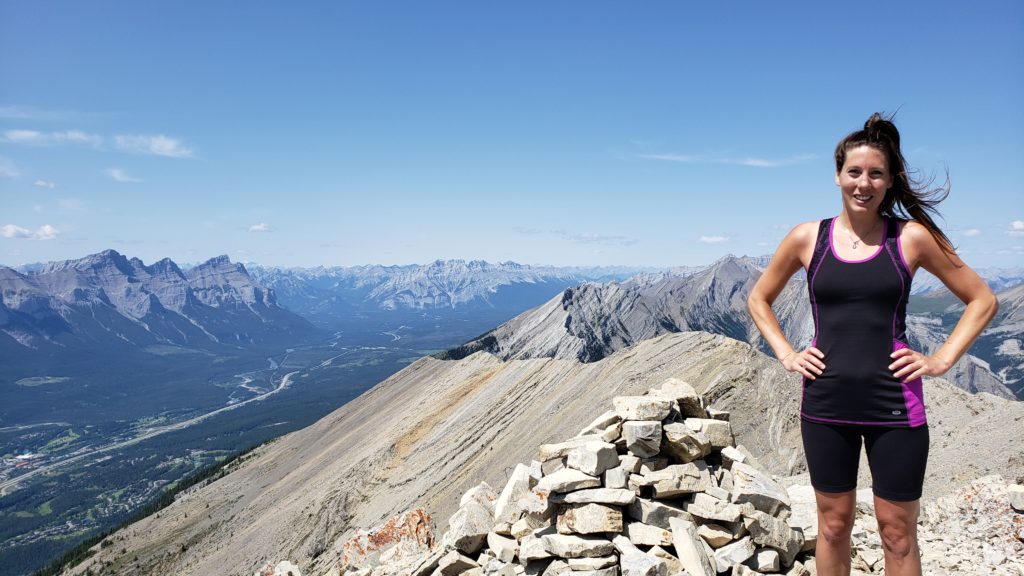
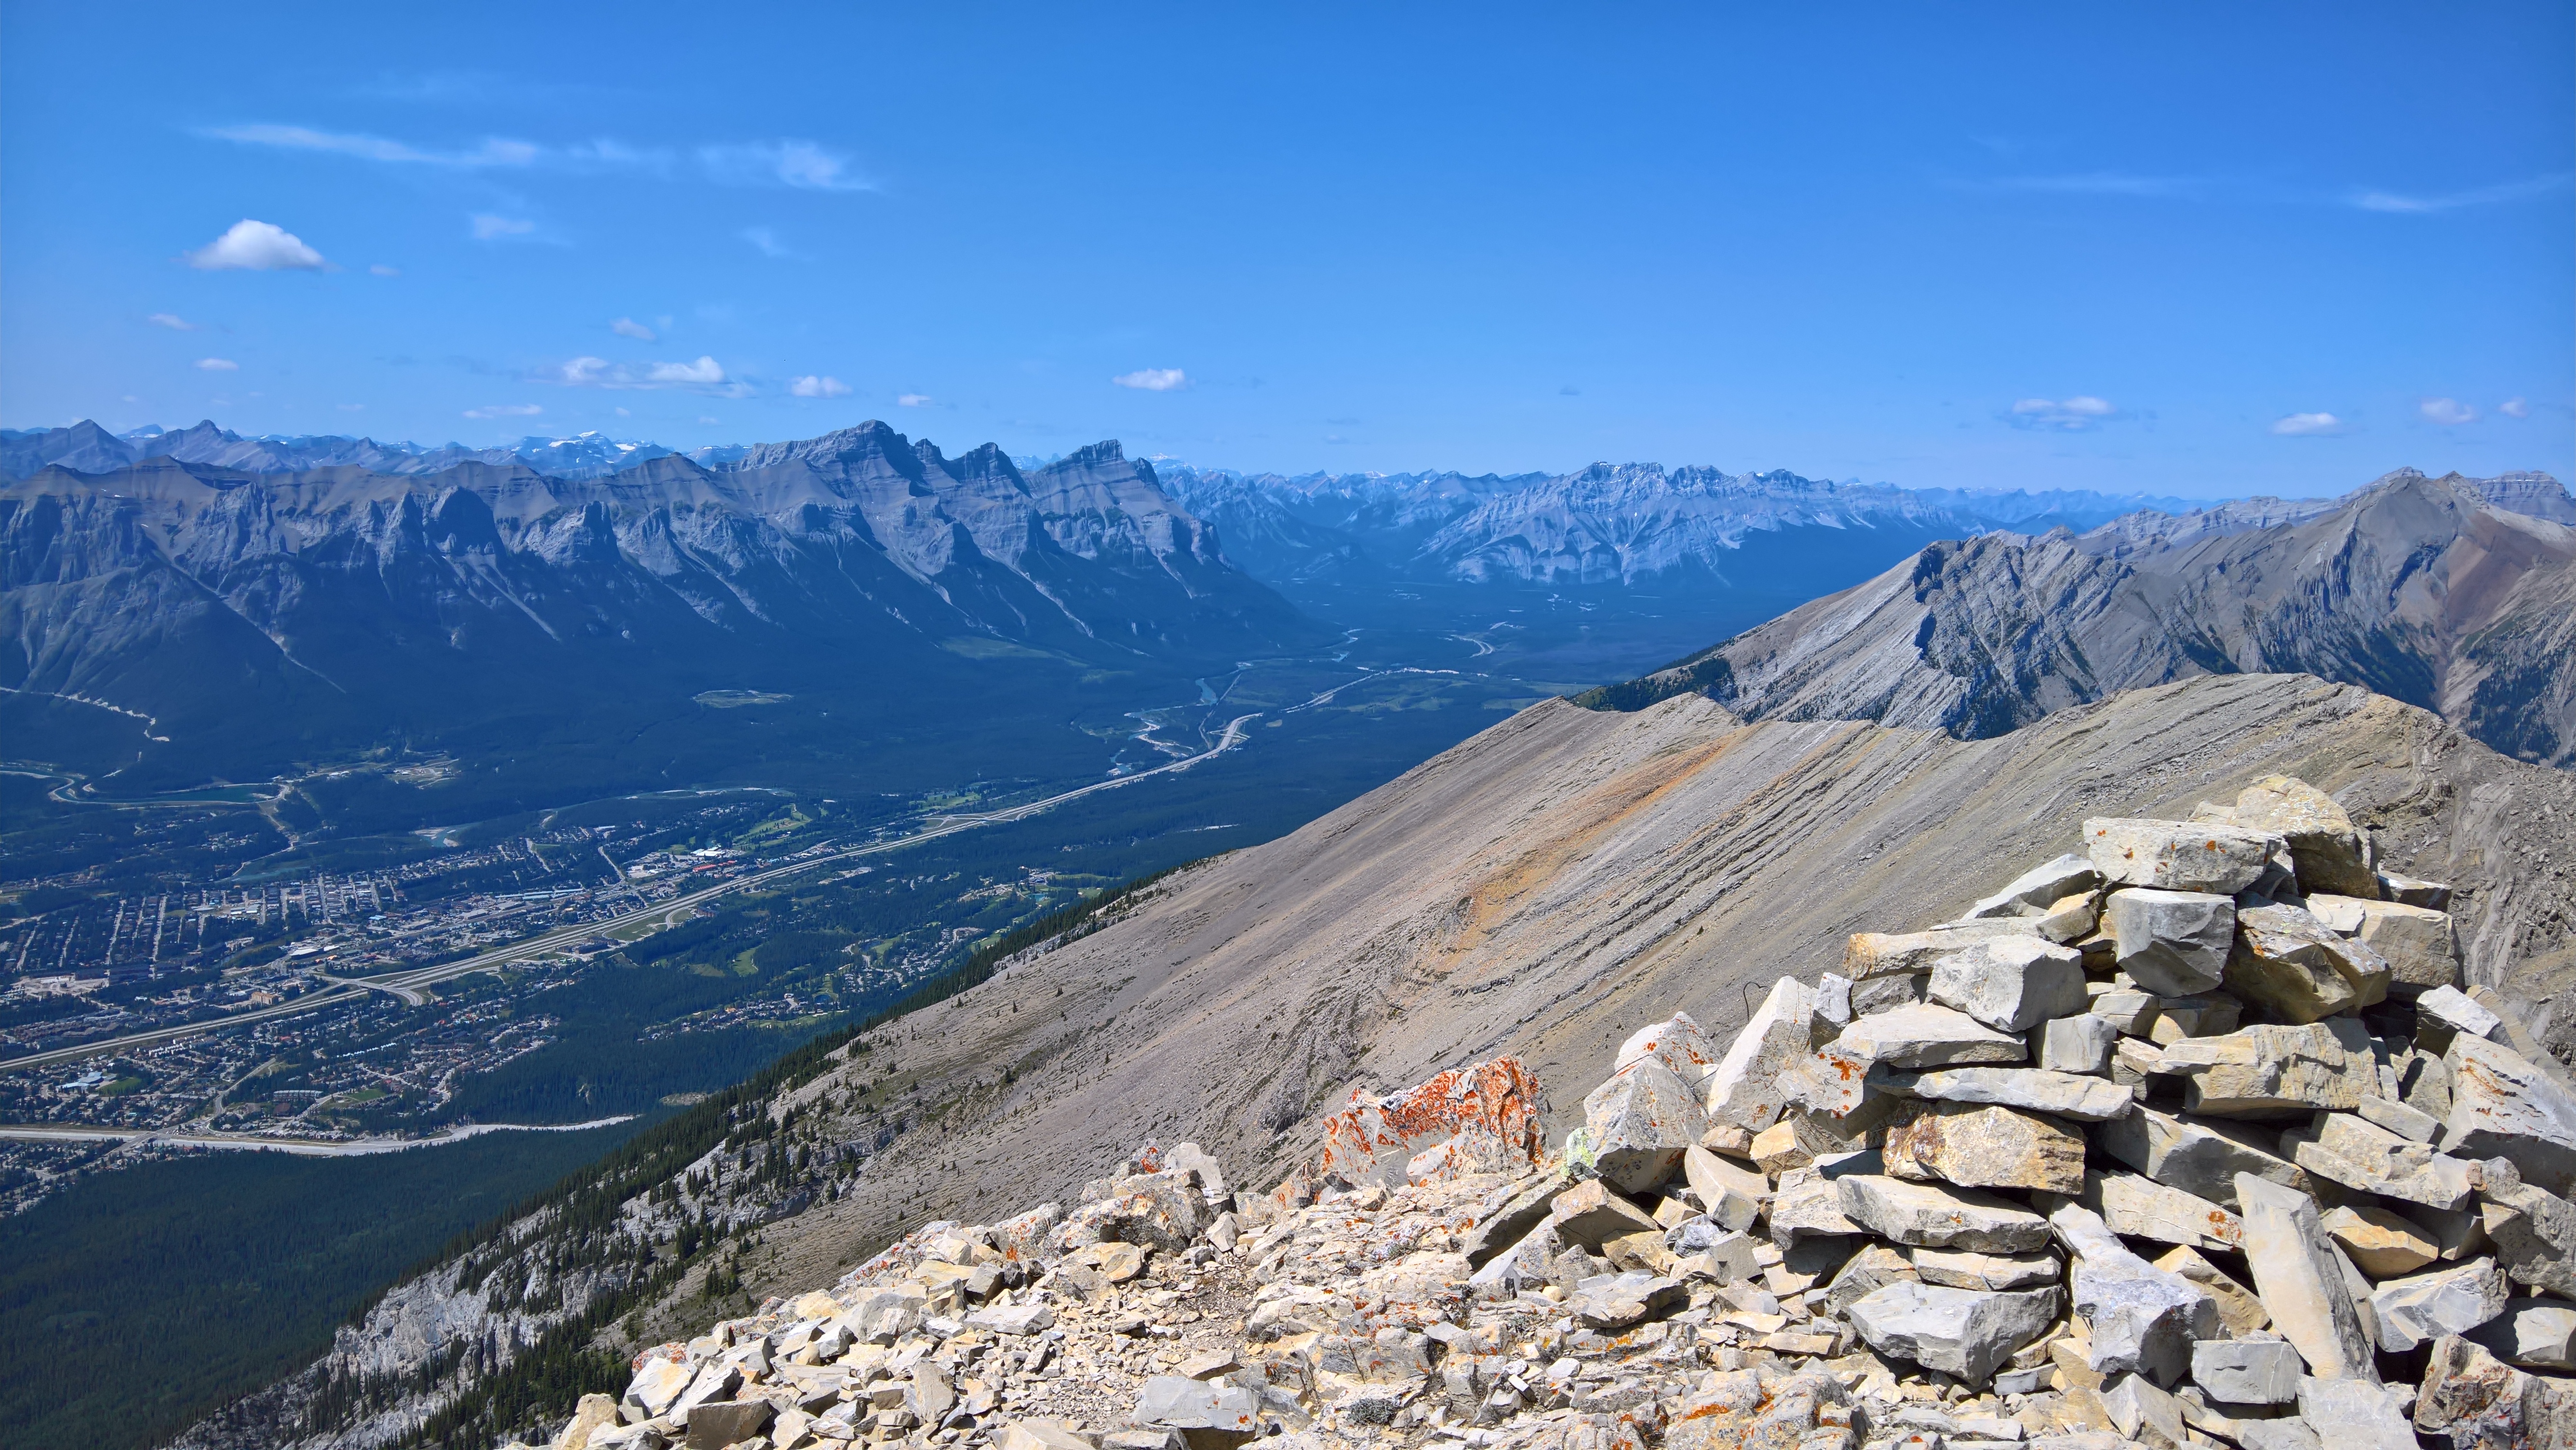
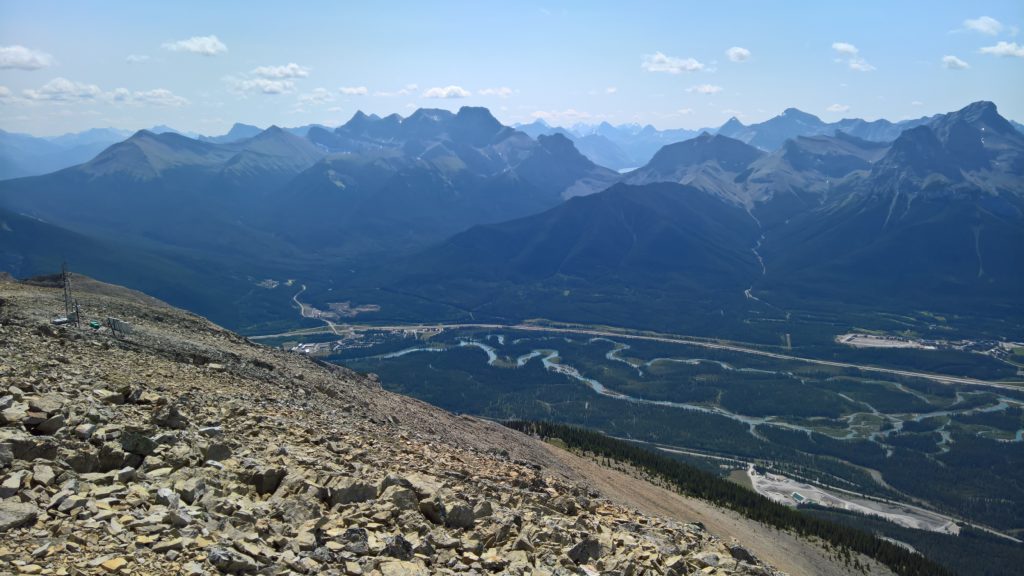
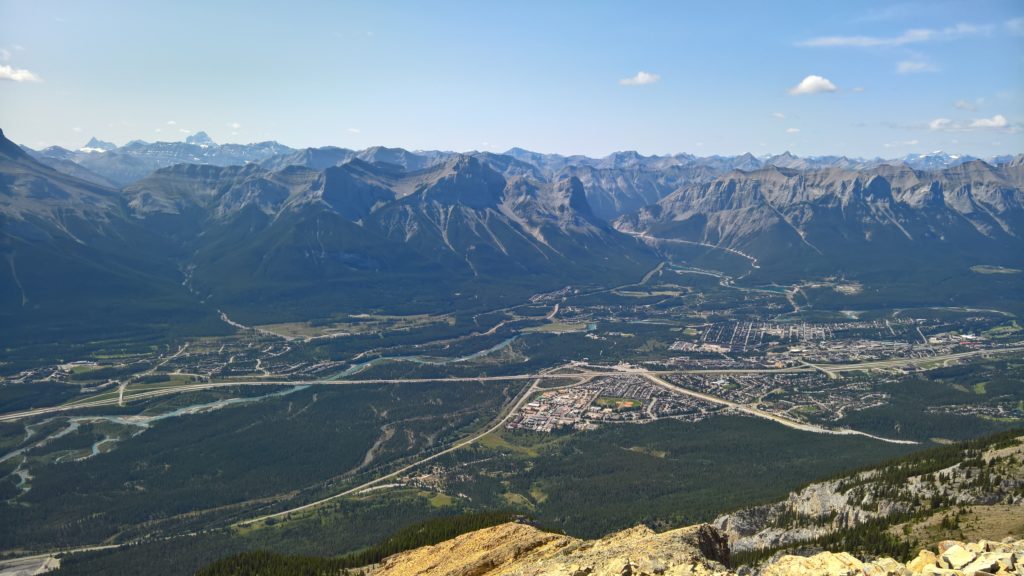
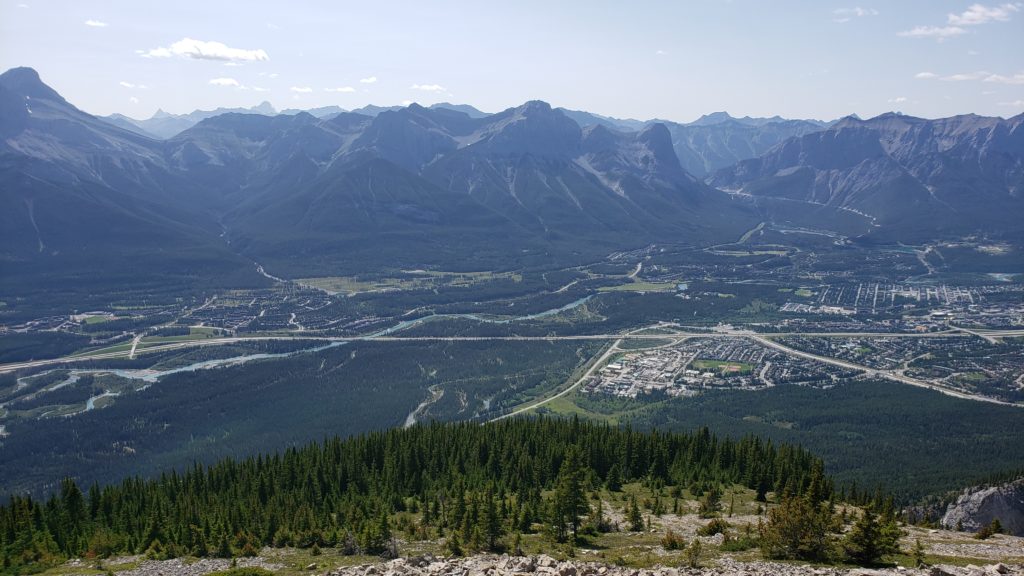
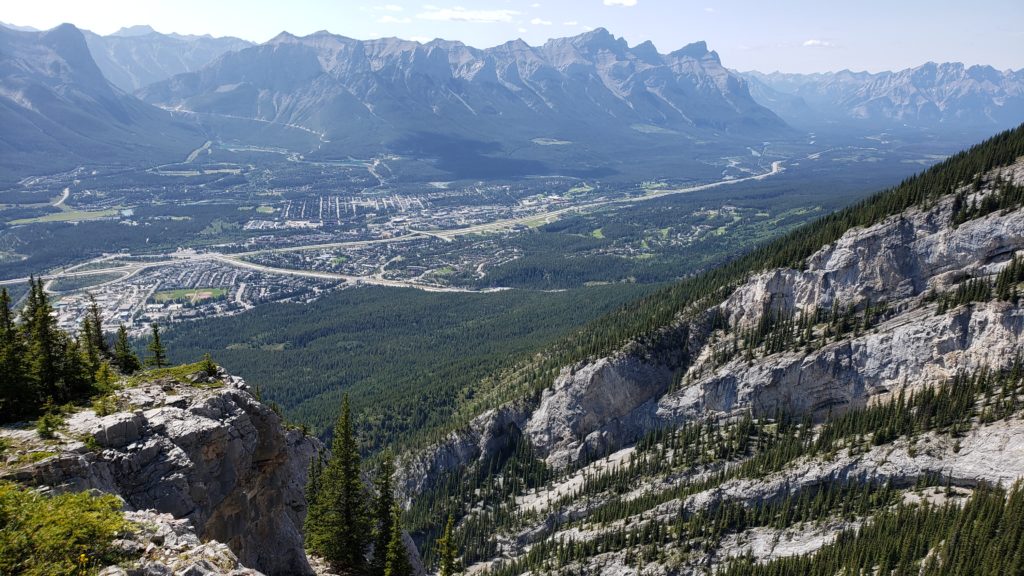
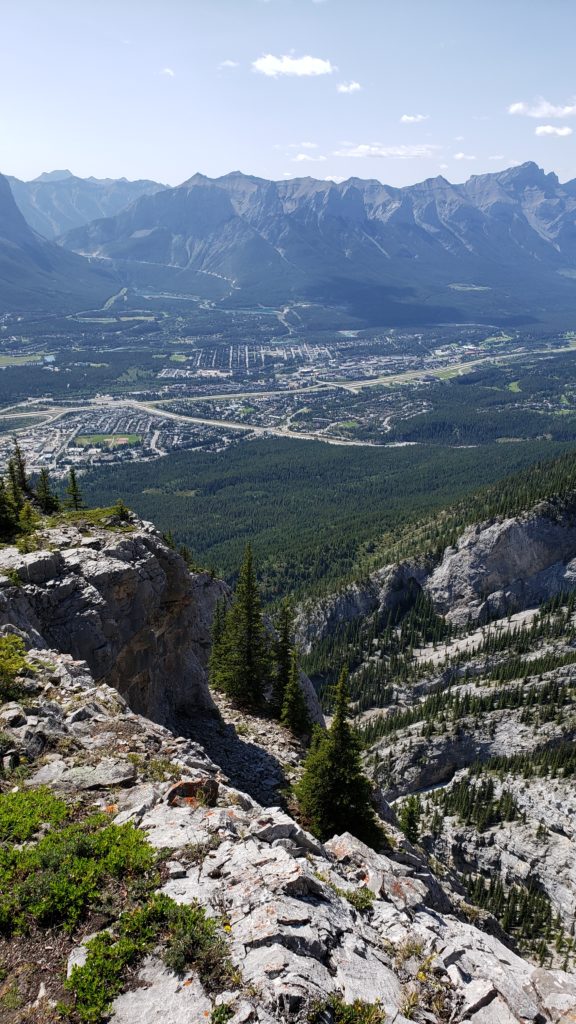
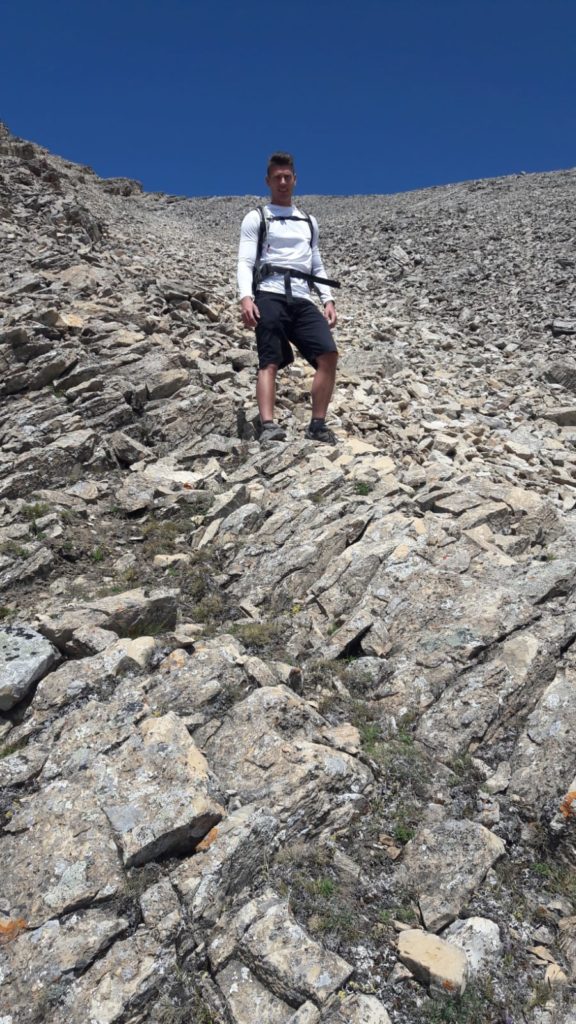
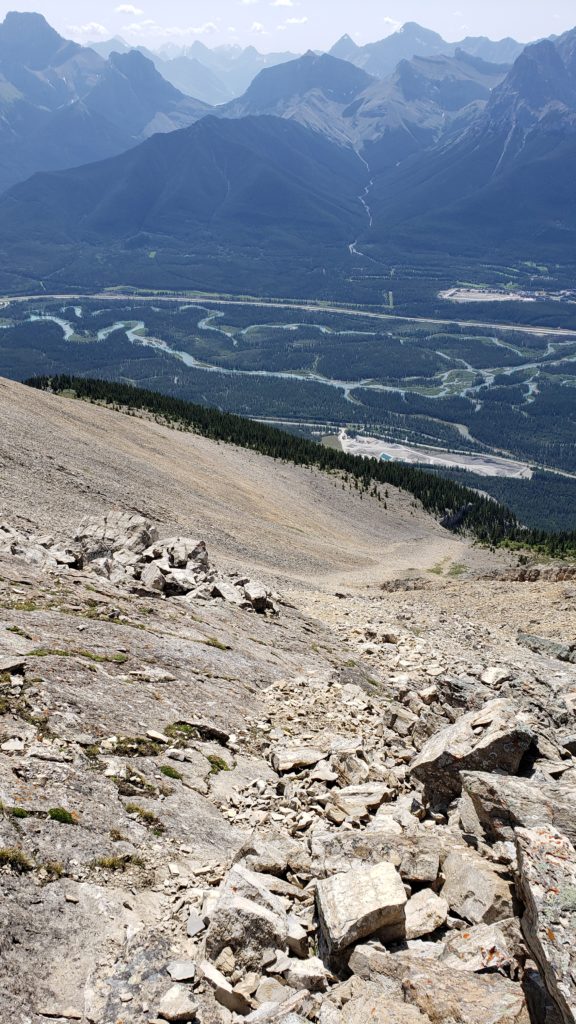
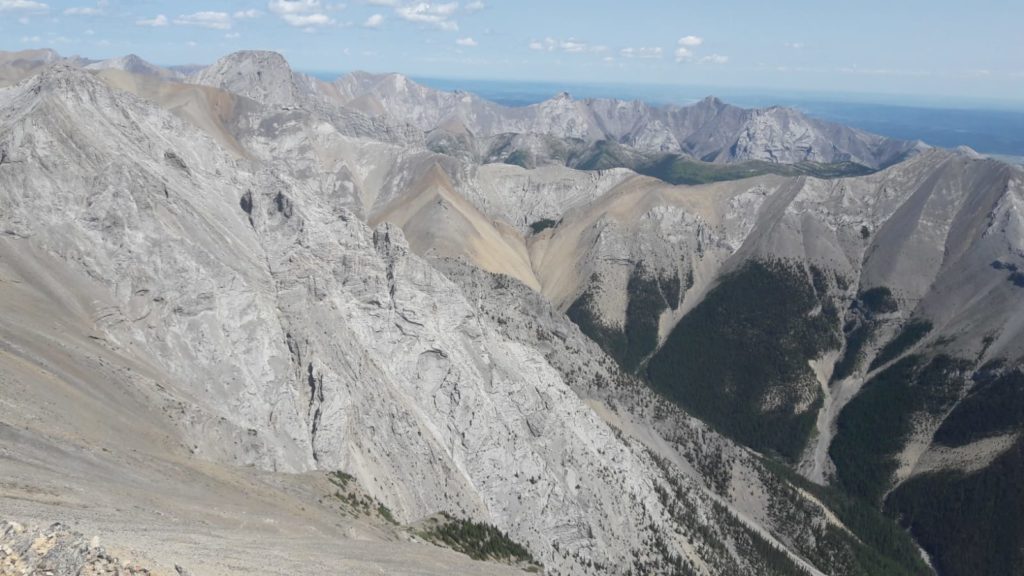
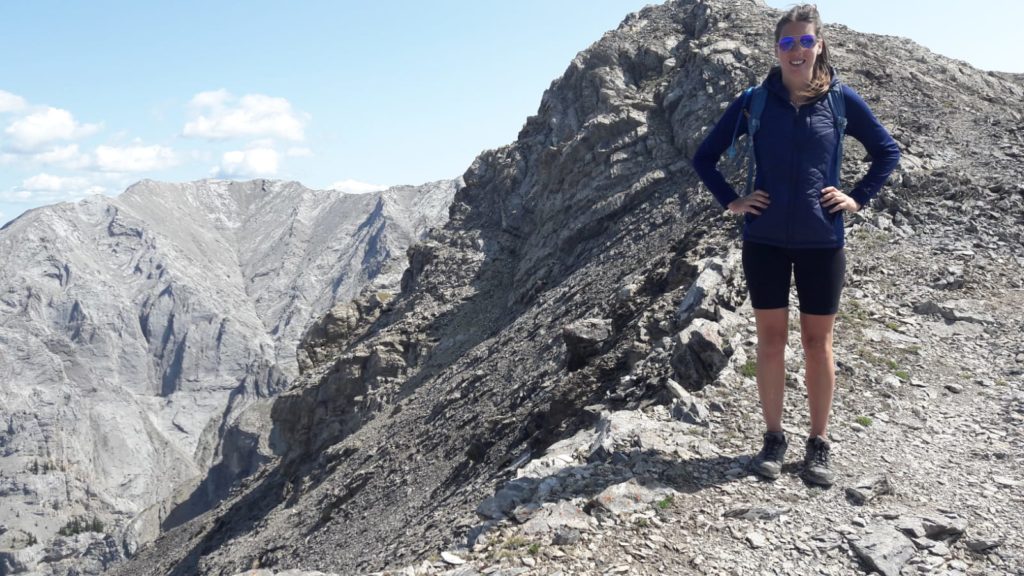
Grotto Mountain is an ascent up to an altitude of around 2,870m (9416ft), with beautiful views of Canmore, Alberta and other mountains. I completed this trek with my usual hiking buddy Elisha!
Stephen Wagner and Elisha Comeau – Grotto Mountain
Stephen Wagner on Grotto Mountain Summit
Elisha Comeau on Grotto Mountain Summit
Summit view from Grotto Mountain
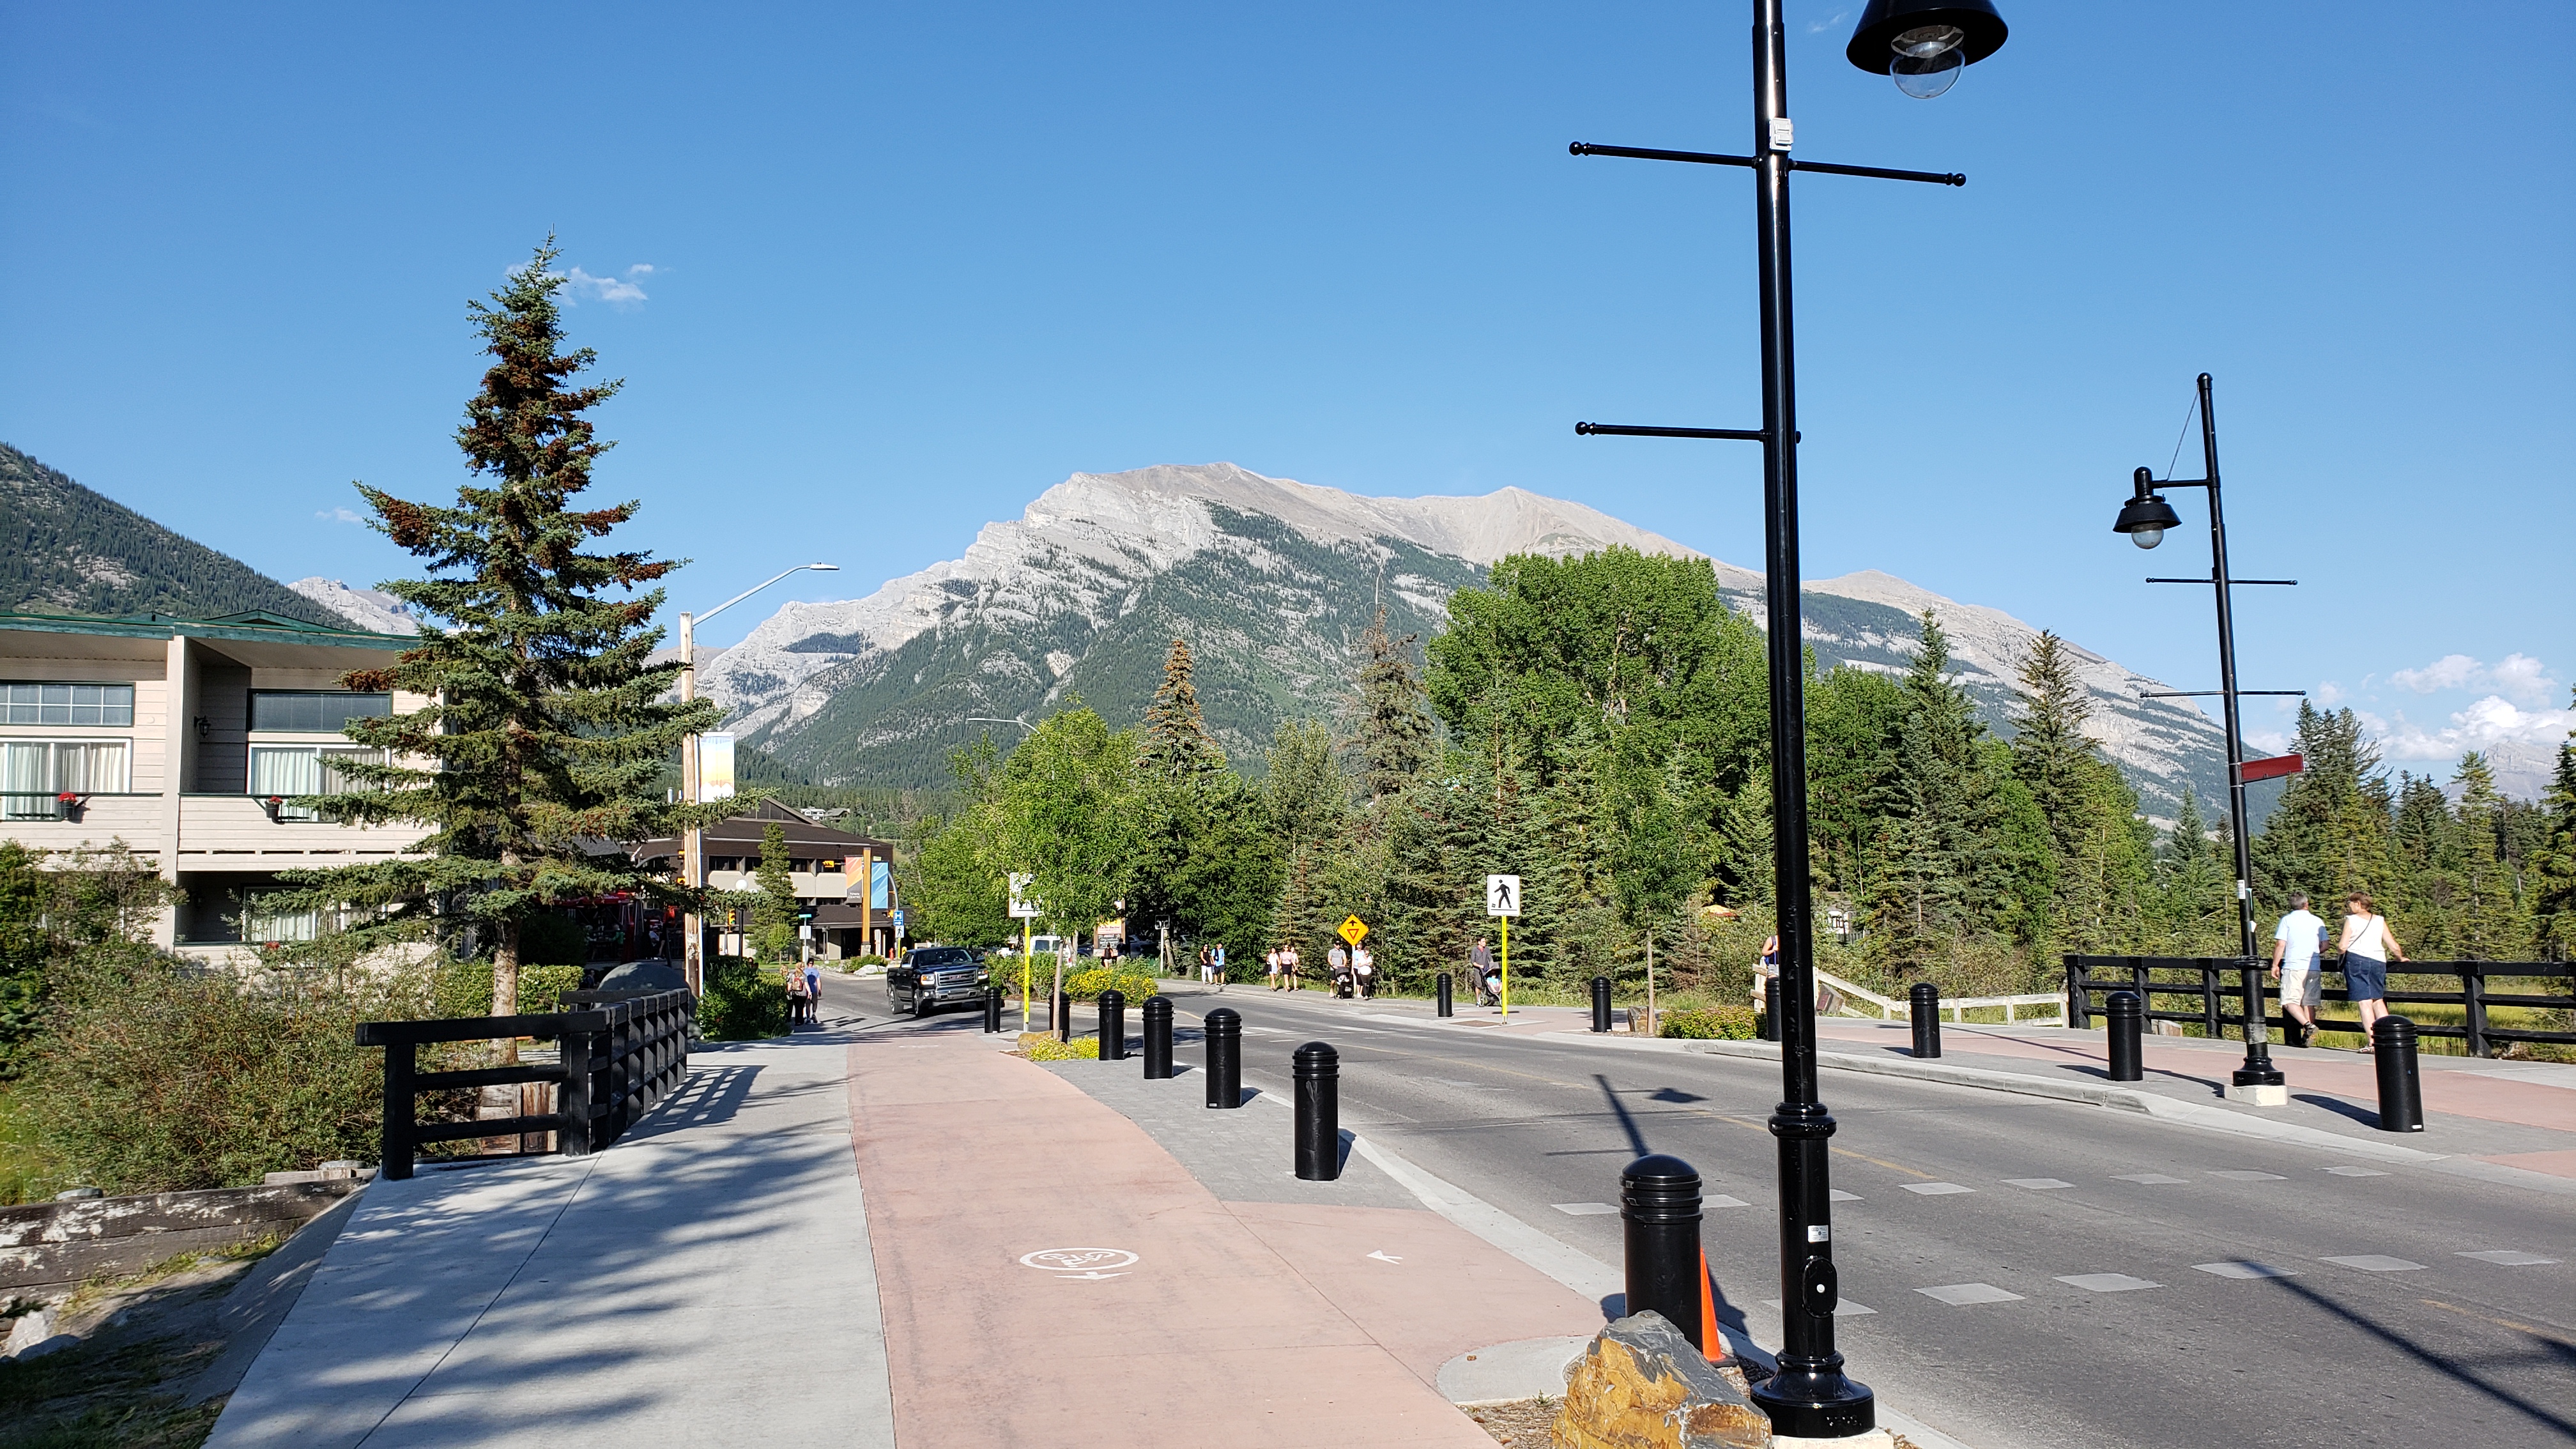
And of course, below is a picture of the mountain from Canmore, Alberta. The summit is actually the peak/summit on the right side of the mountain, the left is the lower fake summit.
As I mentioned above, it’s very challenging even having done it a few times before. The ACC route is a nice long slow climb and descent, while the hard route is pretty much straight up and down.
Along the hard route we did see some wild life like mountain goats, but they stayed far away. I’ve never seen bears on this hike, however I believe there may be a risk at the bottom, as well as up to the point of the top of the tree line.
Grotto Mountain Hike Pictures
Stay safe, be bear aware, and always make sure you always do hikes like this with a friend!
Around a month ago I decided to turn on and start utilizing NFS v4.1 (Version 4.1) in DSM on my Synology DS1813+ NAS. As most of you know, I have a vSphere cluster with 3 ESXi hosts, which are backed by an HPE MSA 2040 SAN, and my Synology DS1813+ NAS.
The reason why I did this was to test the new version out, and attempt to increase both throughput and redundancy in my environment.
If you’re a regular reader you know that from my original plans (post here), and than from my issues later with iSCSI (post here), that I finally ultimately setup my Synology NAS to act as a NFS datastore. At the moment I use my HPE MSA 2040 SAN for my hot storage, and I use the Synology DS1813+ for cold storage. I’ve been running this way for a few years now.
Why NFS?
Some of you may ask why I chose to use NFS? Well, I’m an iSCSI kinda guy, but I’ve had tons of issues with iSCSI on DSM, especially MPIO on the Synology NAS. The overhead was horrible on the unit (result of the lack of hardware specs on the NAS) for both block and file access to iSCSI targets (block target, vs virtualized (fileio) target).
I also found a major issue, where if one of the drives were dying or dead, the NAS wouldn’t report it as dead, and it would bring the iSCSI target to a complete halt, resulting in days spending time finding out what’s going on, and then finally replacing the drive when you found out it was the issue.
After spending forever trying to tweak and optimize, I found that NFS was best for the Synology NAS unit of mine.
What’s this new NFS v4.1 thing?
Well, it’s not actually that new! NFS v4.1 was released in January 2010 and aimed to support clustered environments (such as virtualized environments, vSphere, ESXi). It includes a feature called Session trunking mechanism, which is also known as NFS Multipathing.
We all love the word multipathing, don’t we? As most of you iSCSI and virtualization people know, we want multipathing on everything. It provides redundancy as well as increased throughput.
How do we turn on NFS Multipathing?
According to the VMware vSphere product documentation (here)
While NFS 3 with ESXi does not provide multipathing support, NFS 4.1 supports multiple paths.
NFS 3 uses one TCP connection for I/O. As a result, ESXi supports I/O on only one IP address or hostname for the NFS server, and does not support multiple paths. Depending on your network infrastructure and configuration, you can use the network stack to configure multiple connections to the storage targets. In this case, you must have multiple datastores, each datastore using separate network connections between the host and the storage.
NFS 4.1 provides multipathing for servers that support the session trunking. When the trunking is available, you can use multiple IP addresses to access a single NFS volume. Client ID trunking is not supported.
So it is supported! Now what?
In order to use NFS multipathing, the following must be present:
Multiple NICs configured on your NAS with functioning IP addresses
A gateway is only configured on ONE of those NICs
NFS v4.1 is turned on inside of the DSM web interface
A NFS export exists on your DSM
You have a version of ESXi that supports NFS v4.1
So let’s get to it! Enabling NFS v4.1 Multipathing
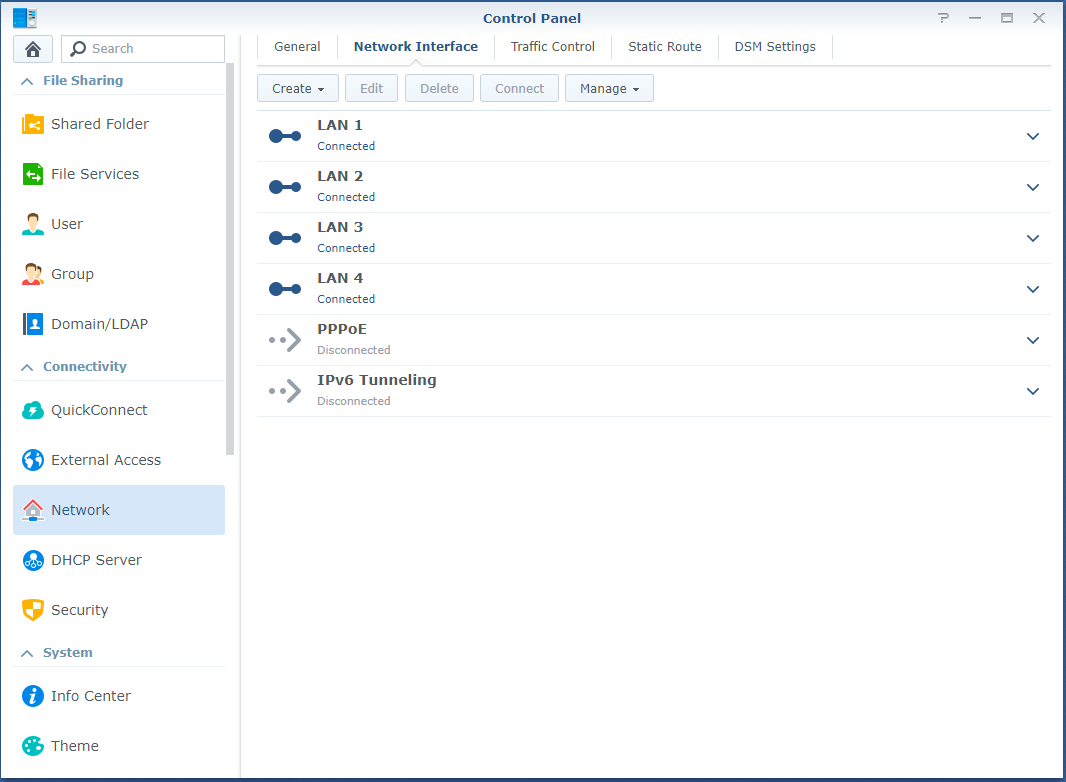
First log in to the DSM web interface, and configure your NIC adapters in the Control Panel. As mentioned above, only configure the default gateway on one of your adapters.
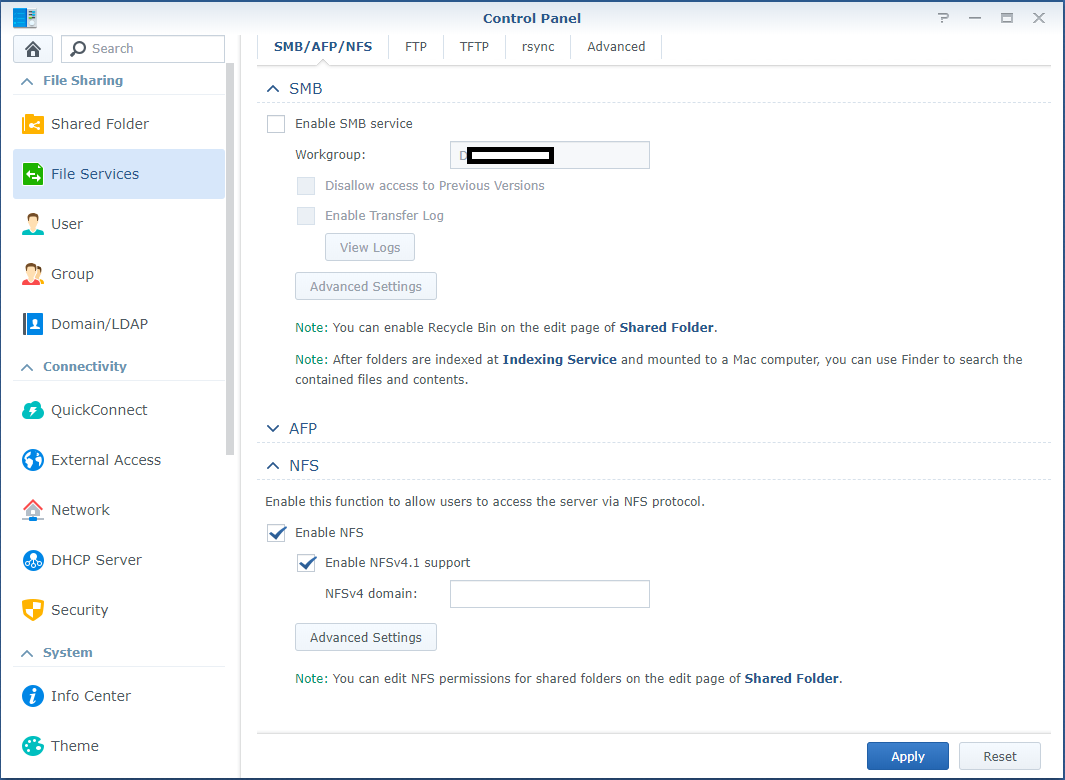
While still in the Control Panel, navigate to “File Services” on the left, expand NFS, and check both “Enable NFS” and “Enable NFSv4.1 support”. You can leave the NFSv4 domain blank.
If you haven’t already configured an NFS export on the NAS, do so now. No further special configuration for v4.1 is required other than the norm.
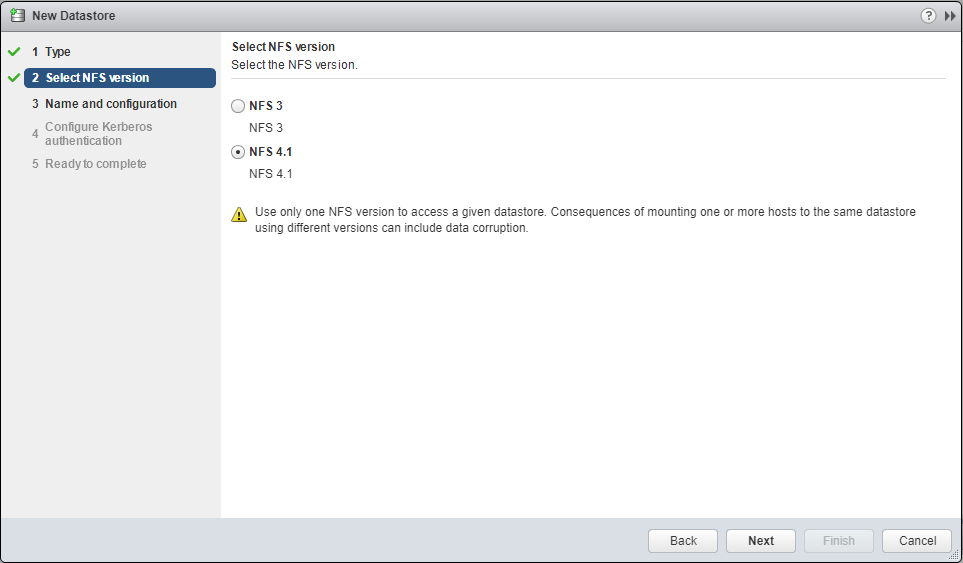
Log on to your ESXi host, go to storage, and add a new datastore. Choose to add an NFS datastore.
On the “Select NFS version”, select “NFS 4.1”, and select next.
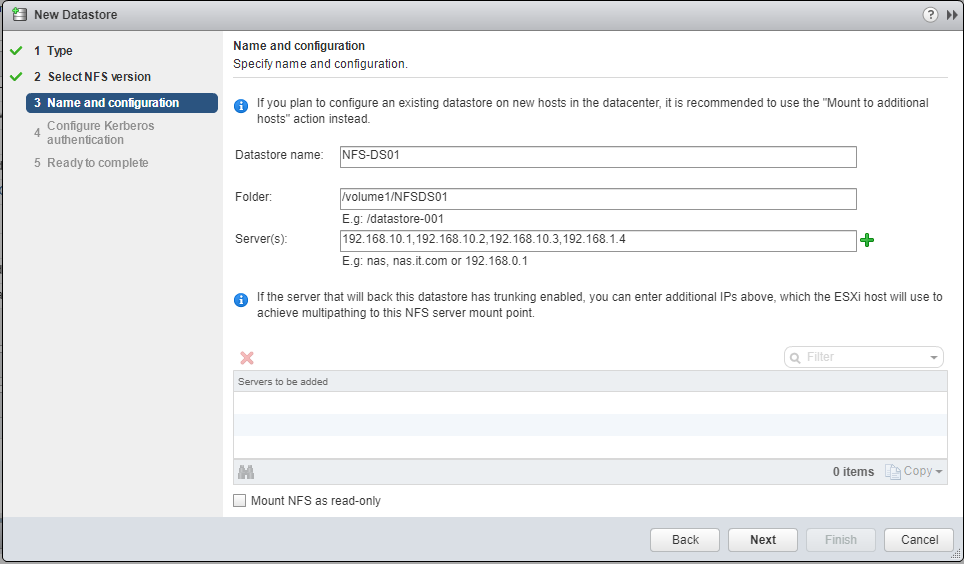
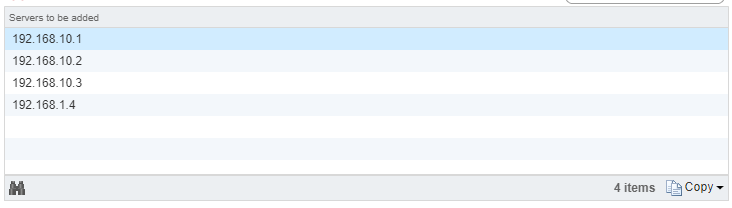
Enter the datastore name, the folder on the NAS, and enter the Synology NAS IP addresses, separated by commas. Example below:
Press the Green “+” and you’ll see it spreads them to the “Servers to be added”, each server entry reflecting an IP on the NAS. (please note I made a typo on one of the IPs).
Follow through with the wizard, and it will be added as a datastore.
That’s it! You’re done and are now using NFS Multipathing on your ESXi host!
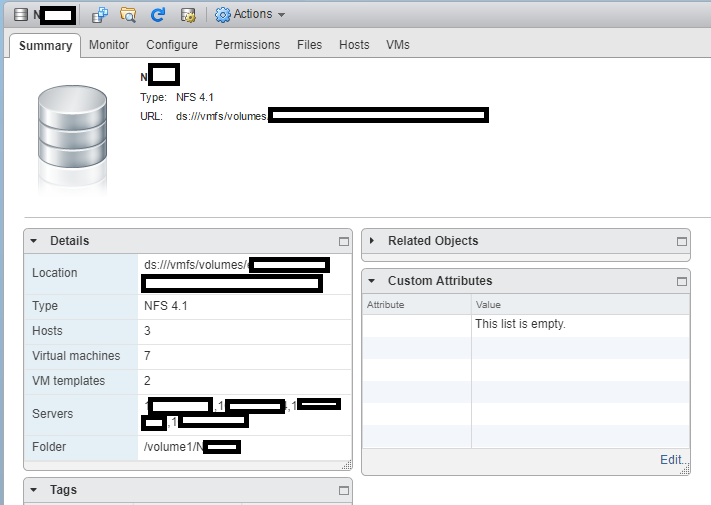
NFS Datastore Object with Multipathing
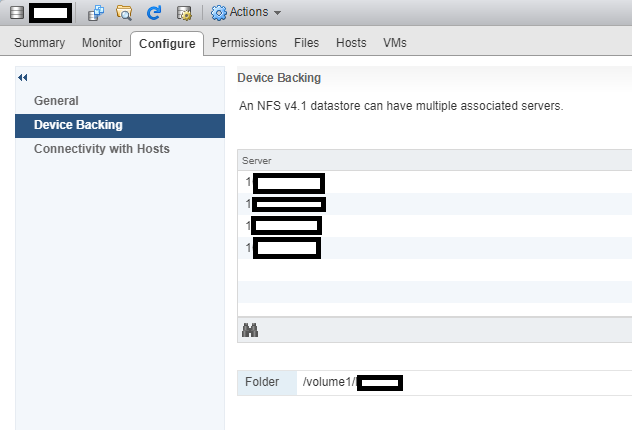
NFS Datastore Backing with Multipathing and multiple IPs
In my case, I have all 4 NICs in my DS1813+ configured and connected to a switch. My ESXi hosts have 10Gb DAC connections to that switch, and can now utilize it at faster speeds. During intensive I/O loads, I’ve seen the full aggregated network throughput hit and sustain around 370MB/s.
After resolving the issues mentioned below, I’ve been running for weeks with absolutely no problems, and I’m enjoying the increased speed to the NAS.
Additional Important Information
After enabling this, I noticed that RAM and Memory usage had drastically increased on the Synology NAS. This would peak when my ESXi hosts would restart. This issue escalated to the NAS running out of memory (both physical and swap) and ultimately crashing.
After weeks of troubleshooting I found the processes that were causing this. While the processes were unrelated, this issue would only occur when using NFS Multipathing and NFS v4.1. To resolve this, I had to remove the “pkgctl-SynoFinder” package, and disable the services. I could do this in my environment because I only use the NAS for NFS and iSCSI. This resolved the issue. I created a blog post here to outline how to resolve this. I also further optimized the NAS and memory usage by disabling other unneeded services in a post here, targeted for other users like myself, who only use it for NFS/iSCSI.
Leave a comment and let me know if this post helped!
Today (August 9th, 2019, starting in the early morning) I noticed that numerous Sophos UTM firewalls were sending the notification “The spam filter daemon is unable to reach the database servers via HTTP. Please make sure that the device is able to send HTTP (TCP port 80) requests to the Internet. You may have to allow such traffic on upstream devices.”.
Everything is still functioning and upon troubleshooting I noticed that nothing had been changed, nor was broken. I believe this is a service outage of some type.
You may find yourself unable to download attachments on an e-mail message you received on your Android or Apple iPhone from your Microsoft Exchange Server. In my case, this presented a “Unable to download.” with a retry option. Retrying would not work.
If the attachment is larger (over 10MB), this is most likely due to a limit enforced on the Activesync site in IIS on your Exchange Server. In this post I’m going to tell you why this happens, and how to fix it!
The Problem
Microsoft Exchange uses IIS (Internet Information Server) for numerous services including ActiveSync. ActiveSync provides the connectivity to your mobile device for your Exchange access.
IIS has numerous limits configured to stop massive bogus requests, reduce DDOS attacks, and other reasons.
The Fix
To resolve this and allow the attachment to download, we need to modify two configuration values inside of the web.config file on IIS.
Below are the values we will be modifying:
MaxDocumentDataSize – Maximum file (message) data size for transfer. “Sets the maximum data size that we will fetch (range or othewise)”
maxRequestLength – “Specifies the limit for the input stream buffering threshold, in KB. This limit can be used to prevent denial of service attacks that are caused, for example, by users posting large files to the server. The default is 4096 KB.” (as per here)
These settings are configured in the following file:
Before modifying the variables, please make a copy or backup of the web.config file so you can restore.
After you make a backup, open the file in notepad (right click -> run as administrator), and open the web.config file.
Simply search for the two values listed above, and change them. In my case, I tripled the “MaxDocumentDataSize”, and the “maxRequestLength” values. Examples from my “web.config” file are below:
This website uses cookies to improve your experience. We'll assume you're ok with this, but you can opt-out if you wish.
Do you accept the use of cookies and accept our privacy policy? AcceptRejectCookie and Privacy Policy
Privacy & Cookies Policy
Privacy Overview
This website uses cookies to improve your experience while you navigate through the website. Out of these cookies, the cookies that are categorized as necessary are stored on your browser as they are essential for the working of basic functionalities of the website. We also use third-party cookies that help us analyze and understand how you use this website. These cookies will be stored in your browser only with your consent. You also have the option to opt-out of these cookies. But opting out of some of these cookies may have an effect on your browsing experience.