Well, I start writing this post minutes after completing my first vSphere 6.0 upgrade to vSphere 6.5, and as always with VMware products it went extremely smooth (although with any upgrade there are minor hiccups).
Thankfully with the evolution of virtualization technology, upgrades such as the upgrade to vSphere 6.5 is such a massive change to your infrastructure, yet the process is extremely simplified, can be easily rolled out, and in the event of problems has very simple clear paths to revert back and re-attempt. Failed upgrades usually aren’t catastrophic, and don’t even affect production environments.
Whenever I do these vSphere upgrades, I find it funny how you’re making such massive changes to your infrastructure with each click and step, yet the thought process and understanding behind it is so simple and easy to follow. Essentially, after one of these upgrades you look back and think: “Wow, for the little amount of work I did, I sure did accomplish a lot”. It’s just one of the beauties of virtualization, especially holding true with VMware products.
To top it all off you can complete the entire upgrade/migration without even powering off any of your virtual machines. You could do this live, during business hours, in a production environment… How cool is that!
Just to provide some insights in to my environment, here’s a list of the hardware and configuration:
-2 X HPE Proliant DL360p Gen8 Servers (each with dual processors, and each with 128GB RAM, no local storage)
-1 X HPE MSA2040 Dual Controller SAN (each host has multiple connections to the SAN via 10Gb DAC iSCSI, 1 connection to each of the dual controllers)
-VMware vSphere 6.0 running on Windows Virtual Machine (Windows Server 2008 R2)
-VMware Update Manager (Running on the same server as the vCenter Server)
-VMware Data Protection (2 x VMware vDP Appliances, one as a backup server, one as a replication target)
-VMware ESXi 6.0 installed on to SD-cards in the servers (using HPE Customized ESXi installation)
One of the main reasons why I was so quick to adopt and migrate to vSphere 6.5, was I was extremely interested in the prospect of migrating a Windows based vCenter instance, to the new vCenter 6.5 appliance. This is handy as it simplifies the environment, reduces licensing costs and requirements, and reduces time/effort on server administration and maintenance.
First and foremost, following the recommended upgrade path (you have to specifically do the upgrades and migrations for all the separate modules/systems in a certain order), I had to upgrade my vDP appliances first. For vDP to support vCenter 6.5, you must upgrade your vDP appliances to 6.1.3. As with all vDP upgrades, you must shut down the appliance, mark all the data disks as dependent, take a snapshot, and mount the upgrade ISO, and then boot and initiate the upgrade from the appliance web interface. After you complete the upgrade and confirm the appliance is functioning, you shut down the appliance, remove the snapshot, mark all data disks as independent (except the first Virtual disk, you only mark virtual disk 2+ and up as independent), and you’re done your upgrade.
A note on a problem I dealt with during the upgrade process for vDP to version 6.1.3 (appliance does not detect mounted ISO image) can be found here: http://www.stephenwagner.com/?p=1107
Moving on to vCenter! VMware did a great job with this. You load up the VMware Migration Assistant tool on your source vCenter server, load up the migration/installation application on a separate computer (the workstation you’re using), and it does the rest. After prepping the destination vCenter appliance, it exports the data from the source server, copies it to the destination server, shuts down the source VM, and then imports the data to the destination appliance and takes over the role. It’s the coolest thing ever watching this happen live. Upon restart, you’ve completed your vCenter Server migration.
A note on a problem I dealt with during the migration process (which involved exporting VMware Update Manager from the source server) can be found here: http://www.stephenwagner.com/?p=1115
And as for the final step, it’s now time to upgrade your ESXi hosts to version 6.5. As always, this is an easy task with VMware Update Manager, and can be easily and quickly rolled out to multiple ESXi hosts (thanks to vMotion and DRS). After downloading your ESXi installation ISO (in my case I use the HPE customized image), you upload it in to your new VMware Update Manager instance, add it to an upgrade baseline, and then attach the baseline to your hosts. To push this upgrade out, simply select the cluster or specific host (depending on if you want to rollout to a single host, or multiple at once), and remediate! After a couple restarts the upgrade is done.
A note on a problem I dealt with during ESXi 6.5 upgrade (conflicting VIBs marking image as incompatible when deploying HPE customized image) can be found here: http://www.stephenwagner.com/?p=1120
After all of the above, the entire environment is now running on vSphere 6.5! Don’t forget to take a backup before and after the upgrade, and also upgrade your VM hardware versions to 6.5 (VM compatibility version), and upgrade VMware tools on all your VMs.
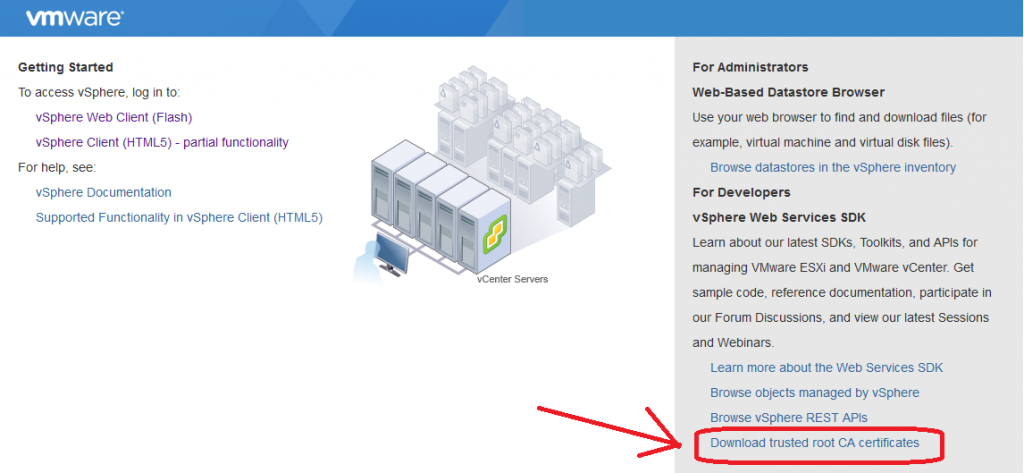
Make sure to visit https://YOURVCENTERSERVER to download the VMware Certificate Authority (VMCA) root certificates, and add them to the “Trusted Root Certification Authorities” on your workstation so you can validate all the SSL certs that vCenter uses. Also, note that the vSphere C# client (the windows application) has been deprecated, and you now must use the vSphere Web Client, or the new HTML5 web client.
Happy Virtualizing! Leave a comment!
