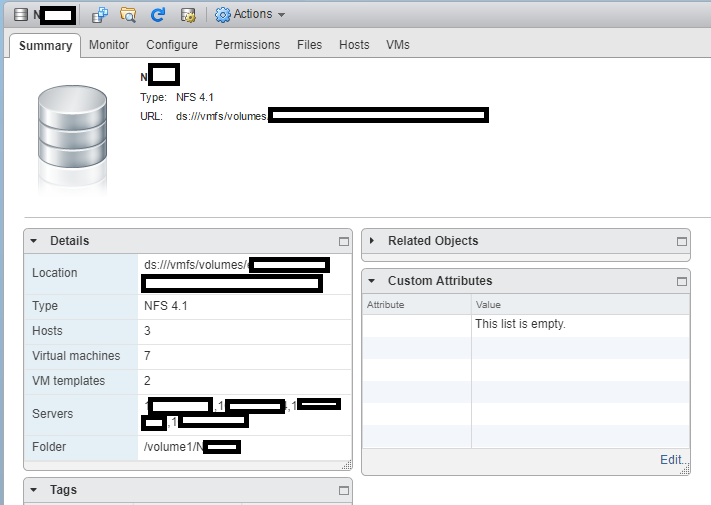
Around a month ago I decided to turn on and start utilizing NFS v4.1 (Version 4.1) in DSM on my Synology DS1813+ NAS. As most of you know, I have a vSphere cluster with 3 ESXi hosts, which are backed by an HPE MSA 2040 SAN, and my Synology DS1813+ NAS.
The reason why I did this was to test the new version out, and attempt to increase both throughput and redundancy in my environment.
If you’re a regular reader you know that from my original plans (post here), and than from my issues later with iSCSI (post here), that I finally ultimately setup my Synology NAS to act as a NFS datastore. At the moment I use my HPE MSA 2040 SAN for my hot storage, and I use the Synology DS1813+ for cold storage. I’ve been running this way for a few years now.
Why NFS?
Some of you may ask why I chose to use NFS? Well, I’m an iSCSI kinda guy, but I’ve had tons of issues with iSCSI on DSM, especially MPIO on the Synology NAS. The overhead was horrible on the unit (result of the lack of hardware specs on the NAS) for both block and file access to iSCSI targets (block target, vs virtualized (fileio) target).
I also found a major issue, where if one of the drives were dying or dead, the NAS wouldn’t report it as dead, and it would bring the iSCSI target to a complete halt, resulting in days spending time finding out what’s going on, and then finally replacing the drive when you found out it was the issue.
After spending forever trying to tweak and optimize, I found that NFS was best for the Synology NAS unit of mine.
What’s this new NFS v4.1 thing?
Well, it’s not actually that new! NFS v4.1 was released in January 2010 and aimed to support clustered environments (such as virtualized environments, vSphere, ESXi). It includes a feature called Session trunking mechanism, which is also known as NFS Multipathing.
We all love the word multipathing, don’t we? As most of you iSCSI and virtualization people know, we want multipathing on everything. It provides redundancy as well as increased throughput.
How do we turn on NFS Multipathing?
According to the VMware vSphere product documentation (here)
While NFS 3 with ESXi does not provide multipathing support, NFS 4.1 supports multiple paths.
NFS 3 uses one TCP connection for I/O. As a result, ESXi supports I/O on only one IP address or hostname for the NFS server, and does not support multiple paths. Depending on your network infrastructure and configuration, you can use the network stack to configure multiple connections to the storage targets. In this case, you must have multiple datastores, each datastore using separate network connections between the host and the storage.
NFS 4.1 provides multipathing for servers that support the session trunking. When the trunking is available, you can use multiple IP addresses to access a single NFS volume. Client ID trunking is not supported.
So it is supported! Now what?
In order to use NFS multipathing, the following must be present:
- Multiple NICs configured on your NAS with functioning IP addresses
- A gateway is only configured on ONE of those NICs
- NFS v4.1 is turned on inside of the DSM web interface
- A NFS export exists on your DSM
- You have a version of ESXi that supports NFS v4.1
So let’s get to it! Enabling NFS v4.1 Multipathing
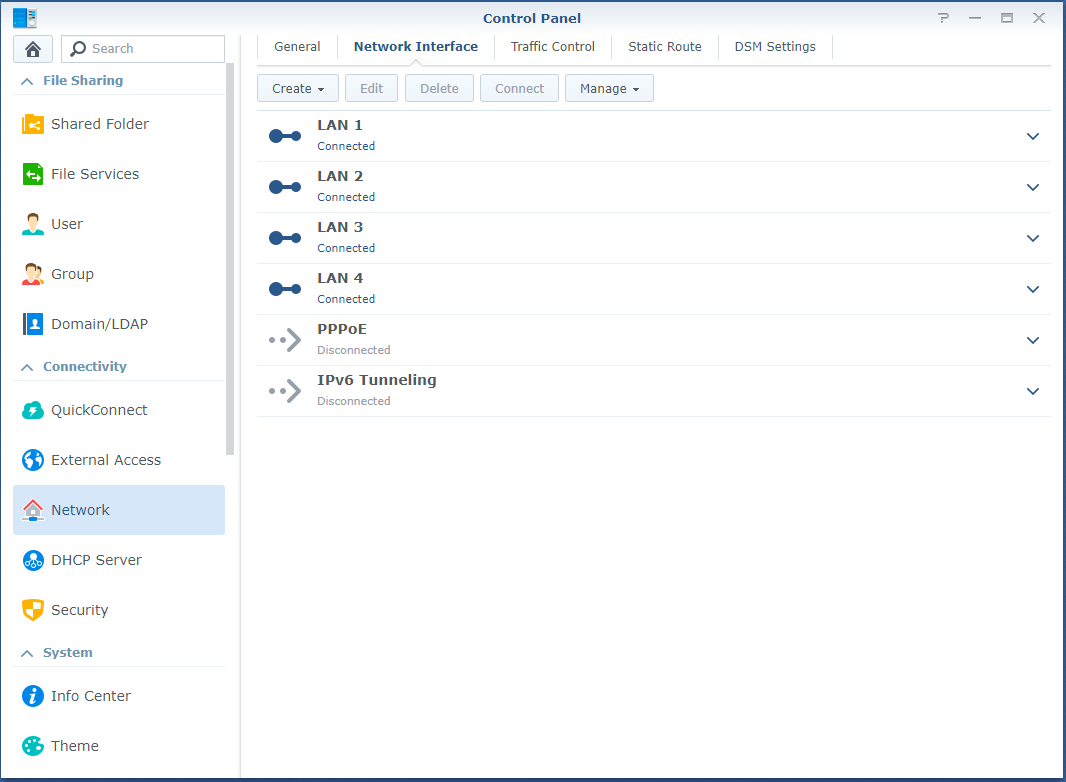
- First log in to the DSM web interface, and configure your NIC adapters in the Control Panel. As mentioned above, only configure the default gateway on one of your adapters.
- While still in the Control Panel, navigate to “File Services” on the left, expand NFS, and check both “Enable NFS” and “Enable NFSv4.1 support”. You can leave the NFSv4 domain blank.
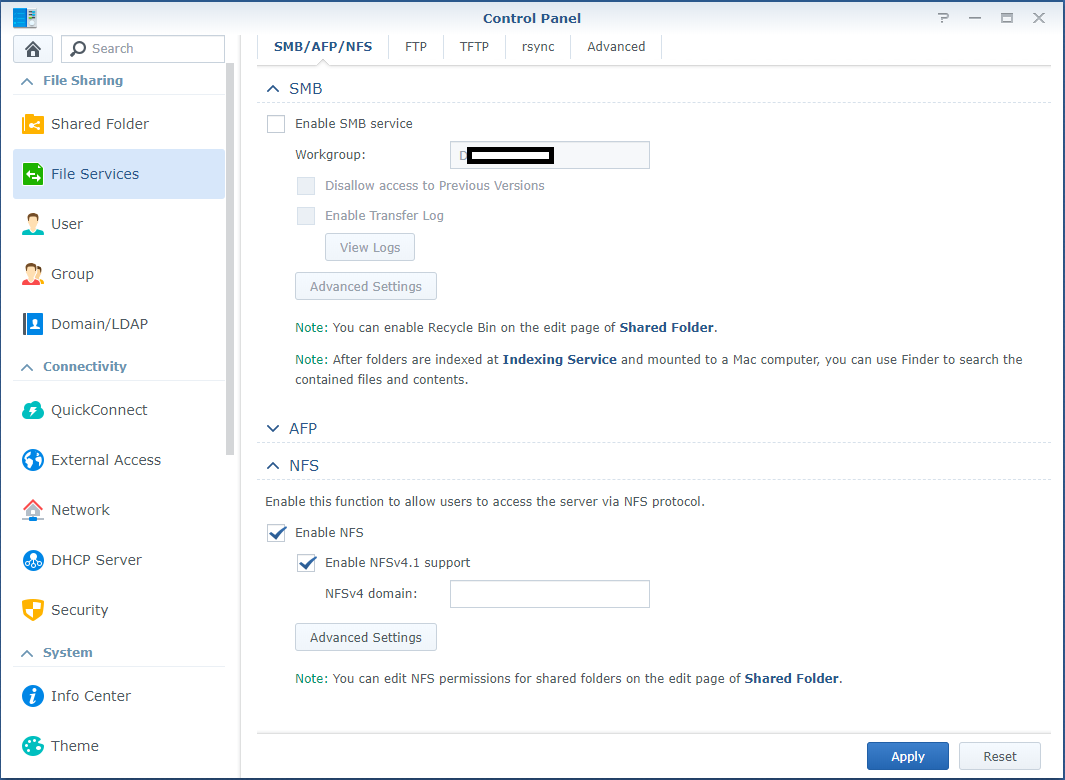
- If you haven’t already configured an NFS export on the NAS, do so now. No further special configuration for v4.1 is required other than the norm.
- Log on to your ESXi host, go to storage, and add a new datastore. Choose to add an NFS datastore.
- On the “Select NFS version”, select “NFS 4.1”, and select next.
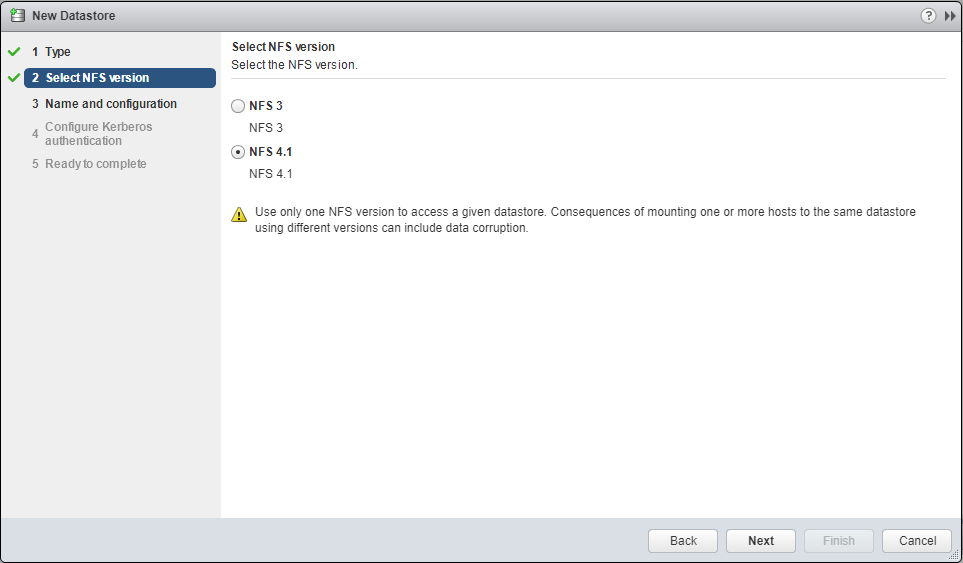
- Enter the datastore name, the folder on the NAS, and enter the Synology NAS IP addresses, separated by commas. Example below:
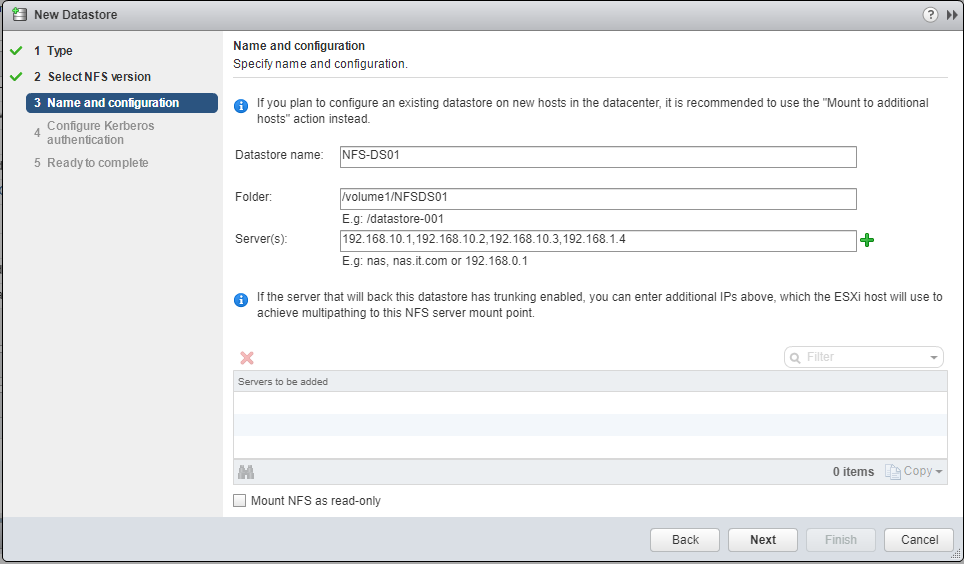
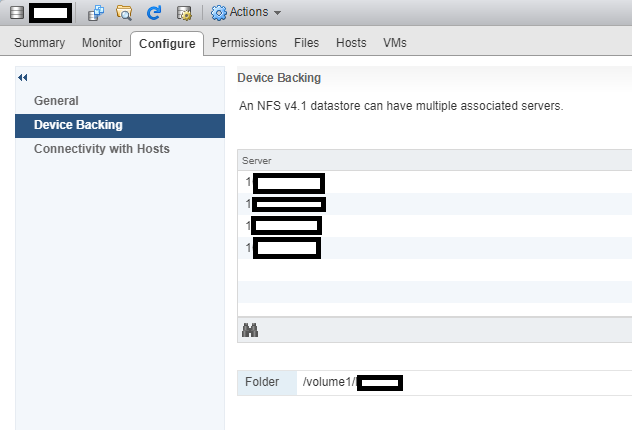
- Press the Green “+” and you’ll see it spreads them to the “Servers to be added”, each server entry reflecting an IP on the NAS. (please note I made a typo on one of the IPs).

- Follow through with the wizard, and it will be added as a datastore.
That’s it! You’re done and are now using NFS Multipathing on your ESXi host!
In my case, I have all 4 NICs in my DS1813+ configured and connected to a switch. My ESXi hosts have 10Gb DAC connections to that switch, and can now utilize it at faster speeds. During intensive I/O loads, I’ve seen the full aggregated network throughput hit and sustain around 370MB/s.
After resolving the issues mentioned below, I’ve been running for weeks with absolutely no problems, and I’m enjoying the increased speed to the NAS.
Additional Important Information
After enabling this, I noticed that RAM and Memory usage had drastically increased on the Synology NAS. This would peak when my ESXi hosts would restart. This issue escalated to the NAS running out of memory (both physical and swap) and ultimately crashing.
After weeks of troubleshooting I found the processes that were causing this. While the processes were unrelated, this issue would only occur when using NFS Multipathing and NFS v4.1. To resolve this, I had to remove the “pkgctl-SynoFinder” package, and disable the services. I could do this in my environment because I only use the NAS for NFS and iSCSI. This resolved the issue. I created a blog post here to outline how to resolve this. I also further optimized the NAS and memory usage by disabling other unneeded services in a post here, targeted for other users like myself, who only use it for NFS/iSCSI.
Leave a comment and let me know if this post helped!
