Jun 072014
 

So, you have:

2 X HP Proliant DL360p Gen8 Servers with 2 X 10 Core Processors

1 X MSA 2040 SAN – With Dual Controllers


And you want more visibility, functionality, and more important “Insight” on your systems where the hardware meets the software. This is where HP Insight Control for VMWare comes in to play.

This package is amazing for providing information and “Insight” in to all your equipment, including servers and storage units. It allows you to update firmware, monitor and manage servers, monitor and manage storage arrays, and rapidly deploy new data stores and manage existing ones. It makes all this information and functionality available via the vSphere management interfaces, which is just fantastic.


I was browsing the downloads area on HP’s website for the MSA 2040, and the website told me I should download “Insight Control for VMWare”, I figured why not! After getting this package installed, I instantly saw the value.

HP Insight control for VMWare, allows you to access server health, management, and control, along with storage health, management, and control. It supports HP servers with iLo, and fully supports the MSA 2040 SAN.

Installation was a breeze, it was installed within seconds. I chose to install it directly on to my demo vSphere 5.5 vCenter server. Barely any configuration is required, the installation process was actually a few clicks of “Next”. Once install, you simply have to configure iLo credentials, and then add your storage system if you have a compatible SAN. Even adding your SAN is super easy, and it allows you to choose whether you want Insight Control to have full access to the SAN (which allows you to create, and manage datastores), or only Read Only, which only allows it to pull information from the unit.


And for those of you concerned about port conflicts, it uses:

3500,3501, 3502, 3503, 3504, 3505, 3506, 3507, 3508, 3509, 3510, 3512, 3513, 3511, 8090.


The Insight Control for VMWare is available through both the software client, and the web client. As far as I’m concerned it’s a “must have” if your running HP equipment in your vSphere environment!

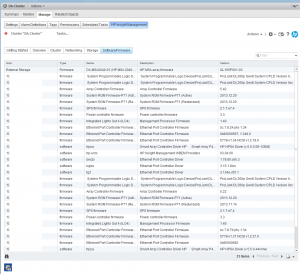
HP Insight Control Firmware Management Page

HP Insight Control Firmware Management Page

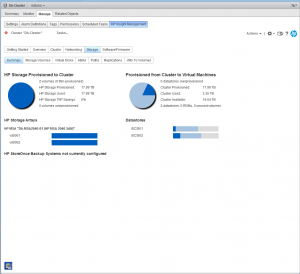
HP Insight Control for VMWare on Software Client for vSphere

HP Insight Control for VMWare on Software Client for vSphere

HP Insight Control for VMWare showing iSCSI initiator paths

HP Insight Control for VMWare showing iSCSI initiator paths

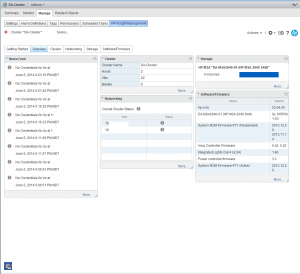
HP Insight Control for VMWare Web Client

HP Insight Control for VMWare Web Client

HP Inight Control for VMWare Overview in Web Client

HP Inight Control for VMWare Overview in Web Client


May 282014
 

In the last few months, my company (Digitally Accurate Inc.) and our sister company (Wagner Consulting Services), have been working on a number of new cool projects. As a result of this, we needed to purchase more servers, and implement an enterprise grade SAN. This is how we got started with the HPE MSA 2040 SAN (formerly known as the HP MSA 2040 SAN), specifically a fully loaded HPE MSA 2040 Dual Controller SAN unit.

The Purchase

For the server, we purchased another HPE Proliant DL360p Gen8 (with 2 X 10 Core Processors, and 128Gb of RAM, exact same as our existing server), however I won’t be getting that in to this blog post.

Now for storage, we decided to pull the trigger and purchase an HPE MSA 2040 Dual Controller SAN. We purchased it as a CTO (Configure to Order), and loaded it up with 4 X 1Gb iSCSI RJ45 SFP+ modules (there’s a minimum requirement of 1 4-pack SFP), and 24 X HPE 900Gb 2.5inch 10k RPM SAS Dual Port Enterprise drives. Even though we have the 4 1Gb iSCSI modules, we aren’t using them to connect to the SAN. We also placed an order for 4 X 10Gb DAC cables.

To connect the SAN to the servers, we purchased 2 X HPE Dual Port 10Gb Server SFP+ NICs, one for each server. The SAN will connect to each server with 2 X 10Gb DAC cables, one going to Controller A, and one going to Controller B.

HPE MSA 2040 Configuration

I must say that configuration was an absolute breeze. As always, using intelligent provisioning on the DL360p, we had ESXi up and running in seconds with it installed to the on-board 8GB micro-sd card.

I’m completely new to the MSA 2040 SAN and have actually never played with, or configured one. After turning it on, I immediately went to HPE’s website and downloaded the latest firmware for both the drives, and the controllers themselves. It’s a well known fact that to enable iSCSI on the unit, you have to have the controllers running the latest firmware version.

Turning on the unit, I noticed the management NIC on the controllers quickly grabbed an IP from my DHCP server. Logging in, I found the web interface extremely easy to use. Right away I went to the firmware upgrade section, and uploaded the appropriate firmware file for the 24 X 900GB drives. The firmware took seconds to flash. I went ahead and restarted the entire storage unit to make sure that the drives were restarted with the flashed firmware (a proper shutdown of course).

While you can update the controller firmware with the web interface, I chose not to do this as HPE provides a Windows executable that will connect to the management interface and update both controllers. Even though I didn’t have the unit configured yet, it’s a very interesting process that occurs. You can do live controller firmware updates with a Dual Controller MSA 2040 (as in no downtime). The way this works is, the firmware update utility first updates Controller A. If you have a multipath (MPIO) configuration where your hosts are configured to use both controllers, all I/O is passed to the other controller while the firmware update takes place. When it is complete, I/O resumes on that controller and the firmware update then takes place on the other controller. This allows you to do online firmware updates that will result in absolutely ZERO downtime. Very neat! PLEASE REMEMBER, this does not apply to drive firmware updates. When you update the hard drive firmware, there can be ZERO I/O occurring. You’d want to make sure all your connected hosts are offline, and no software connection exists to the SAN.

Anyways, the firmware update completed successfully. Now it was time to configure the unit and start playing. I read through a couple quick documents on where to get started. If I did this right the first time, I wouldn’t have to bother doing it again.

I used the wizards available to first configure the actually storage, and then provisioning and mapping to the hosts. When deploying a SAN, you should always write down and create a map of your Storage area Network topology. It helps when it comes time to configure, and really helps with reducing mistakes in the configuration. I quickly jaunted down the IP configuration for the various ports on each controller, the IPs I was going to assign to the NICs on the servers, and drew out a quick diagram as to how things will connect.

Since the MSA 2040 is a Dual Controller SAN, you want to make sure that each host can at least directly access both controllers. Therefore, in my configuration with a NIC with 2 ports, port 1 on the NIC would connect to a port on controller A of the SAN, while port 2 would connect to controller B on the SAN. When you do this and configure all the software properly (VMWare in my case), you can create a configuration that allows load balancing and fault tolerance. Keep in mind that in the Active/Active design of the MSA 2040, a controller has ownership of their configured vDisk. Most I/O will go through only to the main controller configured for that vDisk, but in the event the controller goes down, it will jump over to the other controller and I/O will proceed uninterrupted until your resolve the fault.

First part, I had to run the configuration wizard and set the various environment settings. This includes time, management port settings, unit names, friendly names, and most importantly host connection settings. I configured all the host ports for iSCSI and set the applicable IP addresses that I created in my SAN topology document in the above paragraph. Although the host ports can sit on the same subnets, it is best practice to use multiple subnets.

Jumping in to the storage provisioning wizard, I decided to create 2 separate RAID 5 arrays. The first array contains disks 1 to 12 (and while I have controller ownership set to auto, it will be assigned to controller A), and the second array contains disk 13 to 24 (again ownership is set to auto, but it will be assigned to controller B). After this, I assigned the LUN numbers, and then mapped the LUNs to all ports on the MSA 2040, ultimately allowing access to both iSCSI targets (and RAID volumes) to any port.

I’m now sitting here thinking “This was too easy”. And it turns out it was just that easy! The RAID volumes started to initialize.

VMware vSphere Configuration

At this point, I jumped on to my vSphere demo environment and configured the vDistributed iSCSI switches. I mapped the various uplinks to the various portgroups, confirmed that there was hardware link connectivity. I jumped in to the software iSCSI imitator, typed in the discovery IP, and BAM! The iSCSI initiator found all available paths, and both RAID disks I configured. Did this for the other host as well, connected to the iSCSI target, formatted the volumes as VMFS and I was done!

I’m still shocked that such a high performance and powerful unit was this easy to configure and get running. I’ve had it running for 24 hours now and have had no problems. This DESTROYS my old storage configuration in performance, thankfully I can keep my old setup for a vDP (VMWare Data Protection) instance.

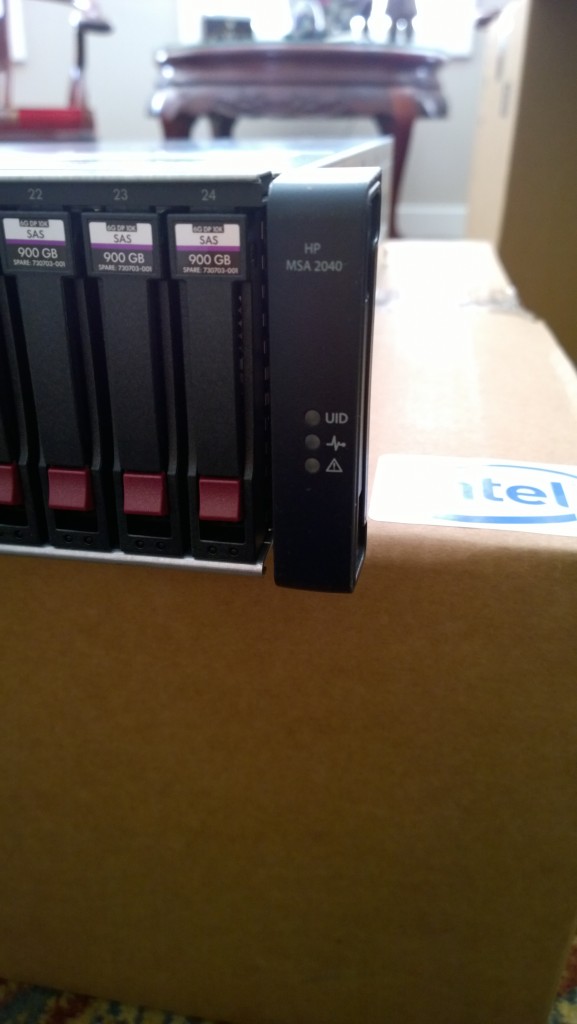
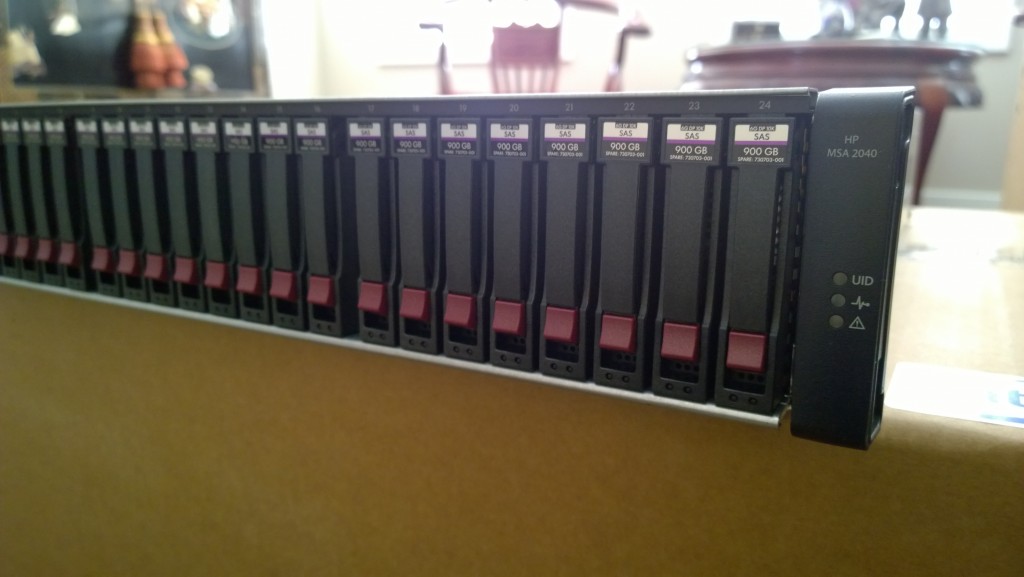
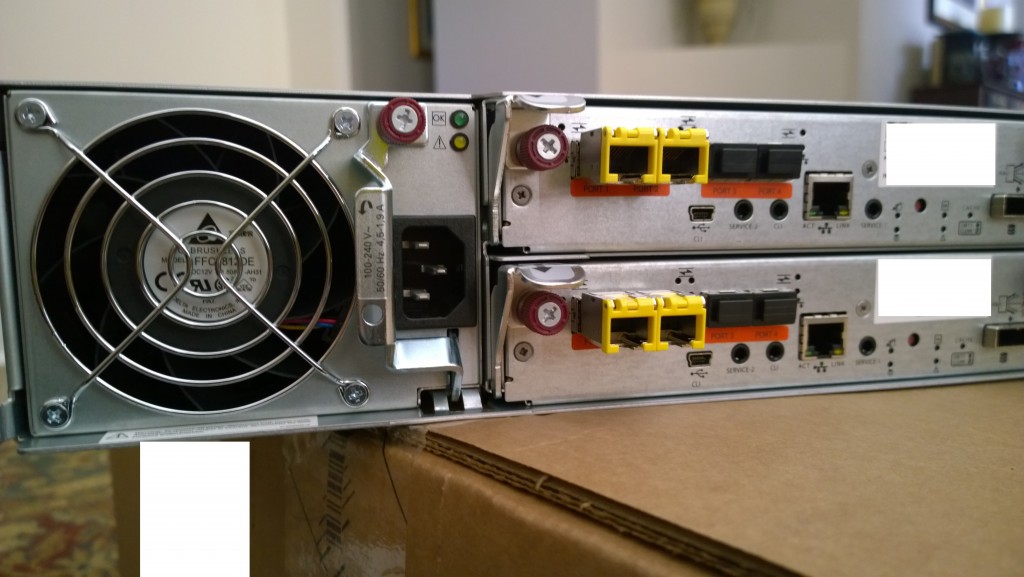
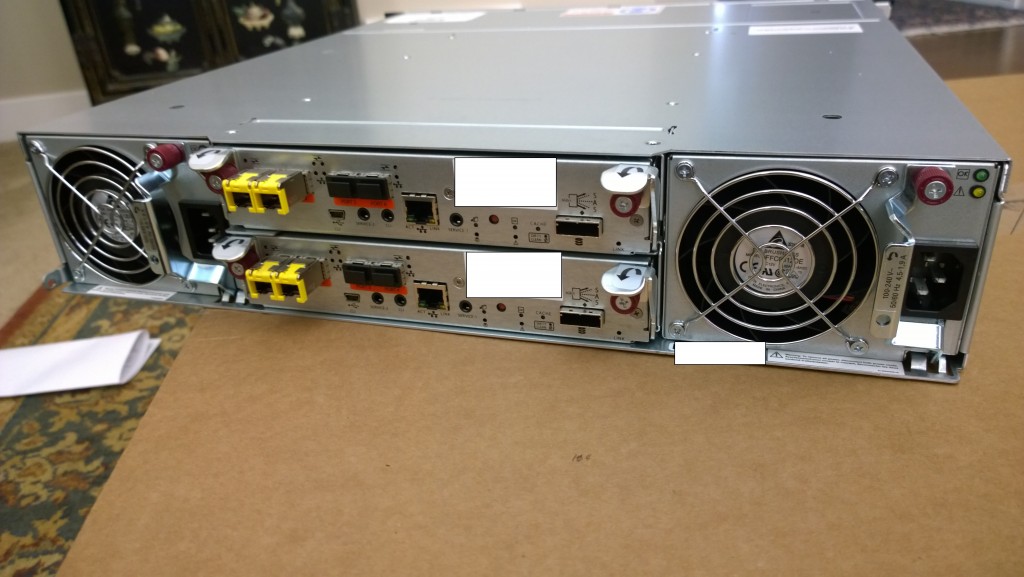
HPE MSA 2040 Pictures

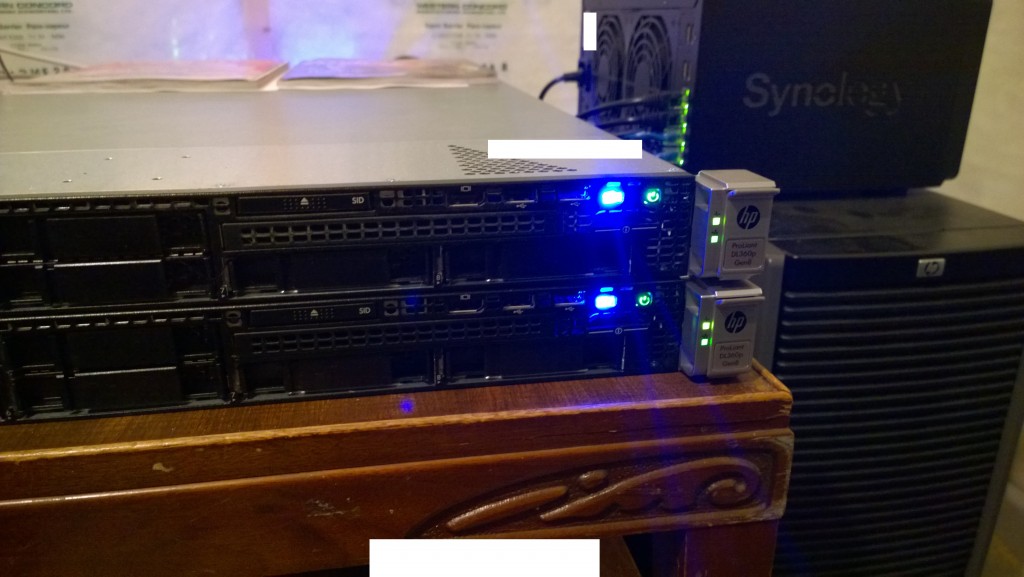
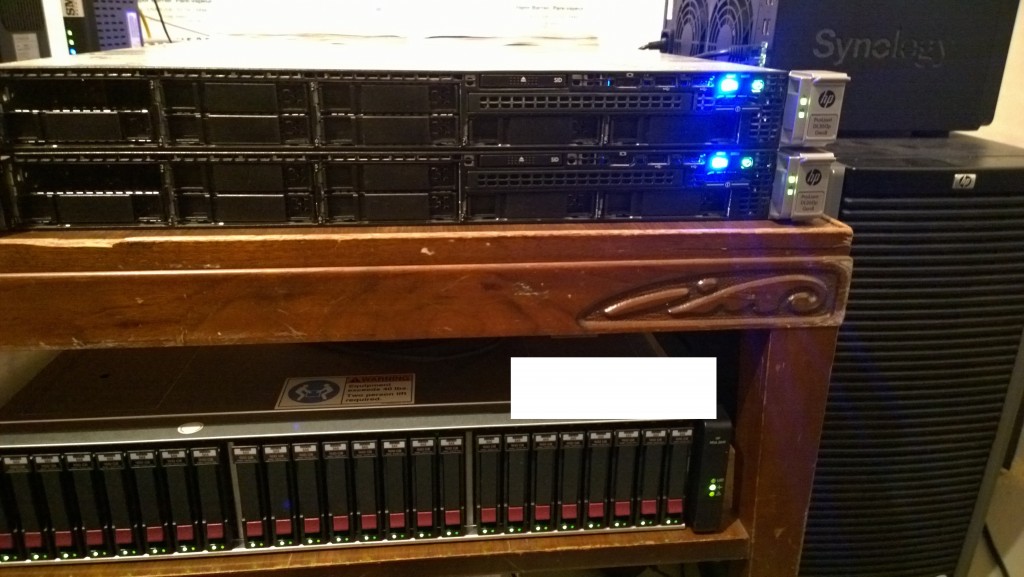
I’ve attached some pics below. I have to apologize for how ghetto the images/setup is. Keep in mind this is a test demo environment for showcasing the technologies and their capabilities.

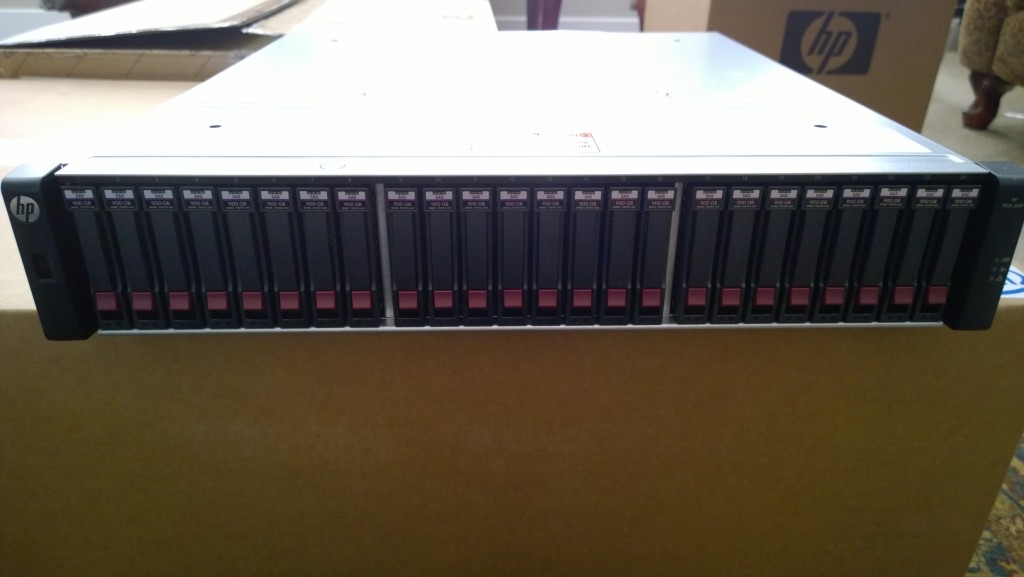
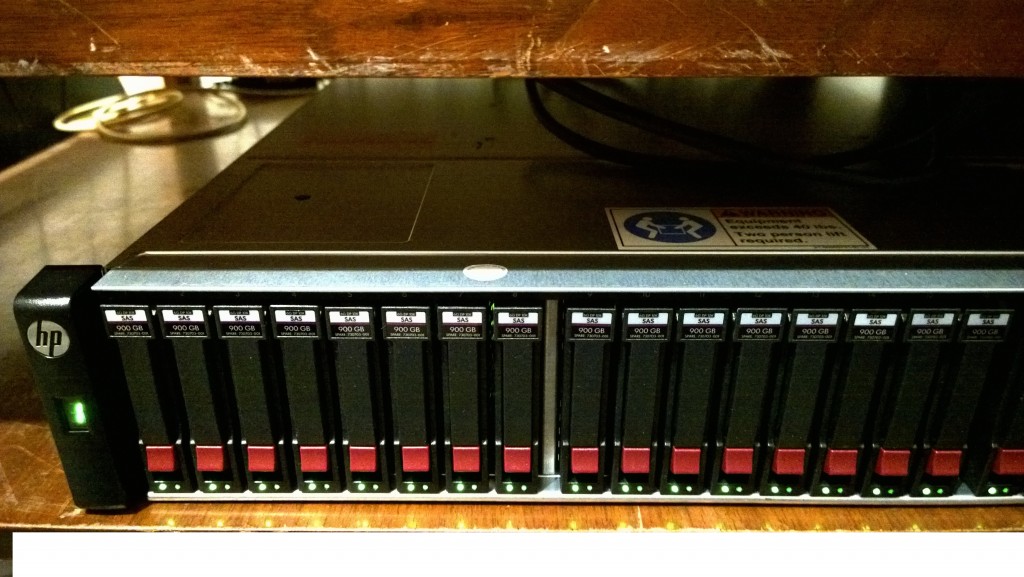
HPe MSA 2040 SAN - Front Image
HPE MSA 2040 SAN – Front Image
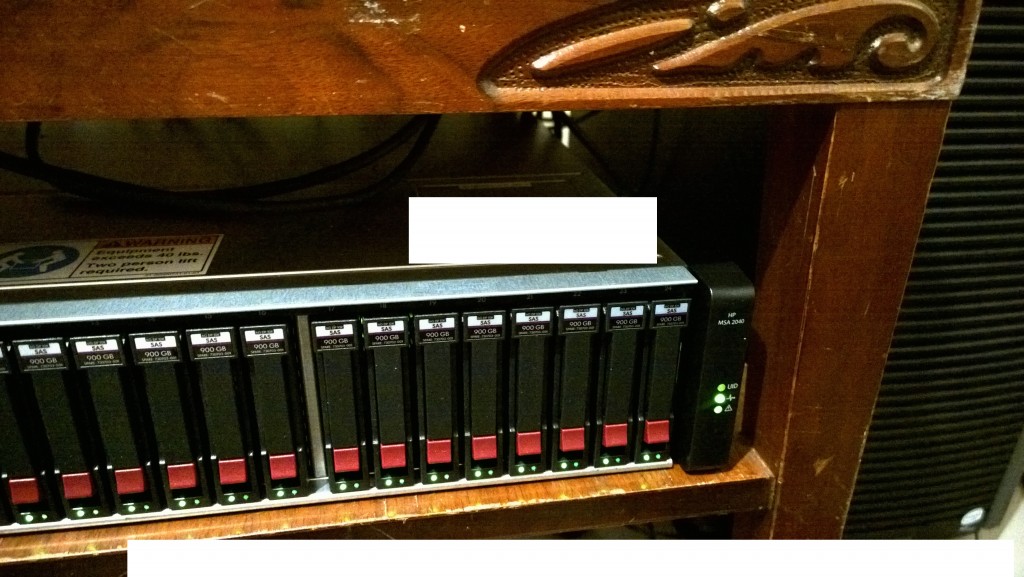
HP MSA 2040 - Side Image
HP MSA 2040 – Side Image
HPe MSA 2040 SAN with drives - Front Right Image
HPE MSA 2040 SAN with drives – Front Right Image
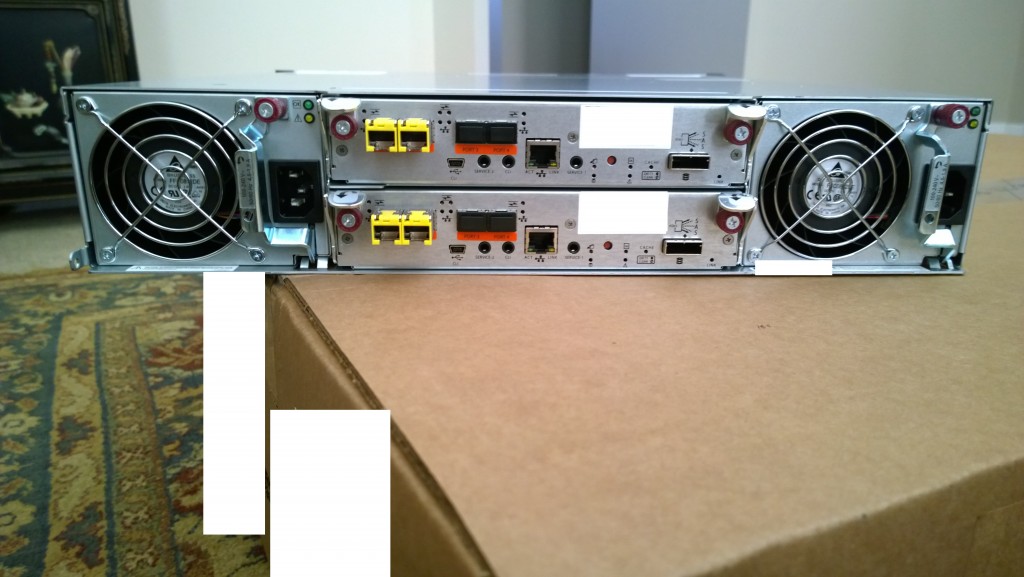
HP MSA 2040 Rear Power Supply and iSCSI Controllers
HPe MSA 2040 Dual Controller - Rear Image
HPE MSA 2040 Dual Controller – Rear Image
HP MSA 2040 Dual Controller SAN - Rear Image
HP MSA 2040 Dual Controller SAN – Rear Image
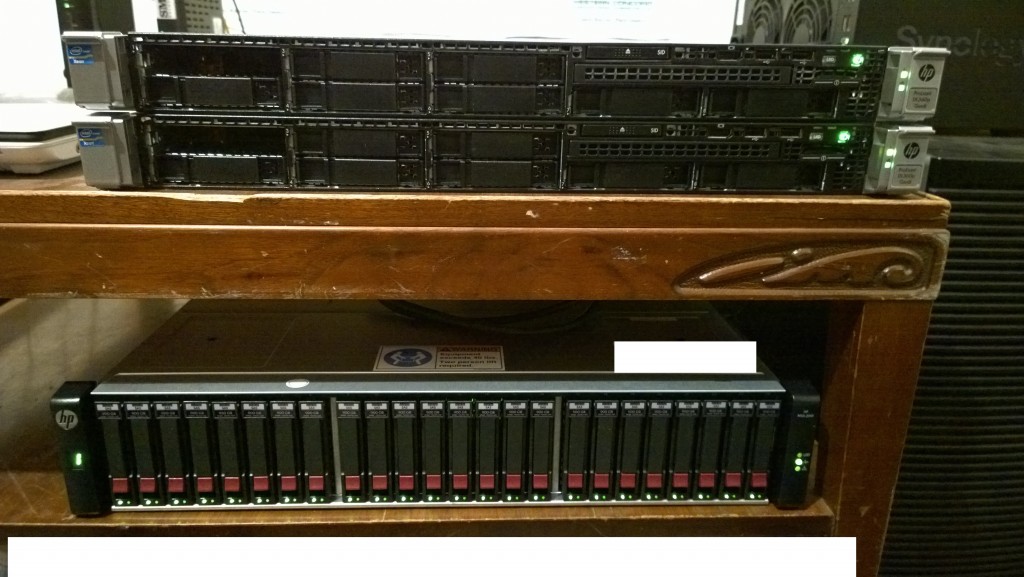
HPe Proliant DL 360p Gen8 HP MSA 2040 Dual Controller SAN
HP Proliant DL 360p Gen8
HP MSA 2040 Dual Controller SAN
HPe MSA 2040 Dual Controller SAN
HPE MSA 2040 – With Power
HP MSA 2040 - Side shot with power on
HP MSA 2040 – Side shot with power on
HP Proliant DL360p Gen8 - UID LED on
HP Proliant DL360p Gen8 – UID LED on
HP Proliant DL360p Gen8 HP MSA 2040 Dual Controller SAN VMWare vSphere
HP Proliant DL360p Gen8
HP MSA 2040 Dual Controller SAN
VMWare vSphere

Update: HPE has updated the MSA product line and the 2040 has now been replaced by the HPE MSA 2050 SAN Dual Controller SAN. There are now also SSD Cache models such as the HPE MSA 2052 Dual Controller SAN.

Apr 122014
 

Recently I decided it was time to beef up my storage link between my demonstration vSphere environment and my storage system. My existing setup included a single HP DL360p Gen8, connected to a Synology DS1813+ via NFS.

I went out and purchased the appropriate (and compatible) HP 4 x 1Gb Server NIC (Broadcom based, 4 ports), and connected the Synology device directly to the new server NIC (all 4 ports). I went ahead and configured an iSCSI Target using a File LUN with ALUA (Advanced LUN features). Configured the NICs on both the vSphere side, and on the Synology side, and enabled Jumbo frames of 9000 bytes.

I connected to the iSCSI LUN, and created a VMFS volume. I then configured Round Robin MPIO on the vSphere side of things (as always I made sure to enable “Multiple iSCSI initators” on the Synology side).

I started to migrate some VMs over to the iSCSI LUN. At first I noticed it was going extremely slow. I confirmed that traffic was being passed across all NICs (also verified that all paths were active). After the migration completed I decided to shut down the VMs and restart to compare boot times. Booting from the iSCSI LUN was absolutely horrible, the VMs took forever to boot up. Keep in mind I’m very familiar with vSphere (my company is a VMWare partner), so I know how to properly configure Round Robin, iSCSI, and MPIO.

I then decided to tweak some settings on the ESXi side of things. I configured the Round Robin policy to IOPS=1, which helped a bit. Then changed the RR policy to bytes=8800 which after numerous other tweaks, I determined achieved the highest performance to the storage system using iSCSI.

This config was used for a couple weeks, but ultimately I was very unsatisfied with the performance. I know it’s not very accurate, but looking at the Synology resource monitor, each gigabit link over iSCSI was only achieving 10-15MB/sec under high load (single contiguous copies) that should have resulted in 100MB/sec and higher per link. The combined LAN throughput as reported by the Synology device across all 4 gigabit links never exceeded 80MB/sec. File transfers inside of the virtual machines couldn’t get higher then 20MB/sec.

I have a VMWare vDP (VMWare Data Protection) test VM configured, which includes a performance analyzer inside of the configuration interface. I decided to use this to test some specs (I’m too lazy to actually configure a real IO/throughput test since I know I won’t be continuing to use iSCSI on the Synology with the horrible performance I’m getting). The performance analyzer tests run for 30-60 minutes, and measure writes and reads in MB/sec, and Seeks in seconds. I tested 3 different datastores.

Synology  DS1813+ NFS over 1 X Gigabit link (1500MTU):

  • Read 81.2MB/sec, Write 79.8MB/sec, 961.6 Seeks/sec

Synology DS1813+ iSCSI over 4 x Gigabit links configured in MPIO Round Robin BYTES=8800 (9000MTU):

  • Read 36.9MB/sec, Write 41.1MB/sec, 399.0 Seeks/sec

Custom built 8 year old computer running Linux MD Raid 5 running NFS with 1 X Gigabit NIC (1500MTU):

  • Read 94.2MB/sec, Write 97.9MB/sec, 1431.7 Seeks/sec

Can someone say WTF?!?!?!?! As you can see, it appears there is a major performance hit with the DS1813+ using 4 Gigabit MPIO iSCSI with Round Robin. It’s half the speed of a single link 1 X Gigabit NFS connection. Keep in mind I purchased the extra memory module for my DS1813+ so it has 4GB of memory.

I’m kind of choked I spent the money on the extra server NIC (as it was over $500.00), I’m also surprised that my custom built NFS server from 8 years ago (drives are 4 years old) with 5 drives is performing better then my 8 drive DS1813+. All drives used in both the Synology and Custom built NFS box are Seagate Barracuda 7200RPM drives (Custom box has 5 X 1TB drives configured RAID5, the Synology has 8 x 3TB drives configured in RAID 5).

I won’t be using iSCSI  or iSCSI MPIO again with the DS1813+ and actually plan on retiring it as my main datastore for vSphere. I’ve finally decided to bite the bullet and purchase an HP MSA2024 (Dual Controller with 4 X 10Gb SFP+ ports) to provide storage for my vSphere test/demo environment. I’ll keep the Synology DS1813+ online as an NFS vDP backup datastore.

Feel free to comment and let me know how your experience with the Synology devices using iSCSI MPIO is/was. I’m curious to see if others are experiencing the same results.

UPDATE – June 6th, 2014

The other day, I finally had time to play around and do some testing. I created a new FileIO iSCSI Target, I connected it to my vSphere test environment and configured round robin. Doing some tests on the newly created datastore, the iSCSI connections kept disconnecting. It got to the point where it wasn’t usable.

I scratched that, and tried something else.

I deleted the existing RAID volume and I created a new RAID 5 volume and dedicated it to Block I/O iSCSI target. I connected it to my vSphere test environment and configured round robin MPIO.

At first all was going smoothly, until again, connection drops were occurring. Logging in to the DSM, absolutely no errors were being reported and everything was fine. Yet, I was at a point where all connections were down to the ESXi host.

I shut down the ESXi host, and then shut down and restarted the DS1813+. I waited for it to come back up however it wouldn’t. I let it sit there and waited for 2 hours for the IP to finally be pingable. I tried to connect to the Web interface, however it would only load portions of the page over extended amounts of time (it took 4 hour to load the interface). Once inside, it was EXTREMELY slow. However it was reporting that all was fine, and everything was up, and the disks were fine as well.

I booted the ESXi host and tried to connect to it, however it couldn’t make the connection to the iSCSI targets. Finally the Synology unit became un-responsive.

Since I only had a few test VMs loaded on the Synology device, I decided to just go ahead and do a factory reset on the unit (I noticed new firmware was available as of that day). I downloaded the firmware, and started the factory reset (which again, took forever since the web interface was crawling along).

After restarting the unit, it was not responsive. I waited a couple hours and again, the web interface finally responded but was extremely slow. It took a couple hours to get through the setup page, and a couple more hours for the unit to boot.

Something was wrong, so I restarted the unit yet again, and again, and again.

This time, the alarm light was illuminated on the unit, also one of the drive lights wouldn’t come on. Again, extreme unresponsiveness. I finally got access to the web interface and it was reporting the temperature of one of the drives as critical, but it said it was still functioning and all drives were OK. I shut off the unit, removed the drive, and restarted it again, all of a sudden it was extremely responsive.

I removed the drive, hooked it up to another computer and confirmed that it was failed (which it was).

I replaced the drive with a new one (same model), and did three tests. One with NFS, one with FileIO iSCSI, and one with BlockIO iSCSI. All of a sudden the unit was working fine, and there was absolutely NO iSCSI connections dropping. I tested the iSCSI targets under load for some time, and noticed considerable performance increases with iSCSI, and no connection drops.

Here are some thoughts:

  • Two possible things fixed the connection drops, either the drive was acting up all along, or the new version of DSM fixed the iSCSI connection drops.
  • While performance has increased with FileIO to around ~120-160MB/sec from ~50MB/sec, I’m still not even close to maxing out the 4 X 1Gb interfaces.
  • I also noticed a significant performance increase with NFS, so I’m leaning towards the fact that the drive had been acting up since day one (seeks per second increased by 3 fold after replacing the drive and testing NFS). I/O wait has been significantly reduced
  • Why did the Synology unit just freeze up once this drive really started dying? It should have been marked as failed instead of causing the entire Synology unit not to function.
  • Why didn’t the drive get marked as failed at all? I regularly performed SMART tests, and checked drive health, there was absolutely no errors. Even when the unit was at a standstill, it still reported the drive as working fine.

Either way, the iSCSI connection drops aren’t occurring anymore, and performance with iSCSI is significantly better. However, I wish I could hit 200MB+/sec.

At this point it is usable for iSCSI using FileIO, however I was disappointed with BlockIO performance (BlockIO should be faster, no idea why it isn’t).

For now, I have an NFS datastore configured (using this for vDP backup), although I will be creating another FileIO iSCSI target and will do some more testing.

Update – August 16, 2019: Please see these additional posts regarding performance and optimization:
Jul 082013
 

Recently I needed to upgrade and replace my storage system which provides basic SMB dump file services, iSCSI, and NFS to my internal network and vSphere cluster. As most of you know, in the past I have traditionally created and configured my own storage systems. For the most part this has worked fantastic, especially with the NFS and iSCSI target services being provided and built in to the Linux OS (iSCSI thanks to Lio-Target).

A few reasons for the upgrade…

  1. I need more storage
  2. I need a pre-packaged product that comes with warranty.

Taking care of the storage size was easy (buy more drives), however I needed to find a pre-packaged product that fits my requirements for performance, capabilities, stability, support, and of course warranty. iSCSI and NFS support was an absolute must!

Some time ago, when I first started working with Lio-Target before it was incorporated and merged in to the linux kernel, I noticed that the parent company Rising Tide Systems mentioned they also provided the target for numerous NAS and SAN devices available on the market, Synology being one of them. I never thought anything of this as back then I wasn’t interesting in purchasing a pre-packaged product, until my search for a new storage system.

Upon researching, I found that Synology released their 2013 line of products. These products had a focus on vSphere compatibility, performance, and redundant network connections (either through Trunking/Link aggregation, or MPIO iSCSI connections).

The device that caught my attention for my purpose was the DS1813+.

DS1813+
Synology DS1813+

Synology DS1813+ Specifications:

  • CPU Frequency : Dual Core 2.13GHz
  • Floating Point
  • Memory : DDR3 2GB (Expandable, up to 4GB)
  • Internal HDD/SSD : 3.5″ or 2.5″ SATA(II) X 8 (Hard drive not included)
  • Max Internal Capacity : 32TB (8 X 4TB HDD) (Capacity may vary by RAID types) (See All Supported HDD)
  • Hot Swappable HDD
  • External HDD Interface : USB 3.0 Port X 2, USB 2.0 Port X 4, eSATA Port X 2
  • Size (HxWxD) : 157 X 340 X 233 mm
  • Weight : 5.21kg
  • LAN : Gigabit X 4
  • Link Aggregation
  • Wake on LAN/WAN
  • System Fan : 120x120mm X2
  • Easy Replacement System Fan
  • Wireless Support (dongle)
  • Noise Level : 24.1 dB(A)
  • Power Recovery
  • Power Supply : 250W
  • AC Input Power Voltage : 100V to 240V AC
  • Power Frequency : 50/60 Hz, Single Phase
  • Power Consumption : 75.19W (Access); 34.12W (HDD Hibernation);
  • Operating Temperature : 5°C to 35°C (40°F to 95°F)
  • Storage Temperature : -10°C to 70°C (15°F to 155°F)
  • Relative Humidity : 5% to 95% RH
  • Maximum Operating Altitude : 6,500 feet
  • Certification : FCC Class B, CE Class B, BSMI Class B
  • Warranty : 3 Years

This puppy has 4 gigabit LAN ports, and 8 SATA bays. There’s tons of reviews on the internet praising Synology, and their DSM operating system (based on embedded linux) on the internet, so I decided to live dangerously and went ahead and placed an order for this device, along with 8 X Seagate 3TB Barracuda drives.

Unfortunately, it’s extremely difficult to get your hands on a DS1813+ in Canada (I’m not sure why). After numerous orders placed and cancelled with numerous companies, I finally found a distributor who was able to get me one. I’ll just say the wait was totally worth it. Initially I also purchased the 2GB RAM add-on as well, so I had this available when the DS1813+ arrived.

I was hoping to take a bunch of pictures, and do thorough testing with the unit before throwing it in to production, however right from the get go, it was extremely easy to configure and use, so right away I had it running in production. Sorry for the lack of pics! 🙂

I did however get a chance to setup the 8 drives in RAID 5, and configured an iSCSI block based target. The performance was fantastic, no problems whatsoever. Even maxing out one gigabit connection, the resources of the unit were barely touched.

I’m VERY impressed with the DSM operating system. Everything is clearly spelled out, and you have very detailed control of the device and all services. Configuration of SMB shares, iSCSI targets, and NFS exports is extremely simple, yet allows you to configure advanced features.

After testing out the iSCSI performance, I decided to get the unit ready for production. I created 2 shared folders, and exported these via NFS to my ESXi hosts. It was very simple, quick, and the ESXi hosts had absolutely no problems connecting to the exports.

One thing that really blew me away about this unit, is the performance. Immediately after configuring the NFS exports, mounting them and using Storage vMotion to migrate 14 live virtual machines to the DS1813+ I noticed MASSIVE performance gains. The performance gains were so large, it put my old custom storage system to shame. And this is really interesting, considering my old storage system, while custom, is actually spec’d way higher then the storage unit (CPU, RAM, and the SATA controller). I’m assuming the DS1813+ has numerous kernel optimizations for storage, and at the same time does not have the overhead of a fully Linux distribution. This also means it’s more stable since you don’t have tons of applications running in the background that you don’t need.

After migrating the VMs I noticed that the virtual machines were running way faster, and were may more responsive. I’m assuming this is due to increased IOPS.

Either way I’m extremely happy with the device and fully recommend it. I’ll be posting more blog articles later detailing configuration of services in detail such as iSCSI, NFS, and some other things. I’m already planning on picking up an additional DS1513+ (5 bay unit) to act as a storage server for VM backups which I perform using GhettoVCB.

Update – August 16, 2019: Please see these additional posts regarding performance and optimization:
Nov 222012
 

Just something I wanted to share in case anyone else ran in to this issue…

At a specific client we have 2 X MSA60 units attached via Smart Array P800 controllers to 2 X DL360 G6 servers. These combo of server, controller, and storage units were purchased just after they were originally released from HP.

I’m writing about a specific condition in which after a drive fails in RAID 5, during rebuild, numerous (and I mean over 70,000) event log entries in the event viewer state: “Surface analysis has repaired an inconsistent stripe on logical drive 1 connected to array controller P800 located in server slot 2. This repair was conducted by updating the parity data to match the data drive contents.”


One one of these arrays, shortly after a successful rebuild while the event viewer was spitting these errors out, had another drive fail. At this point the RAID array went offline, and the entire RAID array and all it’s contents were unrecoverable. Keep in mind this occurred after the rebuild, while a surface scan was in progress. In this specific case we rebuilt the array, restored from backup and all was good. After mentioning this to HP support techs, they said it was safe to ignore these messages as they were fine and informational (I didn’t feel this was the case). After creating the new RAID array on this specific unit, we never saw these messages on that unit again.

On the other MSA60 unit however, we regularly received these messages (we always keep the firmware of the MSA60 unit, and the P800 controller up to date). Again numerous times asked HP support and they said we could safely ignore these. Recently, during a power outage, the P800 controller flagged it’s cache batteries as failed, at the same time a drive failed and we were yet again presented with these errors after the rebuild. After getting the drive replaced, I contacted HP again, and finally insisted that they investigate this issue regarding the event log errors. This specific time, new errors about parity were presenting themselves in the event viewer.

After being put on hold for some time, they came back and mentioned that these errors are probably caused because the RAID array was created with a very early firmware version. They recommended to delete the logical array, and re-create it with the latest firmware to avoid any data loss. I specifically asked if there was a chance that the array could fail due to these errors, and the fact it was created with an early firmware version, and they confirmed it. I went ahead, created backups, deleted the array and re-created it, restored the back and the errors are no longer present.


I just wanted to create this blog post, as I see numerous people are searching for the meaning of these errors, and wanted to shed some light and maybe help a few of you out, to help you avoid any future catastrophic problems!