Mar 162020
 
Picture of Raspberry Pi 4 box and Raspberry Pi 4 board below box

So you just loaded up Ubuntu Server on your Raspberry Pi 4 using the latest Ubuntu Server Pi image and when you try logging in with the default username and password of ubuntu:ubuntu, you get the error “Authentication token Manipulation error” when you try to change the default password and log in.

This occurs on a fresh image write to an SD card using the Ubuntu 18.04.4 LTS 64-bit image. This may occur on other images and other versions of Ubuntu and other versions of the Raspberry Pi.

The filename for the image with the issue is:

ubuntu-18.04.4-preinstalled-server-arm64+raspi3.img.xz

How to Fix

After doing some research, I found out that there was an issue with a password file or the PAM database on the image. I figured that it was best to try to log in first using the default credentials, and then we can worry about changing the password later.

To do this I decided to modify the “cloud-init” scripts. I mounted the SD-Card on another Linux system, opened the “/boot/firmware/user-data”, and changed the “expire” setting on the ubuntu user from true to false.

The Instructions

  1. Mount the SD-Card on another Linux system.
  2. Navigate to the boot filesystem, and then open the “user-data” file inside of the firmware directory using nano or vi. The full path on the SD-Card is:
    /boot/firmware/user-data
  3. Scroll down to this section.
    chpasswd:
      expire: true
      list:
      - ubuntu:ubuntu

    Change the “expire: true” to “expire: false”.
  4. Exit the file and save.
  5. Properly unmount the SD-Card (using umount).
  6. Boot up the Pi with the Micro-SD card.

You should now be able to log in using the username ubuntu and password ubuntu without being asked to change your password, and without seeing the error.

Once you have logged in, change the password to this account by using “passwd”.

Hope it helps!

Jun 302012
 

As most of you know, I have 2 Raspberry Pi.  One has tons of storage, that I do a lot of my hacking on, and development. The other has less storage, I usually keep clean, and don’t do anything funky on it. I like the second to have a clean usable image (even though this doesn’t make sense, and I don’t use it in production, I call the second my “Production Pi”, the first is my “devpi”).

For my development Raspberry Pi, I maintain two installs. One install is a Fedora 17 ARM install with my own kernel that all fits on a 16GB SD card, but my second install (the crazy packed install) actually boots it’s kernel off a small 2GB SD card, and loads it’s rootfs off of a external 500GB USB drive. The SD card install was easy, however the rootfs on USB took a bit of work, I’m going to share with you how I did this.

To have your Raspberry Pi use a rootfs off a USB drive you will need to know what modules your USB drive currently uses on a un-modified Raspberry Pi kernel, and you will need a seperate linux box, and SD card reader/writer to prepare the rootfs and perform these instructions. In my case, I used my 16GB install as a template and cloned it to my 500GB USB drive.

DISCLAIMER: These instructions are what I did to setup a rootfs on a USB device. I am in no way telling you to follow these instructions, and if you do, and any damage occurs I am not liable or responsable. These instructions if not followed properly can cause damage to your existing linux install on your computer and your Raspberry Pi. Only follow these if you understand them.


Let’s get started, first let’s prepare the new bootable SD card which loads our kernel:

1) First we want to take a image of the partition table, and boot partition we already boot from on our existing working Raspberry Pi Fedora 17 ARM install. We only want to image the partition table and boot partition. First we use fdisk to find out how big the boot partition is:

fdisk /dev/sdb

Press “p” and hit enter to print the partition table. In my case it outputted:

Welcome to fdisk (util-linux 2.21.2).

Changes will remain in memory only, until you decide to write them.
Be careful before using the write command.

Command (m for help): p

Disk /dev/sdb: 16.0 GB, 16009658368 bytes
64 heads, 32 sectors/track, 15268 cylinders, total 31268864 sectors
Units = sectors of 1 * 512 = 512 bytes
Sector size (logical/physical): 512 bytes / 512 bytes
I/O size (minimum/optimal): 512 bytes / 512 bytes
Disk identifier: 0x00000000

Device Boot      Start         End      Blocks   Id  System
/dev/sdb1   *          63     1044224      522081    c  W95 FAT32 (LBA)
/dev/sdb2         1044225    27074558    13015167   83  Linux
/dev/sdb3        27074559    31268863     2097152+  83  Linux

This shows that my boot partition starts at sector 63 and goes till 1044224. Each sector is 512 bytes, for a total boot partition that is 534642688 bytes, or ~509 megabytes. The reason that the partition starts at sector 63, is because everything prior to that on the SD card contains partition information, etc… When we image, we will start from the beginning to grab that partition information. After you record the End sector for your boot partition, hit “q” and enter to exit fdisk.

Let’s create the image. In order to do this, you need to find out what sd* device your SD card is on your current system. If you do a dmesg after connecting the sd card, you should see it. Make sure you choose the correct sd* or you could damage your current linux system. In my case, after I connected the SD card to my linux workstation, it became /dev/sdb.

Let’s make the image:

dd if=/dev/sdb of=image.img bs=512 count=1044224

This will create an image called image.img of the boot partition and partition table. Notice how we use a bs=512 (this is because each sector is 512 bytes), and a count=1044224 (this is the end of the boot partition).


2) Let’s copy the SD Card’s rootfs to a external drive! Hook up your empty external hard drive. On this drive we will do a few things. First, partition the drive so we have two partitions (one for the rootfs, and one for swap), then we will make the filesystems, and finally copy over the rootfs to the new drive.

In my case, when I hooked up my external drive to my computer, it was assigned as /dev/sdc, the SD card is still /dev/sdb. Keep in mind this may be different on your computer, if you use the incorrect values, you may actually damage your current linux workstation. You can always use dmesg after hooking up a usb device to find out what sd* it was assigned.

First let’s create a patition table on the usb drive. Again, on my computer the usb drive is sdc, your’s may be different.

fdisk /dev/sdc

In fdisk, we will create a partition for an ext4 filesystem. Press “n” for new partitions, follow the instructions, create a primary partition, and let fdisk choose the start and ending. This will use all the space on the hard drive. When done creating, press “w” and enter to write the partition table. This created the /dev/sdc1 partition. Now we need to create the filesytem and label it.

mkfs.ext4 /dev/sdc1 -L rootfs

This creates a ext4 filesystem and labels it “rootfs”.


3) Let’s copy the old rootfs to the new one. First we need to mount both of them, and copy everything over.

To do this, we are going to create two folders which we will mount both of the rootfs too.

mkdir rootsource

mkdir rootdest

Then we will mount them:

mount /dev/sdb2 rootsource/

mount /dev/sdc1 rootdest/

And finally, we will copy over the rootfs and then unmount the mounts

cp -afv rootsource/* rootdest/

umount rootsource/

umount rootdest/

You have now copied over the root filesystem from your SD card, to the external USB drive.


4) Now we are done with the original SD card, you can remove it, and put in your new SD card which will be used to boot the kernel.

First we need to write the image that contains the partition table, and boot partition. We do this by writing the image file you created above to the NEW SD card. Again, MAKE SURE YOU KNOW WHAT /dev/sd* device the new card is being recognized as.

dd if=image.img of=/dev/sdb

This will write the image to your new SD card. After this, even though we only took the partition table, and the boot partition, the partition table still contains information of the old rootfs. Let’s clean this up (even though we don’t have to).

fdisk /dev/sdb

Inside of fdisk, we will hit “D” to delete all bogus partitions EXCEPT for the boot partition. In my case I had 2 I had to remove, partition 2 and 3. You will probably only have one, which will be partition 2. After you’re done deleting, hit “w” and enter to save.


4) Now we have to go to the boot partition and prepare it to boot off the USB drive.

Let’s create a directory to mount and work inside of, then we will update the cmdline.txt file which the Raspberry Pi uses for information to boot from.

mkdir bootmount

mount /dev/sdb1 bootmount

nano bootmount/cmdline.txt

We are now looking at the cmdline.txt file. We need to update it to boot from the USB drive rootfs partition which we created above. Keep in mind, when you hook the USB drive up to your Raspberry Pi, it will be the only /dev/sd* device, so it will probably appear as /dev/sda if you have no other USB drives connected to it. Update yours, here’s an example of mine:

dwc_otg.lpm_enable=0 console=ttyAMA0,115200 kgdboc=ttyAMA0,115200 console=tty1 root=/dev/sda1 rootfstype=ext4 rootwait text

Save and close the cmdline.txt and then unmount.

umount bootmount


So here is where we sit (in order):

-We imaged the old boot partition

-We prepared the new USB drive

-We copied the rootfs to the new USB drive from the SD card

-We wrote the boot image to the new SD card

-We configured the new SD card to boot using the external drive as a root fs.


All we have left to do is to is connect the USB drive to your Raspberry Pi, and insert the new boot SD card in to the Pi as well. Boot your Raspberry Pi, if all is well, it should boot off your new rootfs (on the USB drive). This will improve speed since the USB drive is WAY faster than the SD card, and now you’re SD card will only be used to boot the kernel.

Important Notes:

-If these instructions don’t work, chances are your USB device may require a driver that is not built in your current Raspberry Pi linux kernel, you will need to identify what module your USB device uses by issuing a “lsmod” when you have booted off your old SD card, then re-compiling the kernel with this built in to the kernel and NOT as a module. Instructions on compiling a kernel can be found here: http://www.stephenwagner.com/?p=616

-If you really feel comfortable with Linux, after you do this, you could re-size the partitions, and create a SWAP partition for your Raspberry Pi. ONLY setup a Swap partition if you are using an external USB drive, as SD Card’s are NOT fast enough, and swap’ing can actually limit the life of a SD card due to the I/Os.
Jun 302012
 

A number of projects I’m currently working on and some that I haven’t even started yet, require me to compile my own kernel. The reason I need to do this is to be able to build various code in to a live running kernel, or make various modules available for hardware/applications I need or will need in the future.


A few reasons why you may require a custom built kernel:

-Hardware support for particular hardware you are using

-Support for USB drives, USB devices, Wifi, etc…

-Support for kernel features (special networking features, software features, etc…)

-Built support for booting off different rootfs devices (NFS, iSCSI, USB devices)

The list goes on and on, but you have the idea. And chances are if you came to this page, you already have your reason, you’re just trying to figure out how. Well it’s pretty easy on Fedora 17 ARM on your Raspberry Pi. Keep in mind you can use a cross-compiler and build the kernel on your desktop x86 machine and move it over, but I preferred to actually build the kernel on my Raspberry Pi.

Here’s how:

1) First let’s grab all the packages we need. We will issue a yum command to make sure we have the compilers, libraries, and other stuff we will need. We will also install “screen” so that we can hide the terminal session where we are compiling so you don’t need to leave your ssh session open.

yum install gcc gcc-c++ gcc-gfortran glib libtool gtk+ gtk+extra gtk2 git ncurses-devel kernel-headers screen

This will install everything and any dependencies that are required.


2) Let’s start a screen session. A screen session is a terminal session you can attach/detach on demand. Think of it as a terminal that you can keep open even in the back ground. You can start it in a ssh session, close your ssh session, and then connect back to the screen session later when you ssh back in.

screen -S kernelcompile

This starts a session called kernelcompile. At any time you can detach the session by pressing Ctrl+A then pressing the “D” button. To re-attach, simply issue “screen -r”.


3) Download the kernel sources (with the Raspberry Pi patches built in). You can grab a copy off of the snapshot off the github Raspberry Pi kernel repo.

wget https://github.com/raspberrypi/linux/tarball/rpi-patches
mv rpi-patches kernel.tar.gz

tar zxvf kernel.tar.gz

This will download the sources as a file called rpi-patches, and we just rename it then untar it.


4) In my case, it resulted in a folder called “raspberrypi-linux-f679f05”. Here we change directory in to the kernel source, and setup the default kernel config options. And then run “make menuconfig” to bring up the script to allow us to configure our kernel. This is where you choose your options as to what you want to build in to the kernel, and what you want to build as kernel modules that can be loaded after the kernel is booted.

cd raspberrypi-linux-f679f05

cp arch/arm/configs/bcmrpi_defconfig .config

make menuconfig

IMPORTANT: You need to append a version on to the kernel version number, so that you don’t screw your current existing modules up (since there’s a chance if you didn’t edit this, they would be overwritten, or your build would fail when building your modules. You can do this in “make menuconfig” under General Setup. Or you can edit your .config file:

nano .config

Look for “CONFIG_LOCALVERSION”. In my case, mine is set to: CONFIG_LOCALVERSION=”.001″ this will put a .001 at the end of the kernels versions tring, and also after the module version number. Example: /lib/modules/3.1.9.001

After you are done with menuconfig, simply exit out of “make menuconfig” and save your config.


5) Now it’s time to start the compiling process. Typing “make” will compile the kernel, and typing “make modules_install” will build the modules and install them to the “/lib/modules” directory.

make

make modules_install

cd..

If the building completed then you have successfully built a linux kernel for the Raspberry Pi and also built/installed the modules that come along with it… We aren’t done yet though. We issue a cd.. to get out of the kernel source directory and back in to the directory that holds it.


6) Next we need to download the Raspberry Pi tools which will contain a python application called “imagetool-uncompressed.py”.

wget https://github.com/raspberrypi/tools/zipball/master

mv master tools.zip

unzip tools.zip

We have downloaded the tools, and unzipped them. It might be an idea to issue a “ls” to note the name of the directory it created.


7) No we need to enter the tools directory. In my case the directory was called “raspberrypi-tools-772201f” but it will be different for you. After we will build the image.

cd raspberrypi-tools-772201f/

cd mkimage/

python2 imagetool-uncompressed.py /path/to/kernel/source/raspberrypi-linux-f679f05/arch/arm/boot/Image

Note, you will have to also change the directory after the imagetool command to directory where you built your kernel. Once this runs, you will be left with a kernel.img file inside of the directory you are currently in. First we will back up the existing kernel, then copy the new kernel to your /boot/ directory.

IMPORTANT: Once you overwrite your existing kernel, if your kernel build was bad, or you don’t have what’s needed to boot, your kernel MAY not boot. This will cause you to restore your old kernel which I am NOT going in to in this blog post!

mv /boot/kernel.img /boot/kernel.img.bak

cp kernel.img /boot/

Above, we have changed the name of your current kernel and added a .bak to the end. Then we copied the new kernel made to the boot directory.


Now you can simply reboot your Raspberry Pi, and BAM, with luck you’ll be running your own kernel.


PS. If you ever want to back this kernel up, all you need to do is copy kernel.img (in /boot/) to a safe place, and make a copy of your /lib/modules/kernelversion (in my case /lib/modules/3.1.9.001) directory. If you ever re-image your Pi and want to use the kernel you just built, you can copy the kernel.img and the modules directory to the new image and you are good to go! Might also be worth while to make a backup of your kernel sources and imagetool if you need it again!

Jun 292012
 

As most of you have read, I received 2 X Raspberry Pi the other day. I’ve been actively hacking and working away on these lovely little devices.

An updated post on setting up a Raspberry Pi as an iSCSI Target can be found here!

One of the projects I wanted to do, was get Lio-Target (iSCSI Target) running on the Pi. I know that the Pi doesn’t have gigabit networking, but I thought this would still be an interesting proof of concept. Anyways, I got it running, and I have succesfully connected to a USB storage device which was configured as a iSCSI target on my Pi, from my Windows 7 workstation.

This is a brief overview, I will be providing instructions in detail at a later date. Here’s how I did it:

1) Download Fedora 17 for ARM (build for Raspberry Pi).

2) Put latest Firmware and Kernel from Raspberry Pi github repo on to the boot partition. Resize my 16GB card so I have boot, root, and a 2 GB swap.

3) Download snapshot of Raspberry Pi kernel sources. I built the iSCSI Target as modules (I also threw in some other stuff for future projects but it’s not important right now).

3) Install compilers, libraries, etc for kernel build process.

4) Compile kernel

5) Build Raspberry Pi kernel image using Raspberry Pi image tools on github repo, copy to boot.

6) Boot off new kernel

7) Install Target CLI from yum (this was a nice change from compiling on my own), and then build Lio-Utils (this isn’t mandatory, but I like Lio-utils).

8) Configure target, connect, test.

Here’s a copy/paste of proof I have it running!

[root@fedora-arm lio-utils.git]# uname -a
Linux fedora-arm 3.1.9.001 #1 PREEMPT Thu Jun 28 16:40:46 MDT 2012 armv6l armv6l armv6l GNU/Linux
[root@fedora-arm lio-utils.git]# w
09:12:10 up 34 min,  5 users,  load average: 0.99, 1.51, 1.10
USER     TTY      FROM              LOGIN@   IDLE   JCPU   PCPU WHAT
root     pts/0    host.digitall 31Dec69 22:38   2.27s  0.02s tail -f /var/log/messages
root     pts/1    host.digitall 31Dec69  0.00s  1.19s  0.05s w
root     pts/2    host.digitall 08:58   13:24  13.89s 13.04s top
root     pts/3    host.digitall 31Dec69  0.00s  0.00s   ?    –
[root@fedora-arm lio-utils.git]# /etc/init.d/target status
[—————————] TCM/ConfigFS Status [—————————-]
\——> iblock_0
HBA Index: 1 plugin: iblock version: v4.1.0-rc1-ml
\——-> array0
Status: ACTIVATED  Execute/Left/Max Queue Depth: 0/128/128  SectorSize: 512  MaxSectors: 240
iBlock device: sdb  UDEV PATH: /dev/sdb
Major: 8 Minor: 16  CLAIMED: IBLOCK
udev_path: /dev/sdb

[—————————] LIO-Target Status [—————————-]
\——> iqn.2003-01.org.linux-iscsi.fedora-arm.armv6l:sn.4682cf8cdeec
\——-> tpgt_1  TargetAlias: LIO Target
TPG Status: ENABLED
TPG Network Portals:
\——-> IP-hidden:3260
TPG Logical Units:
\——-> lun_0/30b42bf9f5 -> target/core/iblock_0/array0

Target Engine Core ConfigFS Infrastructure v4.1.0-rc1-ml on Linux/armv6l on 3.1.9.001
RisingTide Systems Linux-iSCSI Target v4.1.0-rc1
[root@fedora-arm lio-utils.git]# cat /proc/cpuinfo
Processor       : ARMv6-compatible processor rev 7 (v6l)
BogoMIPS        : 697.95
Features        : swp half thumb fastmult vfp edsp java tls
CPU implementer : 0x41
CPU architecture: 7
CPU variant     : 0x0
CPU part        : 0xb76
CPU revision    : 7

Hardware        : BCM2708
Revision        : 0002
Serial          : 00000000c1ad6318
[root@fedora-arm lio-utils.git]#

Jun 272012
 

Well, it’s official. I am now a happy owner of two Raspberry Pi computers.

I’m busy tinkering away but I just wanted to upload some pictures and videos. I will be creating a separate post outlining what I’m hoping to accomplish with these little devices, so stay tuned!

Scroll to the bottom of this post for videos!

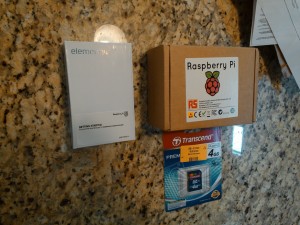
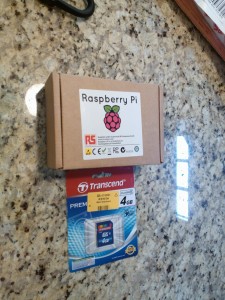
Element 14 shipping package (origina Toronto, Ontario)RS Electronics Box containing Raspberry Pi and 4GB SD Card

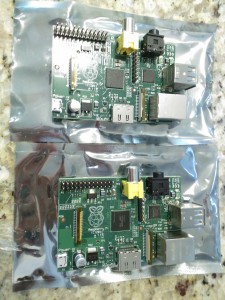
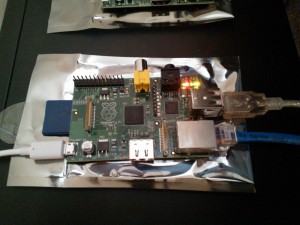
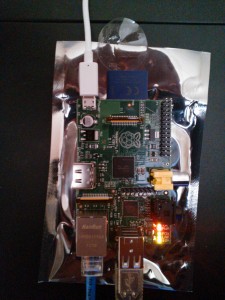
Two Raspberry Pi's in their shipping boxes (Left Element14, Right RS Electronics)Two Raspberry Pi on their electro-static wrappers.

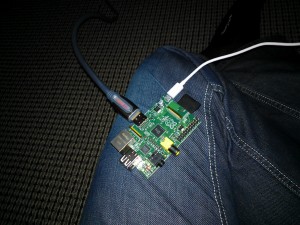
Raspberry Pi hooked upRaspberry Pi

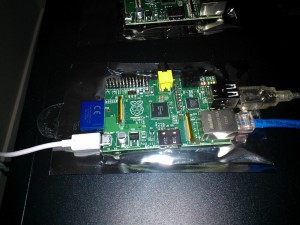
Raspberry Pi in operationRaspberry Pi turned On

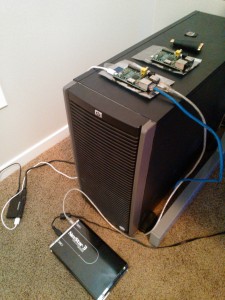
The workbench for Raspberry Pi development