When it comes to troubleshooting login times with non-persistent VDI (VMware Horizon Instant Clones), I often find delays associated with printer drivers not being included in the golden image. In this post, I’m going to show you how to add a printer driver to an Instant Clone golden image!
Printing with non-persistent VDI and Instant Clones
In most environments, printers will be mapped for users during logon. If a printer is mapped or added and the driver is not added to the golden image, it will usually be retrieved from the print server and installed, adding to the login process and ultimately leading to a delay.
Due of the nature of non-persistent VDI and Instant Clones, every time the user goes to login and get’s a new VM, the driver will then be downloaded and installed each of these times, creating a redundant process wasting time and network bandwidth.
To avoid this, we need to inject the required printer drivers in to the golden image. You can add numerous drivers and should include all the drivers that any and all the users are expecting to use.
An important consideration: Try using Universal Print Drivers as much as possible. Universal Printer Drivers often support numerous different printers, which allows you to install one driver to support many different printers from the same vendor.
How to add a printer driver to an instant clone golden image
Below, I’ll show you how to inject a driver in to the Instant Clone golden image. Note that this doesn’t actually add a printer, but only installs the printer driver in to the Windows operating system so it is available for a printer to be configured and/or mapped.
Let’s get started! In this example we’ll add the HP Universal Driver. These instructions work on both Windows 10 and Windows 11 (as well as Windows Server operating systems):
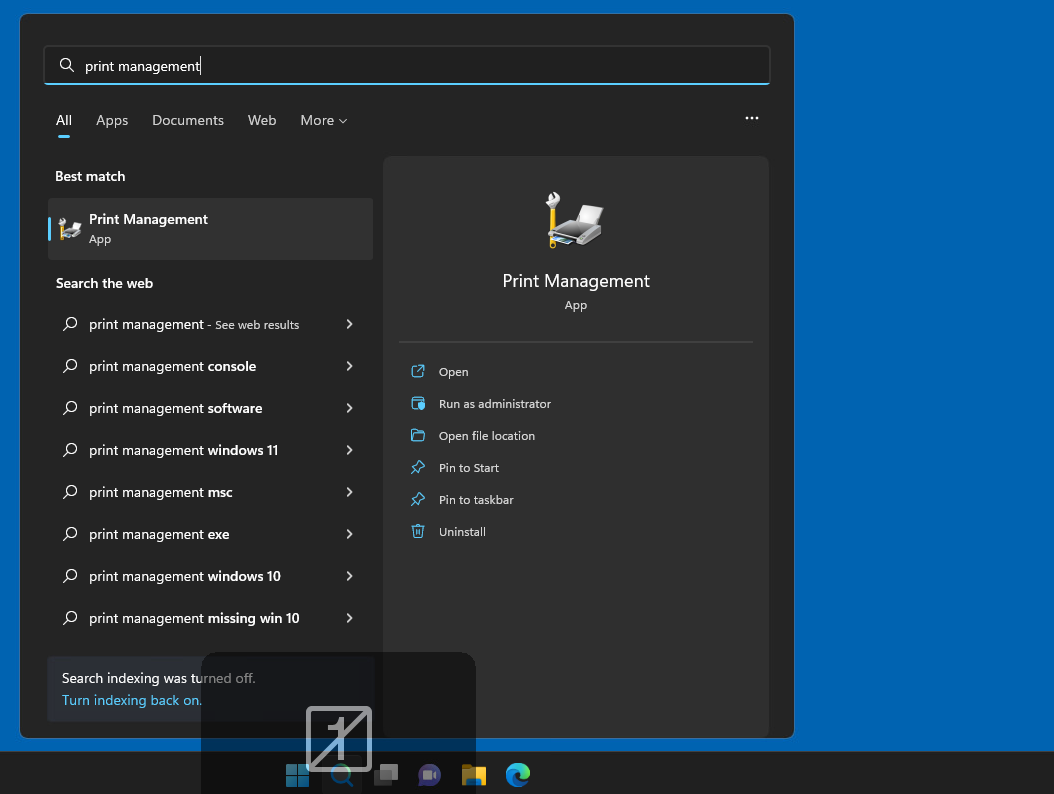
- Click Start, type in “Print Management” and open the “Print Management”. You can also click Start, Run, and type “printmanagement.msc”.
- On the left hand side, expand “Print Servers”, then expand your computer name, and select “Drivers”.
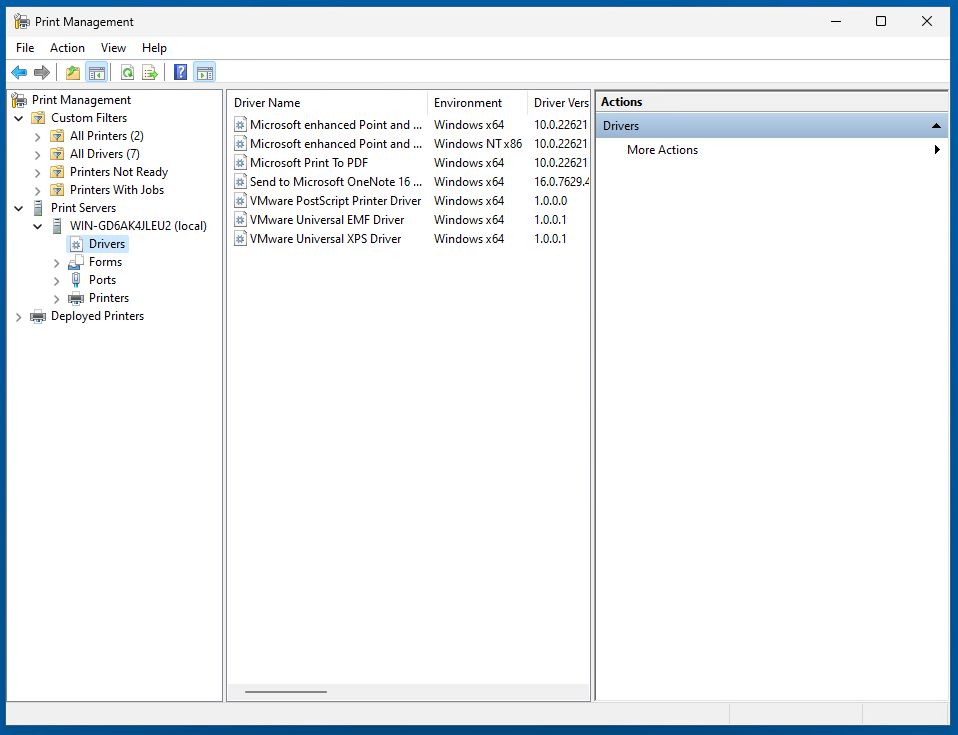
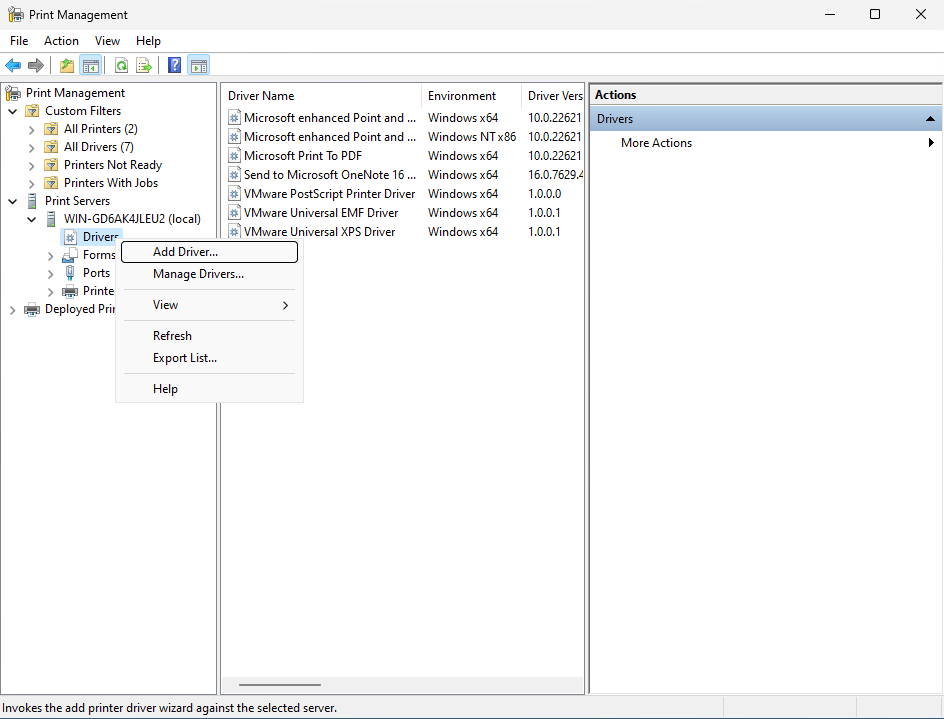
- Right click on “Drivers” and select “Add Driver”.
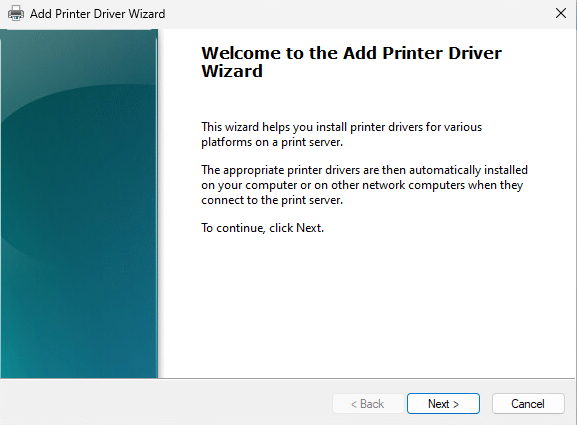
- When the “Welcome to the Add Printer Driver Wizard” opens, click Next.
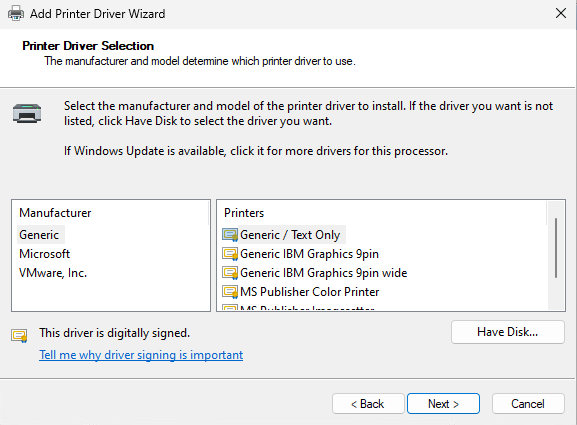
- Leave the default for the architecture. It should default to the architecture of the golden image.
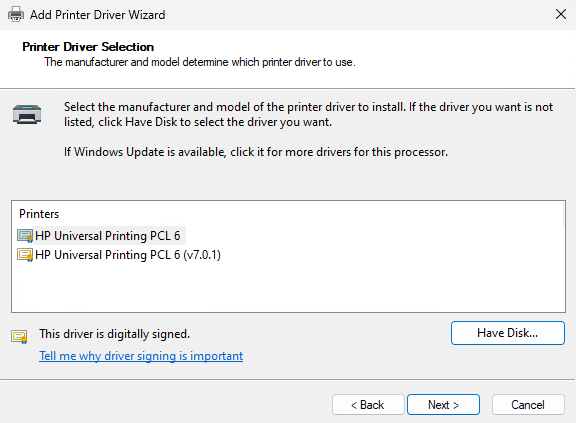
- When you are at the “Printer Driver Selection” stage, click on “Have Disk”.
- Browse to the location of your printer driver. In this example, we navigate to the extracted HP Universal Print Driver.
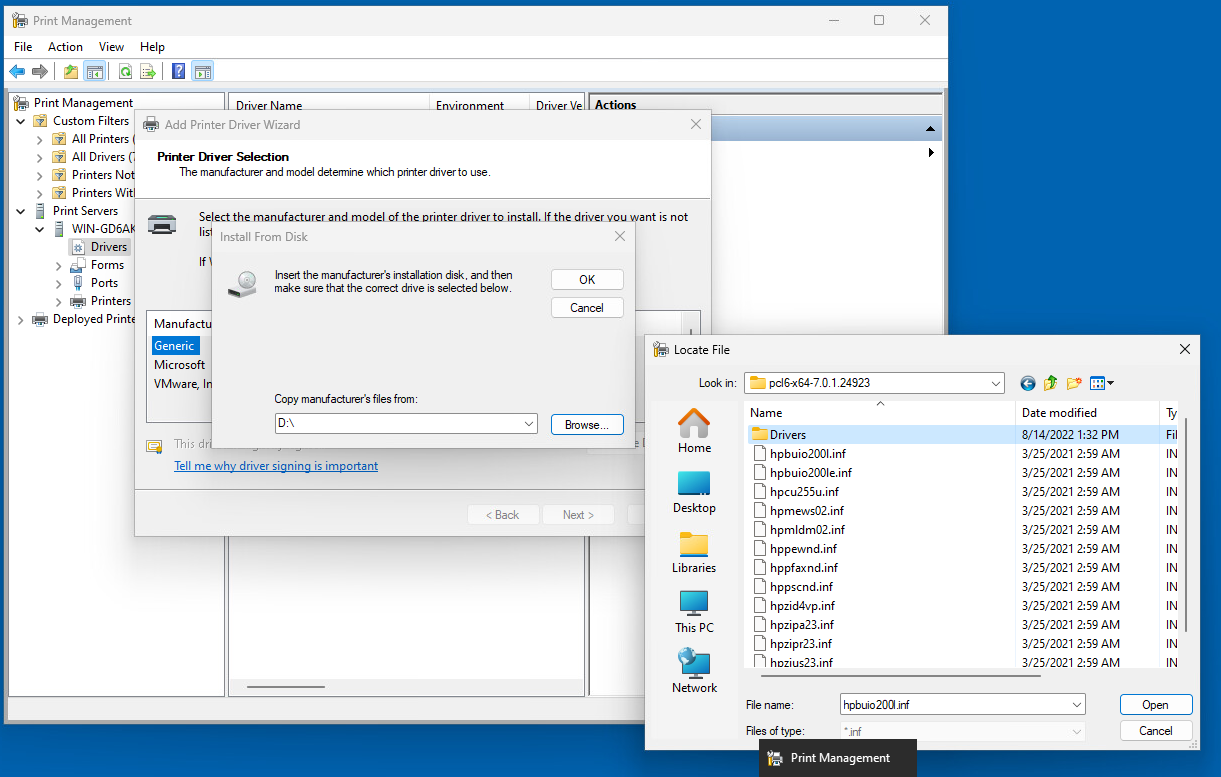
- Select the driver you want to install.
- Click on Finish to complete the driver installation.
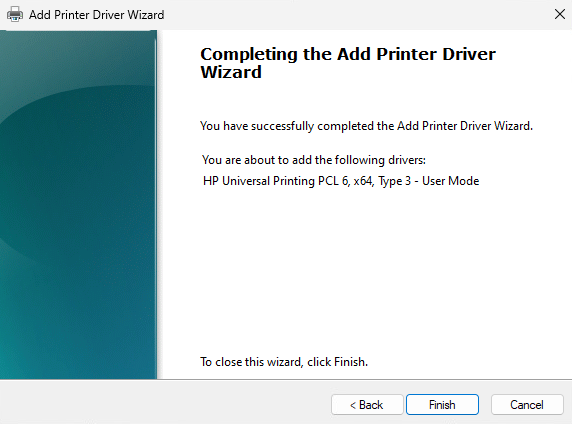
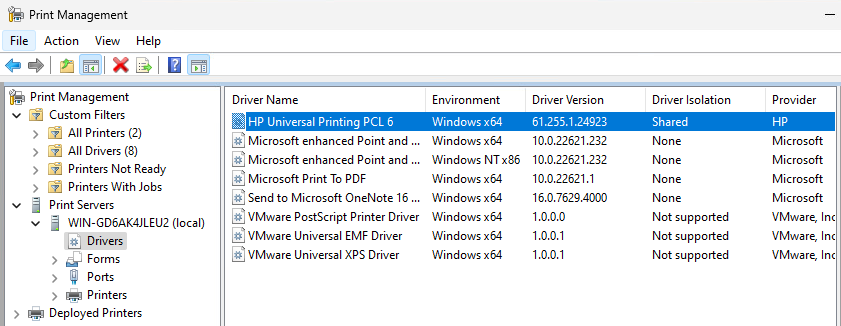
The driver you installed should now appear in the list as it has been installed in to the operating system and is now available should a user add a printer, or have a printer automatically mapped.
Now seal, snap, and deploy your image, and you’re good to go!
