Recently, new deployments of Windows 11 (23H2 images with the latest updates) have changed the behavior of the start menu and introduced the Windows 11 Microsoft Account Center.
This also effects 24H2, however 24H2 isn’t supported on Omnissa Horizon as of yet (to my knowledge) and probably most other VDI platforms, but this will be a concern once support is available.
The introduction of the Microsoft Account Center in the Windows Start Menu will become an issue for VDI deployments, as it changes the behavior of the Start Menu, and introduces some complexities for logging off users as well as introducing the need for training or alternative methods for users to log off.
Update – October 27 2024
When completing the latest Windows Updates, as of October 27th, 2024, the behavior has now changed.
The new behavior is now suitable for easy logoffs.
Behavior
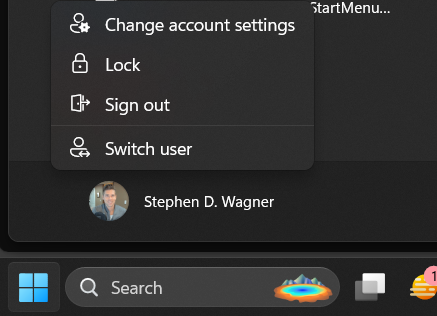
When clicking on Start and proceeding to click on the user name, users are no longer prompted with options like “Sign out, Switch User, Account Settings”. Users are now presented with the new “Microsoft Account Center”, which on non-VDI deployments provides actions for the Microsoft Account. Optimizing your image may slightly change the behavior of the Microsoft Account Center.
Here is an example of the original start menu:
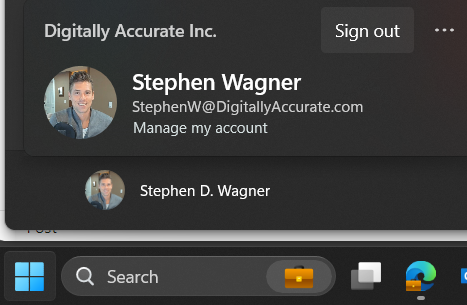
Here is an example of the new start menu with the new Microsoft Account Center:
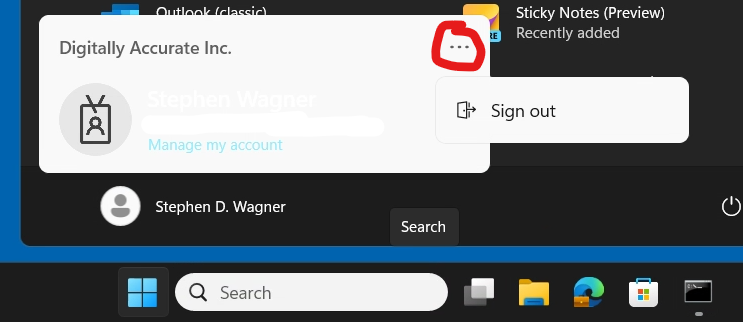
Users, who are expecting to be able to sign out, will not have to click on the “…” on the top right.
Additional Considerations
In addition to the examples provided above, the following behaviors can be expected:
- On the base image, clicking the user icon will do nothing (and may possibly kill the start menu)
- In deployments with Hybrid domain joined Instant Clones
- If the machine hasn’t achieved Hybrid Domain Join, clicking the user account icon will function.
- If the machine has Hybrid domain joined but a PRT has not been issued, click the user account icon will kill the start menu.
- If the machine has Hybrid domain joined and a PRT has been issued, it will perform properly using the new style.
- In deployments with Hybrid Domain Joining and PRT disabled, the new “Microsoft Account Center” from the user icon, should function properly with the new style.
As of today, I haven’t seen the latest Windows Updates change older base images, but I haven’t had the opportunity to sample a large enough number of environments. If this occurs, you may need to brief users on how to log out using the new “Microsoft Account Center”, using the “Log Off” function on the Horizon Client, or possibly even create a desktop shortcut for the users.
Workaround
To workaround this issue, you may need to train users on the new behaviour, advise them to Log off with the VMware Horizon client (proper logoff, not just clicking the “X” which will only disconnect sessions), or create a “Log off” shortcut on their desktop.
I will continue to investigate and update this post, hopefully ultimately with a fix.
I have created a thread on the Omnissa Community Forums, Windows 11 23H2 – Start Menu, Account Icon Behavior Warning.