An all too common problem is when users report e-mail delays ranging from 5 to 15 minutes. When troubleshing these types of issues, you’ll notice this commonly occurs when receiving e-mails from organizations that use Office 365. Specifically this occurs due to greylisting.
Why does this happen
You’re organization is using greylisting on your e-mail proxy/SMTP relay to reduce spam. Greylisting temporarily rejects the first send of an e-mail and waits for the sending server to re-transmit the message. This process usually takes around 5-15 minutes to complete. Greylisting is used because spammers won’t re-transmit the message, which leads to a massive reduction of spam messages coming through.
Once the sending server retransmits, the sending server IP address is added to your firewalls “safe senders” whitelist. From this point on the IP address (or server) will not be subject to greylisting (and any subsequent e-mails).
Office 365 has hundreds, if not thousands (possibly 10’s of thousands) of servers they use to transmit e-mail. The chance of multiple e-mails being sent from a single server is very slim, therefor greylisting is applied to every IP (server) that is sending e-mail because it’s different. Each e-mail from an Office 365 user can take 5-15 minutes, since a new server is used every time.
How to resolve
You’ll need to configure and add an exception to your e-mail proxy/SMTP relay/firewall. This exception can be based off domain, DNS name of sending server, or IP address ranges.
Scroll down for instructions on how to create an exception on a Sophos UTM.
Domain Exception
If you use domain based exceptions, you’ll need to configure these manually for each sending domain that you want your firewall to skip greylist checking. This is a very manual process, which requires lots of human intervention to continuously update your greylist exception.
DNS FQDN of MX Server
This method is the easiest, however most firewall or UTM’s will now allow these types of exceptions since a number of DNS queries will be needed everytime an e-mail comes in. One DNS query on the MX record, and then another DNS query on the DNS host contained in the MX record. If you can configure this type of exception, you’ll want to configure it as below:
*-com.mail.protection.outlook.com
IP Address Range
This is the best method. To create an IP address range exception, we’ll need a copy of all the IP address ranges or IP address spaces that Office 365 uses to send mail. This list can be found at: https://docs.microsoft.com/en-us/microsoft-365/enterprise/urls-and-ip-address-ranges?view=o365-worldwide.
We’ll need to create an exception that skips greylist checking on the IP addresses outlined in the above link. This will stop any greylist checking on e-mails from Office 365 servers.
In my case, I use a Sophos UTM firewall, and to create an exception I had to do the following:
- Log on to the Webmin interface.
- Select “Email Protection”, then “STMP” on the left hand side, then “Exceptions” tab at the top.
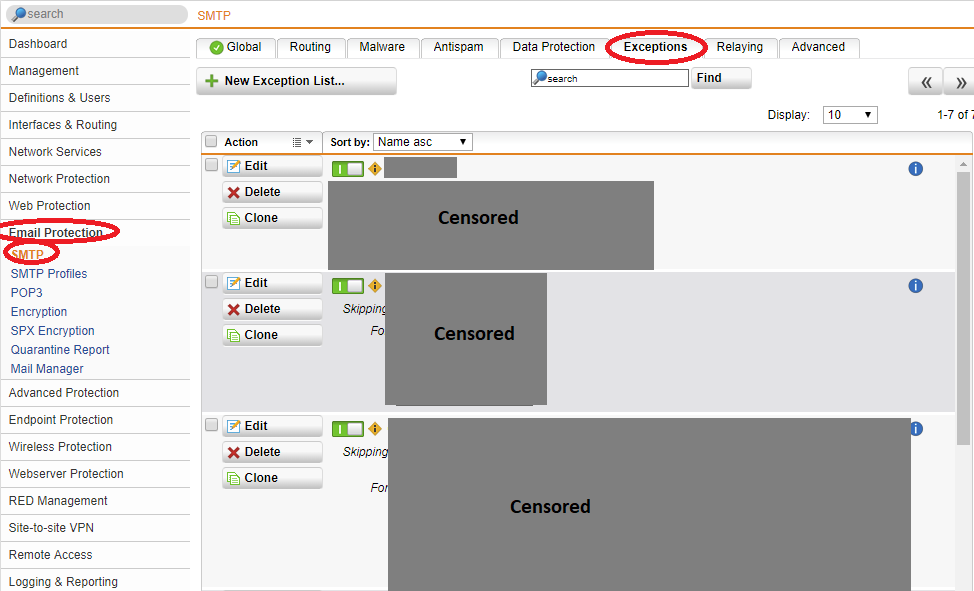
Sophos UTM E-Mail and SMTP Exception List
- Create a “New Exception List” and call it “Office 365 GreylistWhitelist”.
- Check the “Greylisting” box under “Antispam”, and then check the “For these source hosts/networks”.
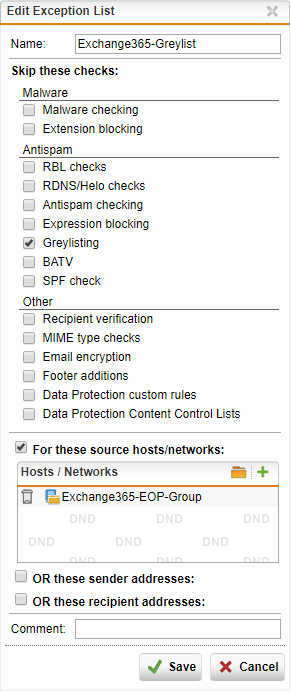
Sophos UTM SMTP Create Exception
- Click the “+” button, and call the Network Definition “Exchange365-EOP-Group”. Change the type to “Network Group”.
- Click the “+” button in the members section, and start adding the IP spaces. Repeat this for each IP space (in total I added 23). Each network name (IP address space) requires a unique name, I named mine “Exchange365-EOP1” through “Exchange365-EOP23”.
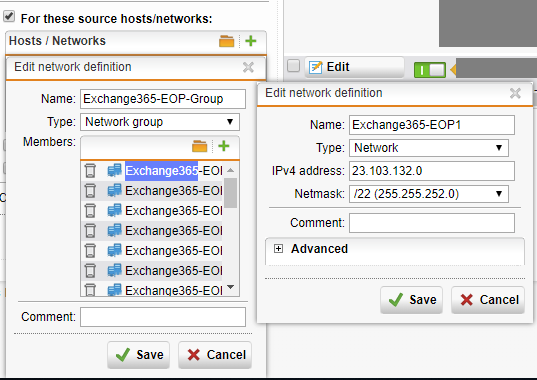
Sophos UTM SMTP Configure Exception
- Click Save on the Network Group, and click Save on the exception.
- Enable the Exception

Sophos UTM SMTP Exception Rule
- Completed! You’ve now made the exception and delays should no longer occur.