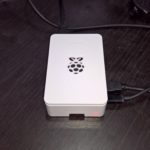
Worried about your Raspberry Pi 4 overheating? The CanaKit Raspberry Pi 4 case and Raspberry PI cooling fan is a must have!
I purchased the complete CanaKit Raspberry Pi 4 Start MAX Kit from Amazon (link here). It’s a great little starter kit, easy to get going, and best of all it was same day delivery with Amazon Prime (for those of us who are impatient).
I placed the order, and within 8 hours I received the package and was up and running with the Pi 4!
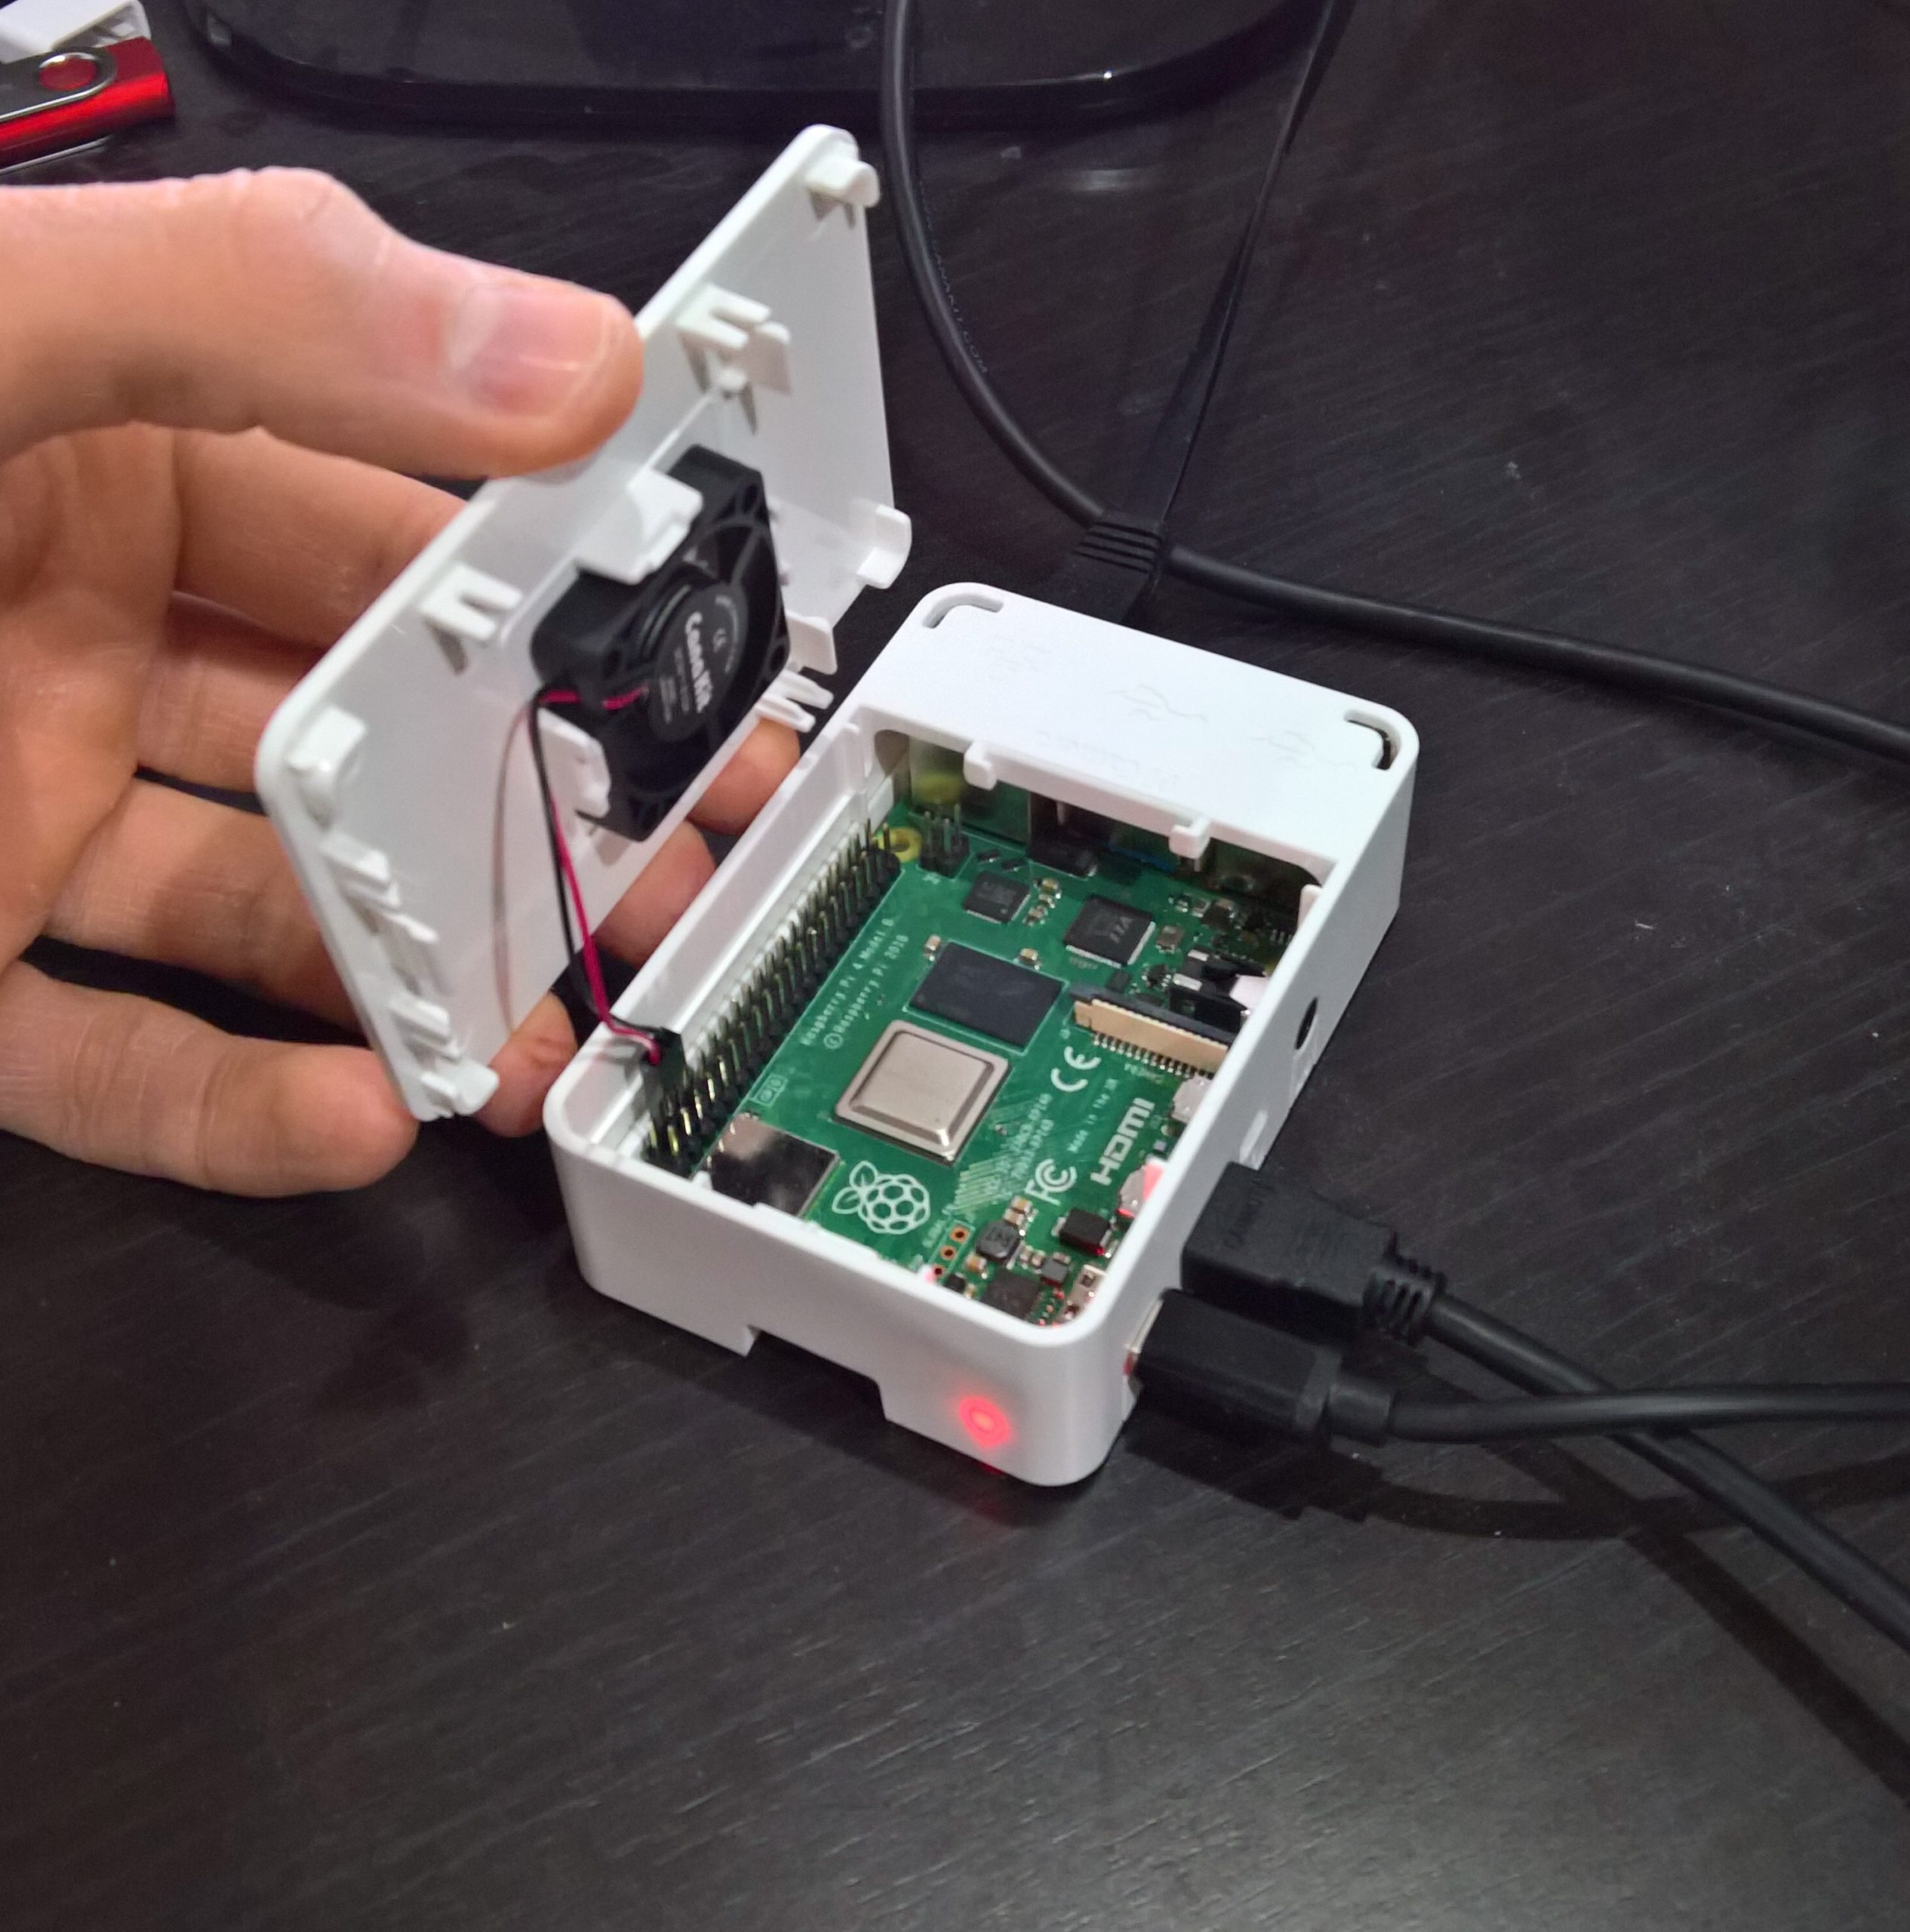
CanaKit Raspberry Pi 4 Open with Fan Kit
The PI cooling fan on the CanaKit case for the Raspberry Pi 4 can be somewhat loud once installed, however when doing CPU intensive operations, it’s a must have to keep your Pi cool.
Pi Cooling Fan stats
Originally I left the fan unhooked until I was compiling a linux kernel on the Raspberry Pi 4. I could feel the heat coming from the top of the case so I decided to check to see what the temperatures were.
You can see that the CPU was running very hot! I sampled the CPU temp 3 times over a period of a minute to confirm it was running that hot.
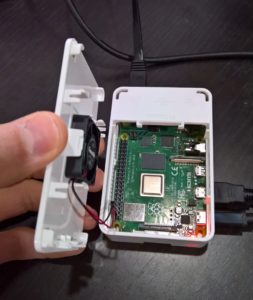
Immediately I decided to hook up the fan and install it in the case. After installing the fan and letting it run for a while, the temperature dropped dramatically.
As you can see, the temperature went from a toasty 83 Celsius, down to 51 Celsius with the fan running. Please keep in mind these temperatures are after the latest firmware update which reduces operating temps.
Fan Connection
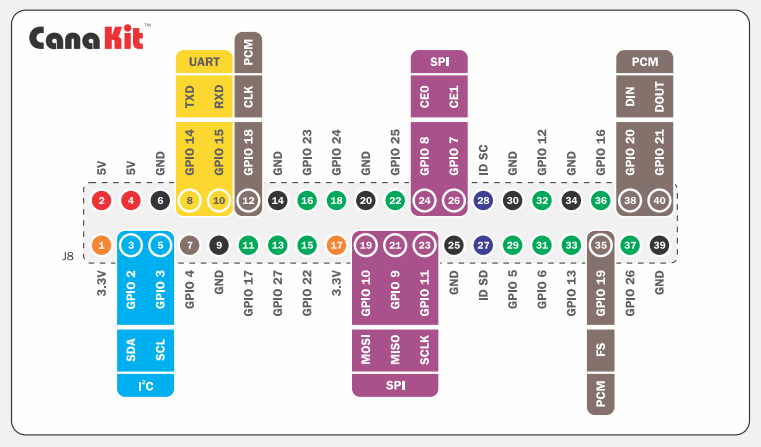
One thing that wasn’t included with the kit, was what pins to connect the PI cooling fan to. If you look at the manual included, or the GPIO pin out schematics, you’ll see that a 5V is available on pin 4, and ground is available right next to it on pin 6.
CanaKit Raspberry Pi 4 Quick Start Guide GPIO Pin-out
So you just loaded up Ubuntu Server on your Raspberry Pi 4 using the latest Ubuntu Server Pi image and when you try logging in with the default username and password of ubuntu:ubuntu, you get the error “Authentication token Manipulation error” when you try to change the default password and log in.
This occurs on a fresh image write to an SD card using the Ubuntu 18.04.4 LTS 64-bit image. This may occur on other images and other versions of Ubuntu and other versions of the Raspberry Pi.
After doing some research, I found out that there was an issue with a password file or the PAM database on the image. I figured that it was best to try to log in first using the default credentials, and then we can worry about changing the password later.
To do this I decided to modify the “cloud-init” scripts. I mounted the SD-Card on another Linux system, opened the “/boot/firmware/user-data”, and changed the “expire” setting on the ubuntu user from true to false.
The Instructions
Mount the SD-Card on another Linux system.
Navigate to the boot filesystem, and then open the “user-data” file inside of the firmware directory using nano or vi. The full path on the SD-Card is:
/boot/firmware/user-data
Scroll down to this section.
chpasswd:
  expire: true
  list:
  - ubuntu:ubuntu
Change the “expire: true” to “expire: false”.
Exit the file and save.
Properly unmount the SD-Card (using umount).
Boot up the Pi with the Micro-SD card.
You should now be able to log in using the username ubuntu and password ubuntu without being asked to change your password, and without seeing the error.
Once you have logged in, change the password to this account by using “passwd”.
Want to see DUO Two-Factor Authentication in action? I’ve created a number of demo videos showing DUO 2FA being used on numerous different platforms. You can see how DUO works with these platforms, and the experience a user can expect when using two-factor authentication from Duo Security.
Duo 2FA is a great way to secure your environment whether it’s servers, workstations, VDI, firewalls, or even WordPress!
Looking to repurpose old PCs or laptops in to VDI Thin Clients (or Zero Clients)? Looking at implementing VDI but don’t have the budget for fancy Thin Clients or Zero Clients? Look no further! 10ZiG RepurpOS (also known as RPOS) allows you to repurpose PCs and laptops as VDI client endpoints.
You get all the power of a thin client, but built in to a piece of software that you can install on traditional x86 PC hardware. This means you don’t have to throw away semi-new hardware when rolling out your VDI deployment, it also means you can repurpose old hardware that was destined for recycling.
Read the post, or scroll down to watch the video!Please note that the screenshots may be a bit blurry since they were captured from the video recording.
The Software
10ZiG RepurpOS (RPOS) is built on Linux, similar to their NOS OS for Zero Clients. It install’s like an operating system on traditional x86 computer systems, and turns them in to a fully functioning Thin Client which can be used for VDI.
Pros of the Software
Easy installation
Installs on x86 hardware (PCs, Laptops)
Supports most VDI Technologies (VMware, Citrix, RDP/VDA)
You can also contact me (or 10ZiG) for a free 10ZiG Repurposing Trial.
Demonstration
Below you’ll see a demonstration video of the 10ZiG RepurpOS (RPOS) in action, followed further below by a text review of the software.
10ZiG RepurpOS (RPOS) Software Video Demonstration
The continuation of this blog post features the different segments of the video.
Setup and Configuration
Getting started is easy… You’ll be provided with a compressed archive that contains an ISO file (which you can burn to CD), or you can use an executable provided that will write the ISO to a USB stick, so you can boot the computer from that.
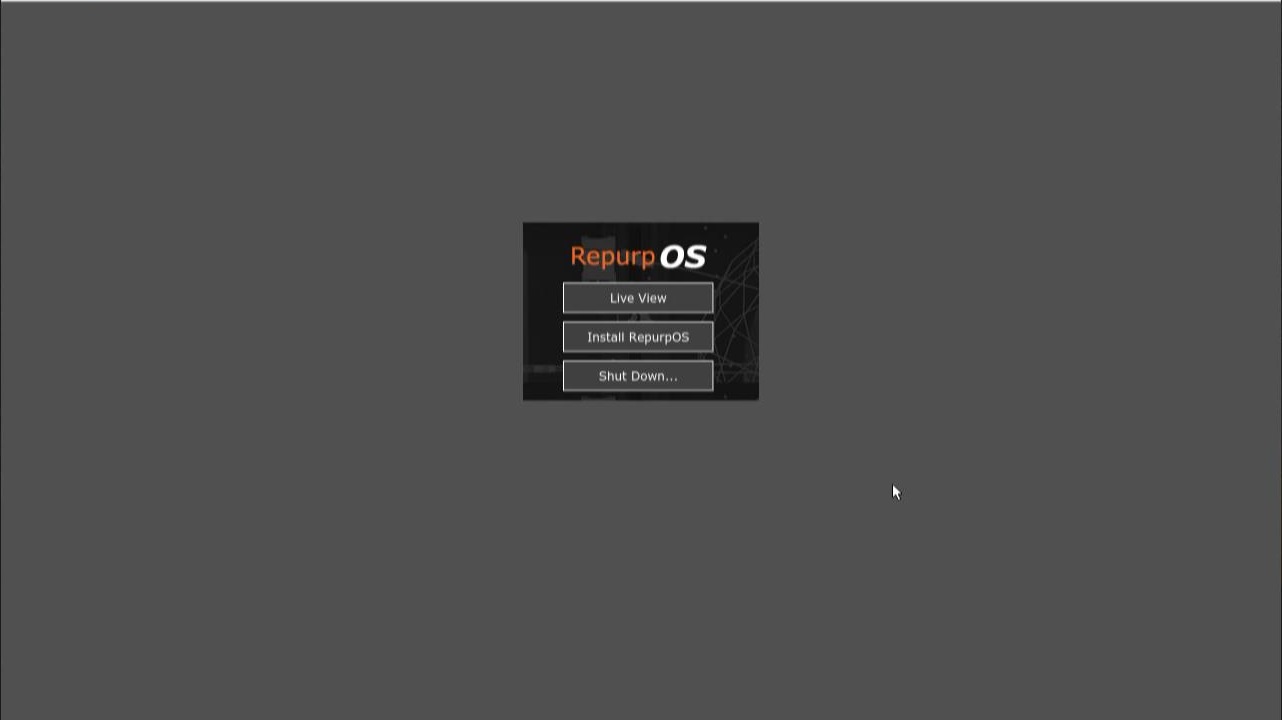
After booting the installer, you’ll see a very simple interface to get started.
10ZiG RepurpOS (RPOS) Installer
You’ll note that you have the capability of both running a Live Instance as a Live CD, or you can choose to install the 10ZiG repurposing software to the hard drive disk.
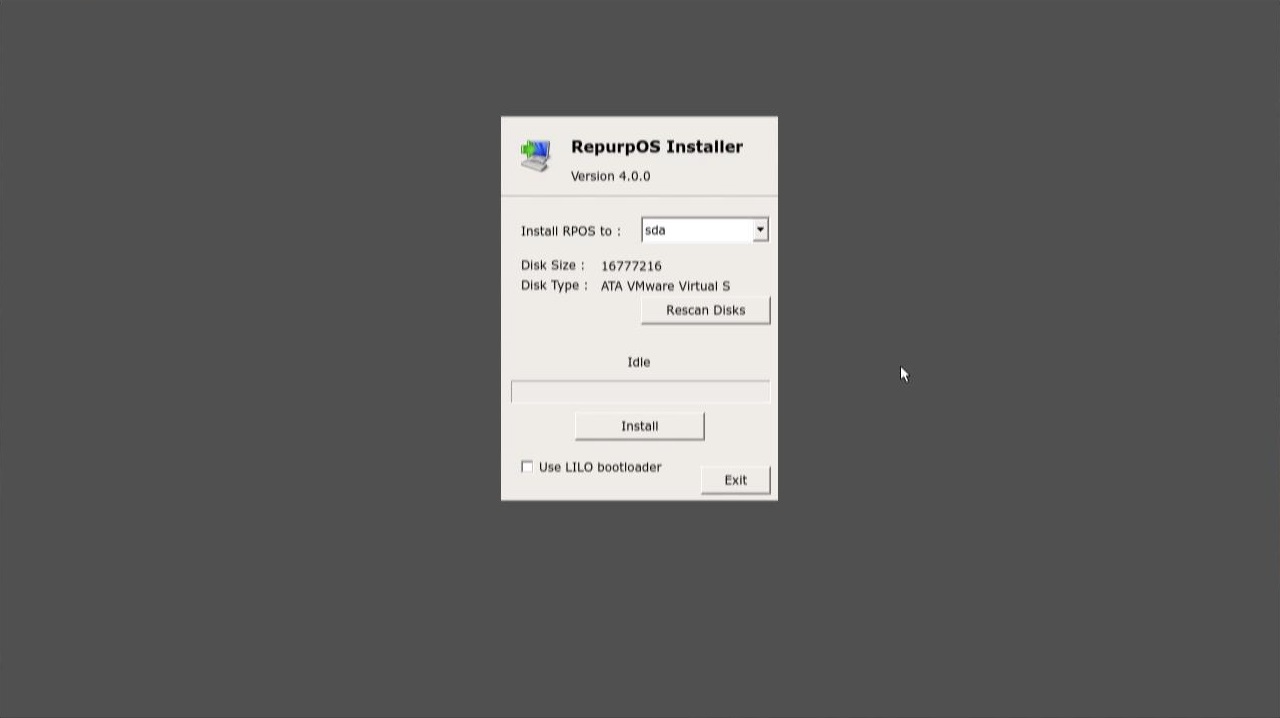
After choosing to “Install RepurpOS”, you select the disk and hit “Install”.
Install the 10ZiG RepurpOS (RPOS) to disk
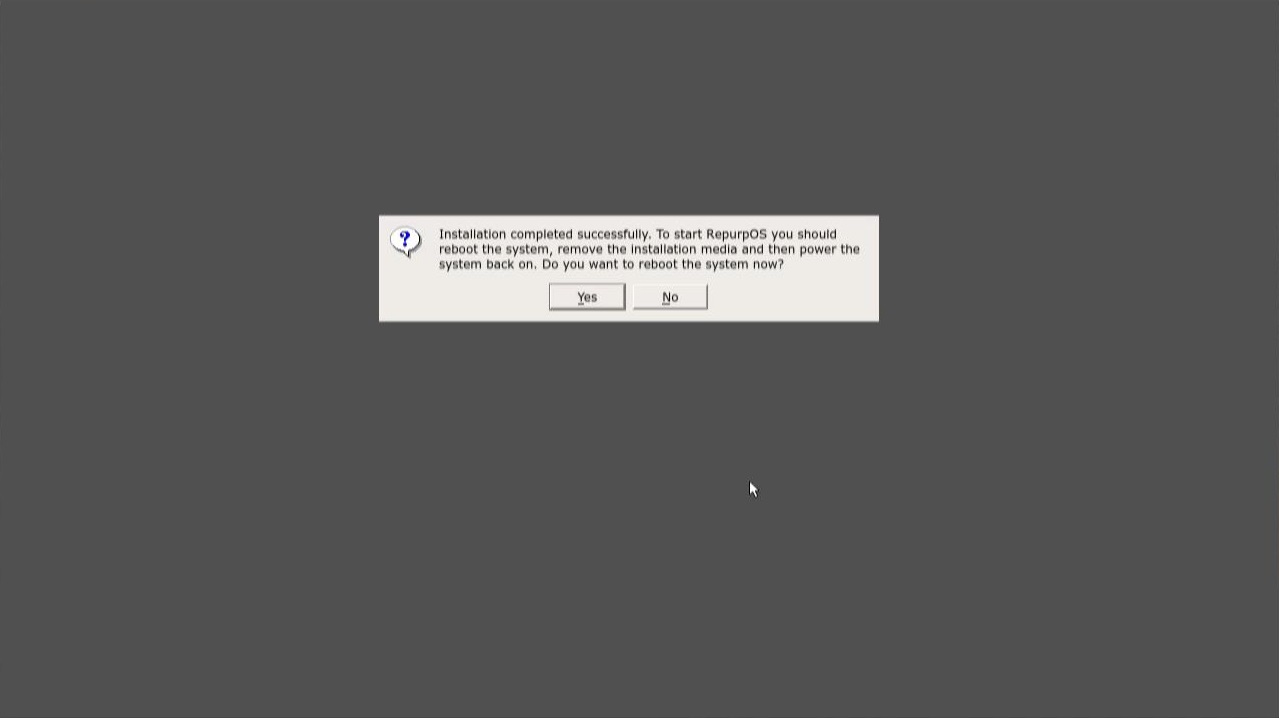
After a few moments, the install will complete. You’ll hit “Exit” and then restart the PC.
10ZiG RepurpOS Installed
10ZiG RepurpOS Reboot after Installation
Interface and Usage
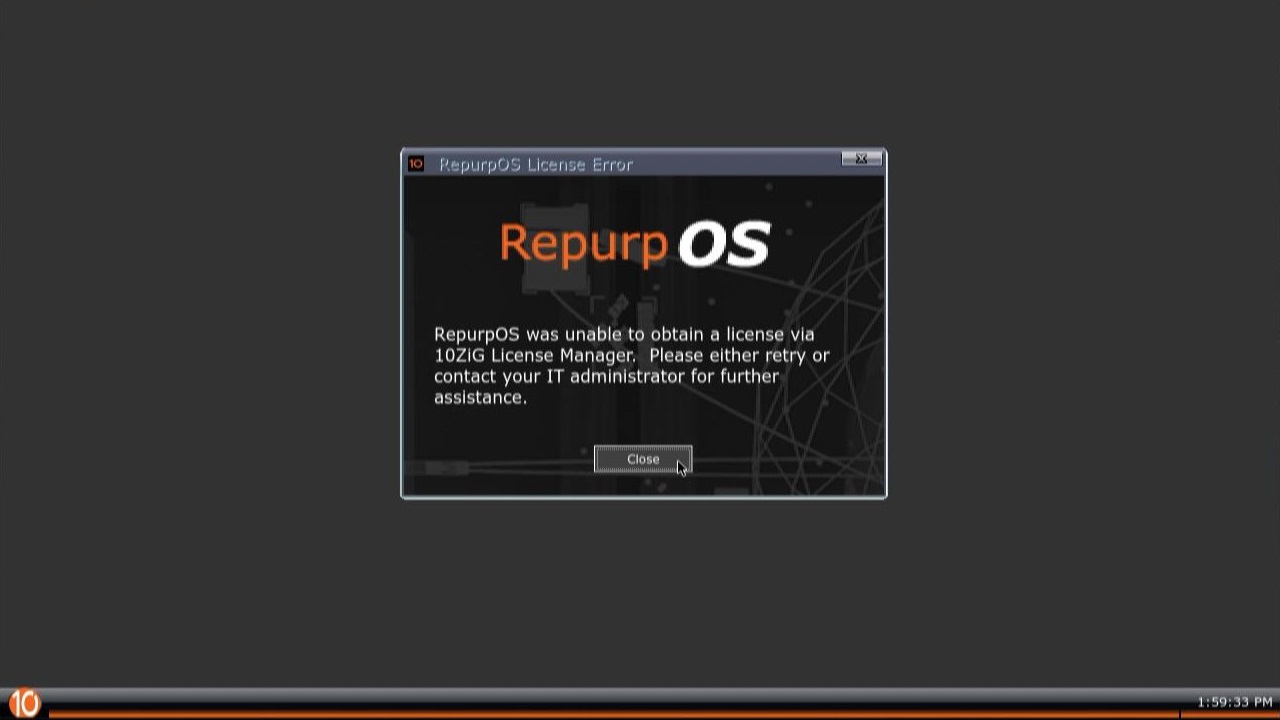
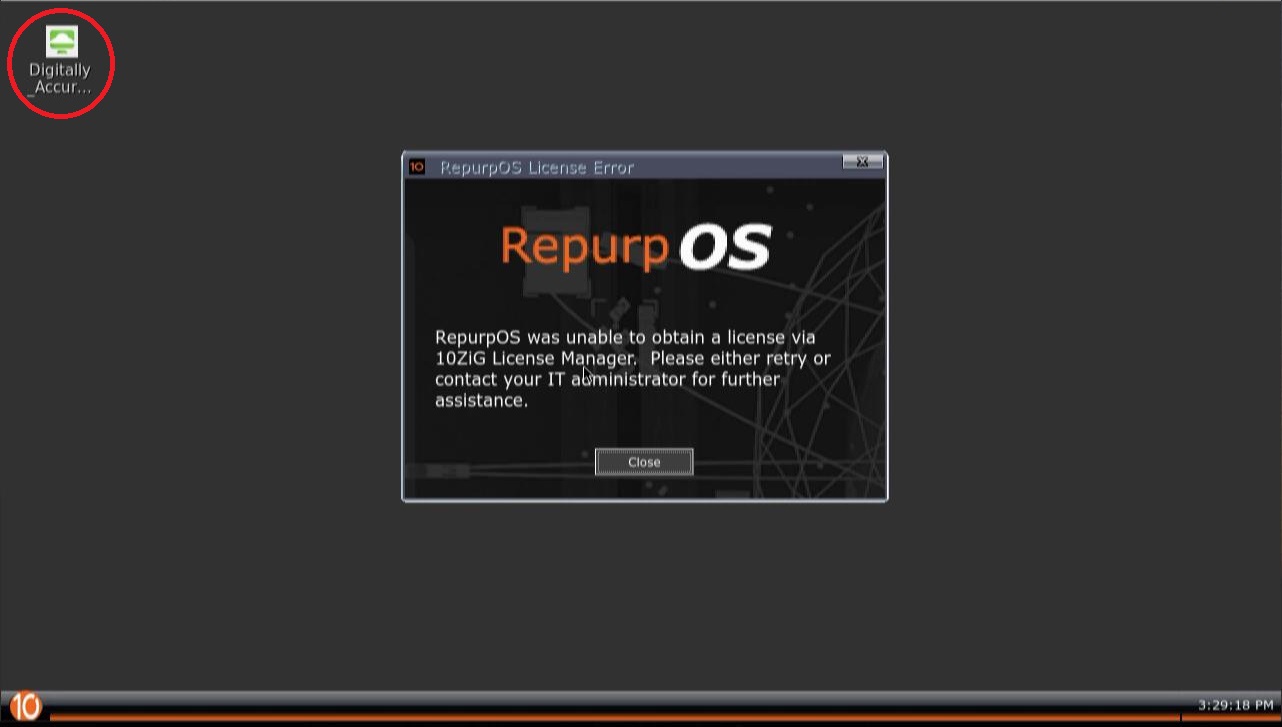
On first boot, you’ll notice the PC repurposing software has a very simple look and interface. We started off with a licensing message since we are using a demo.
10ZiG RepurpOS (RPOS) unable to obtain a license
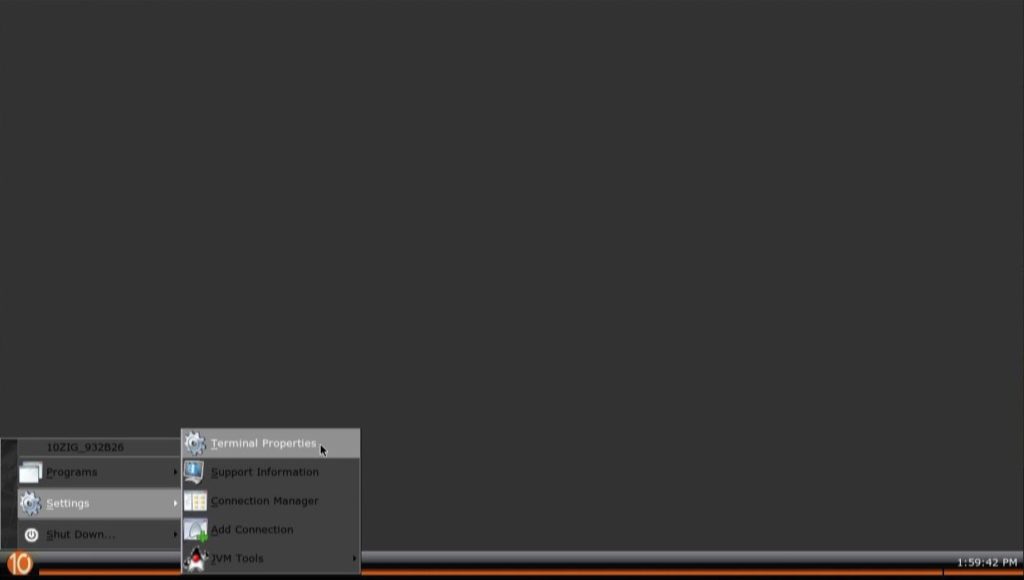
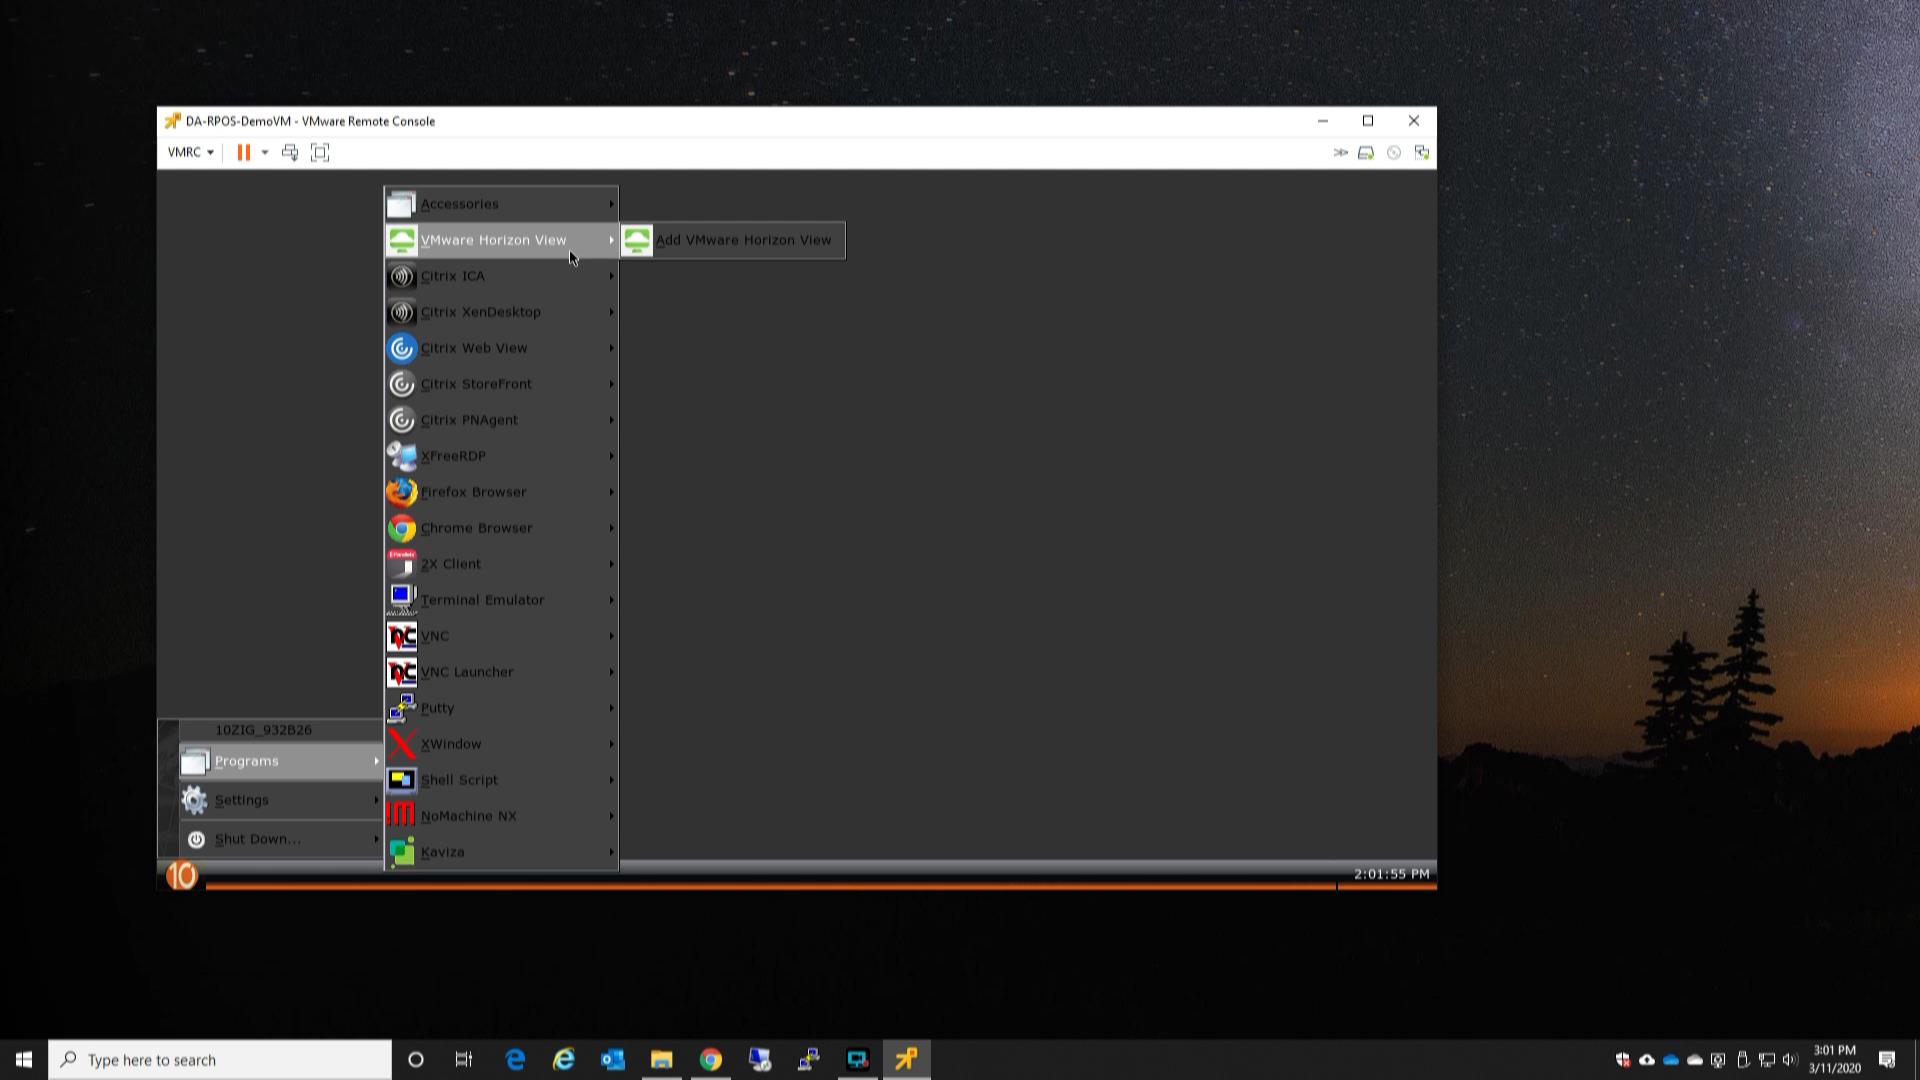
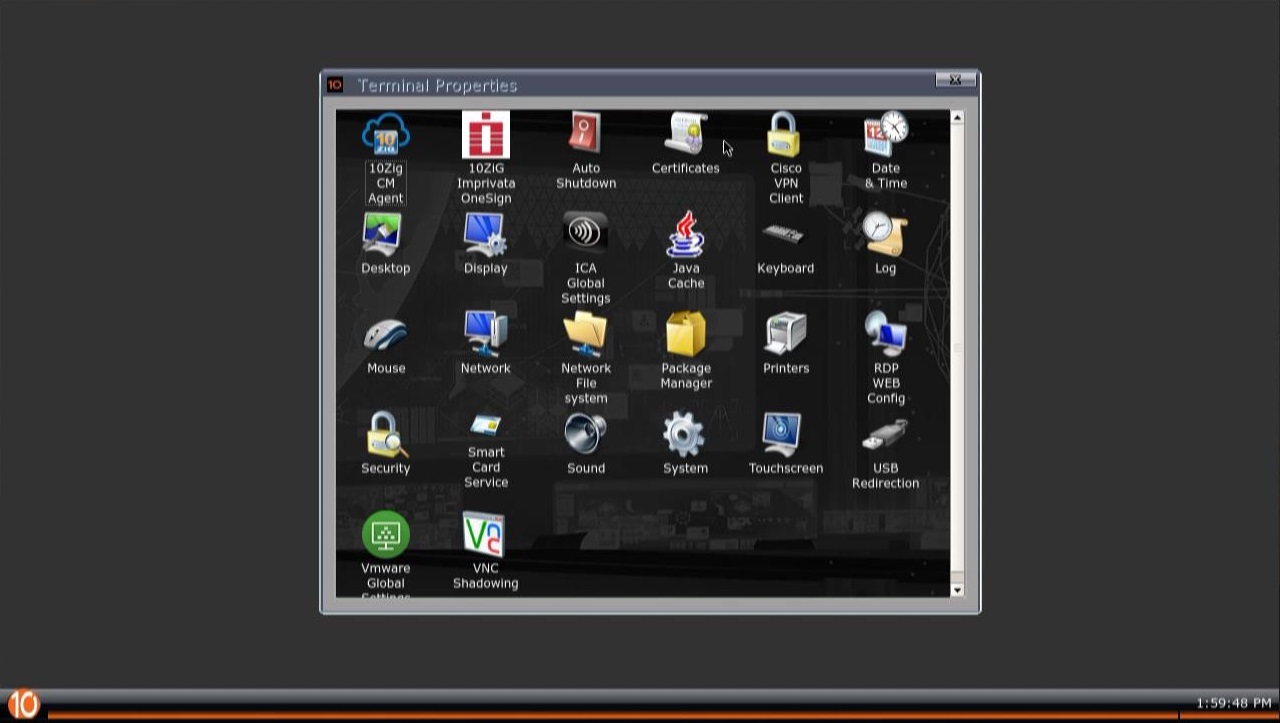
To get started, theres a simple “Start menu”-like interface that allows you to configure and use the client. You can configure the thin client settings, or configure and add connections.
10ZiG RepurpOS (RPOS) Programs
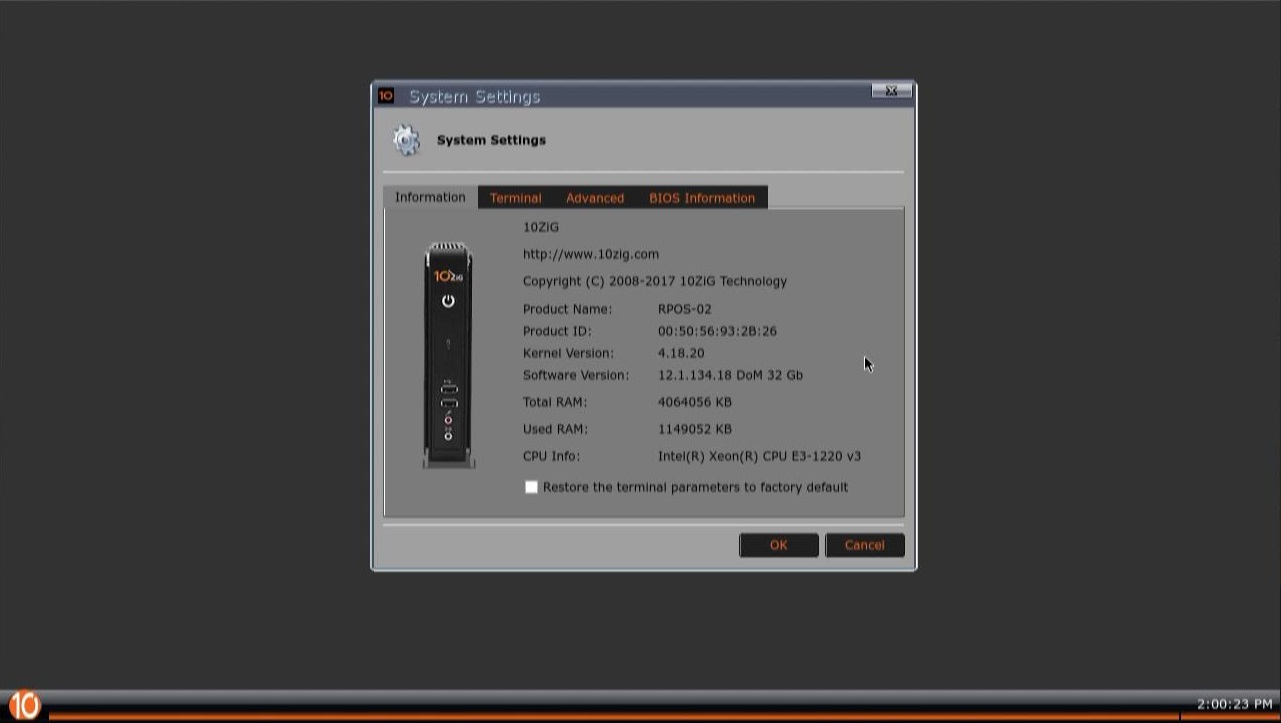
And we have the settings menu.
10ZiG RepurpOS (RPOS) Settings Menu
I want you to keep in mind that while you can configure and use the 10ZiG RPOS software from this interface, in a large corporate environment you’d probably want to use the 10ZiG Manager software, and lock out the interface.
10ZiG RepurpOS Configuration and 10ZiG Manager Compatibility
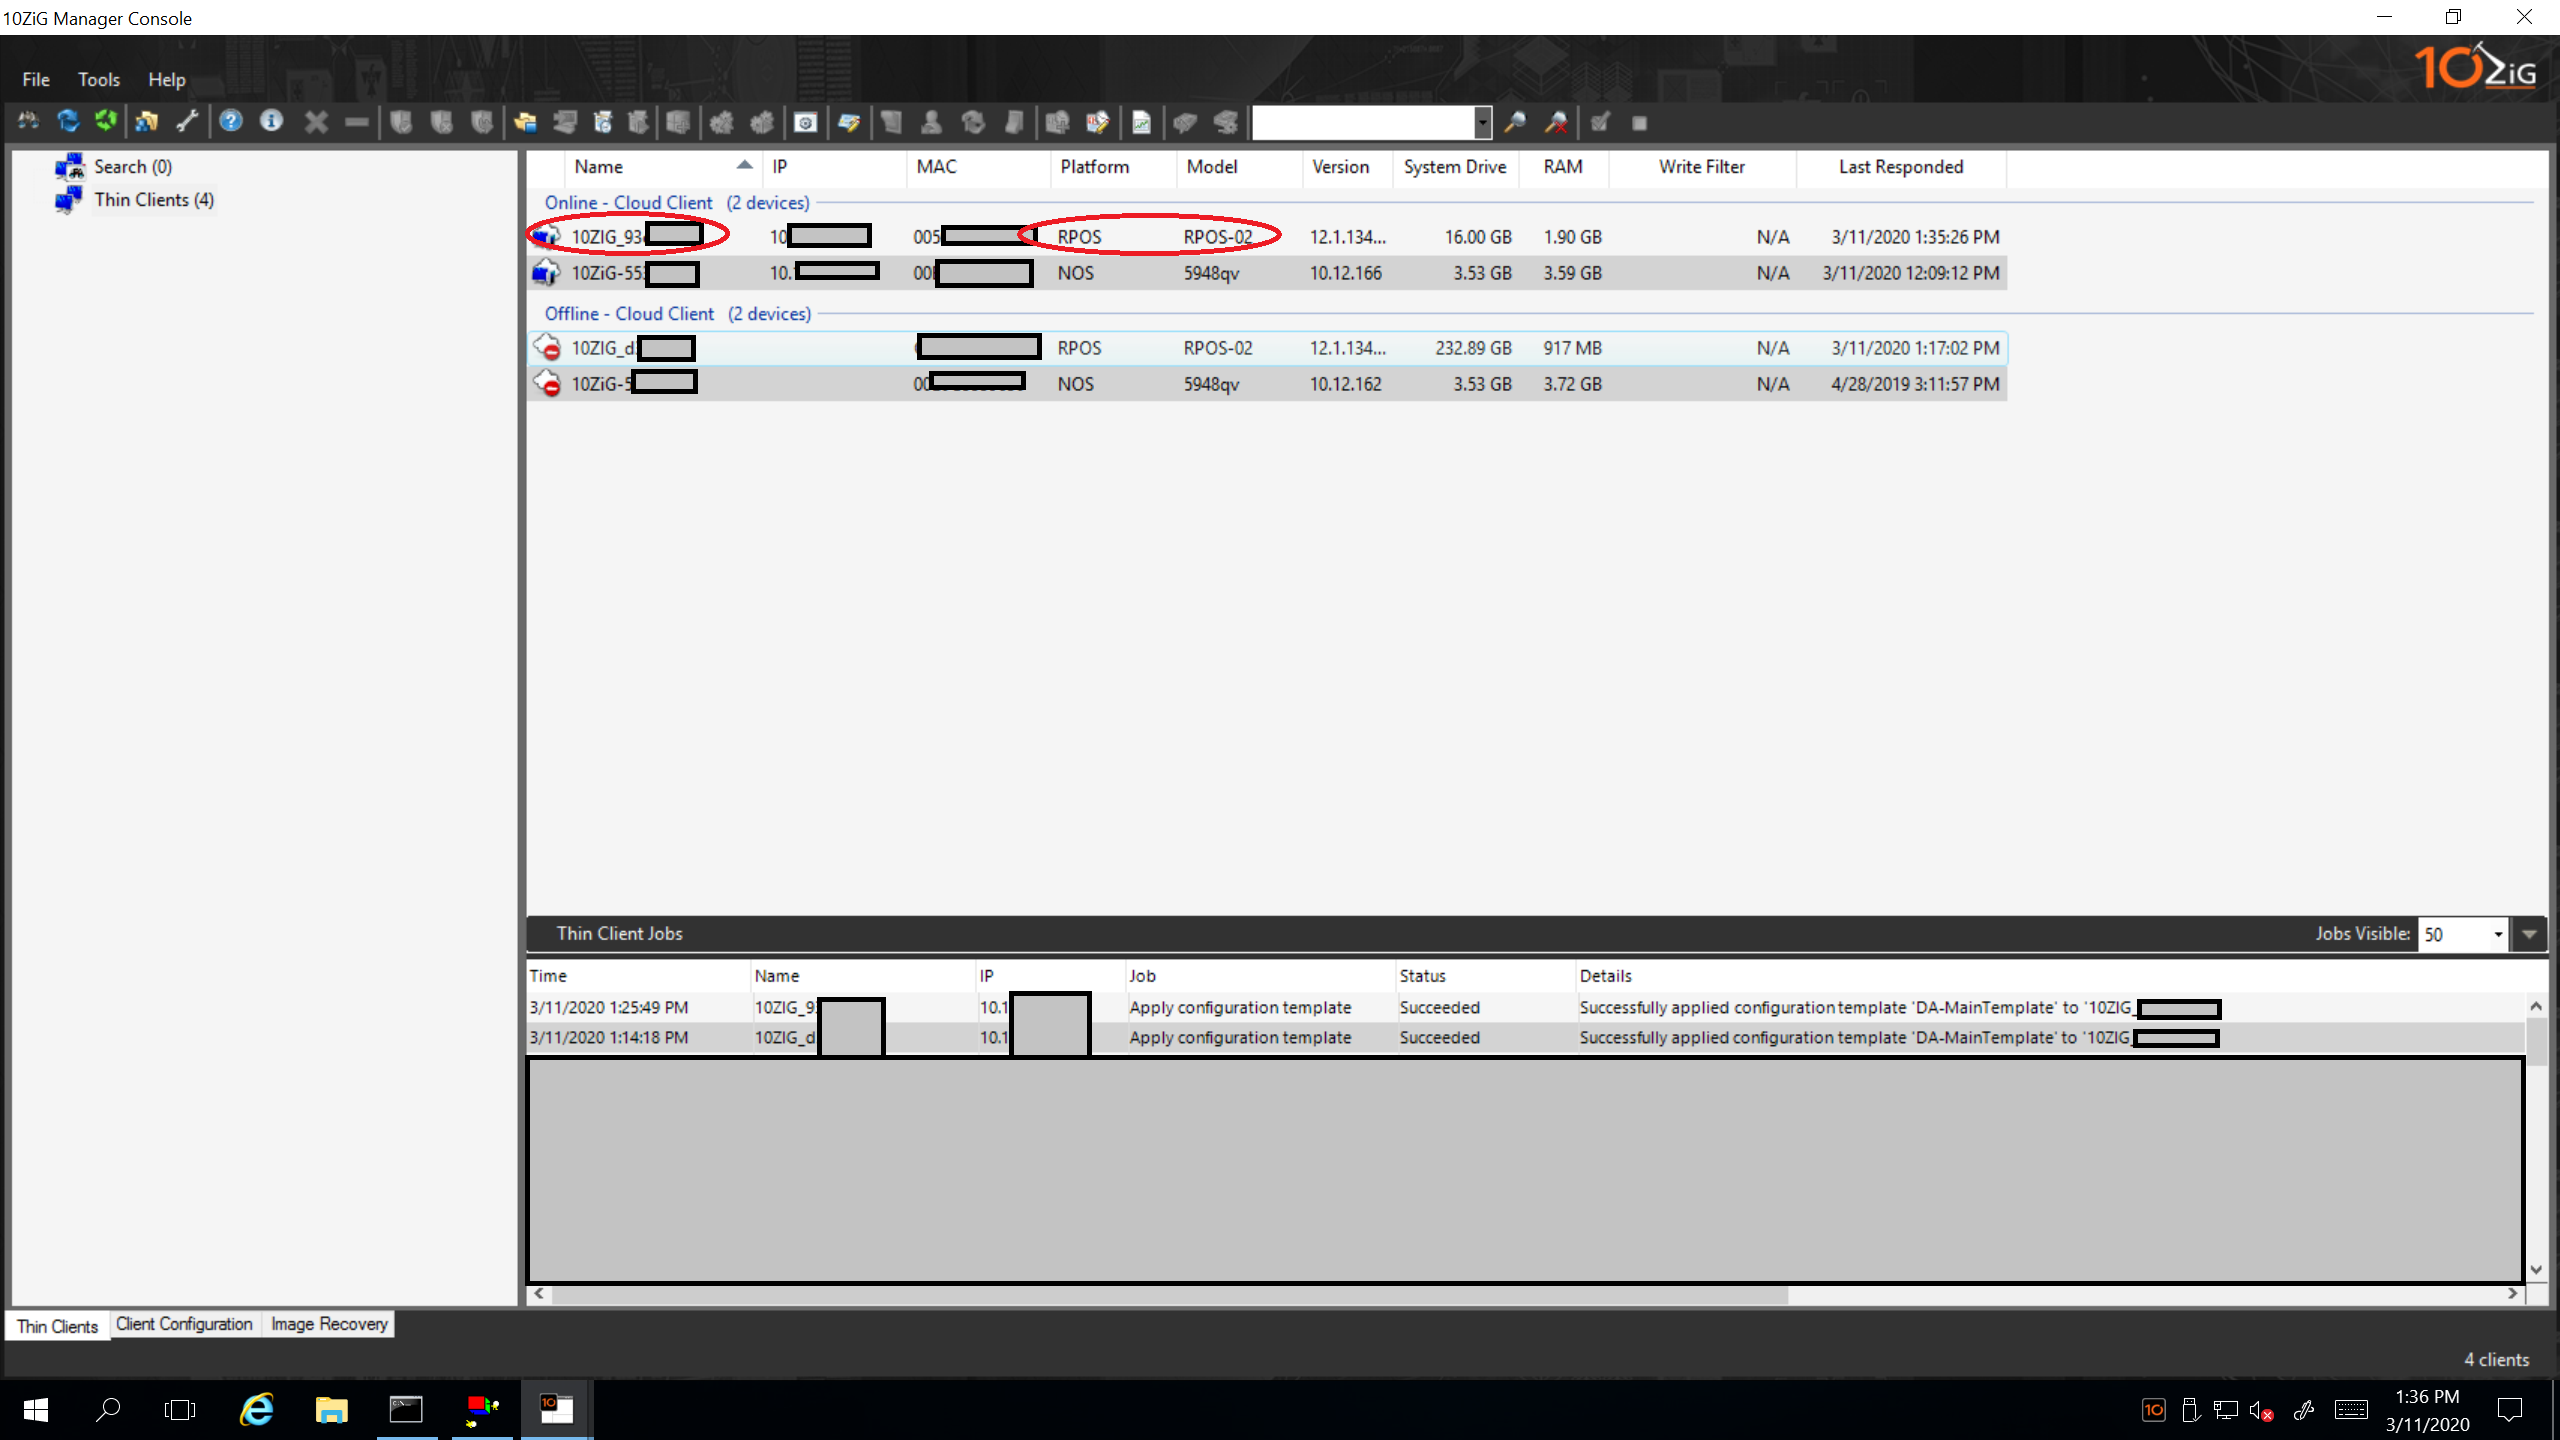
All components of this software can be managed and configured via the 10ZiG Manager, just like the 10ZiG 5948qv and other 10ZiG Zero Clients. This makes the software extremely powerful since you can easily manage and maintain it, even if you have thousands of repurposed PCs running RPOS.
Inside of the 10ZiG Manager, the RPOS devices show up similar to how the other 10ZiG Thin clients and Zero clients would appear.
10ZiG RepurpOS (RPOS) with RPOS and NOS Clients
You can see above that I pushed my main configuration template to the RPOS demo devices. For more posts on 10ZiG Manager, please see the following posts:
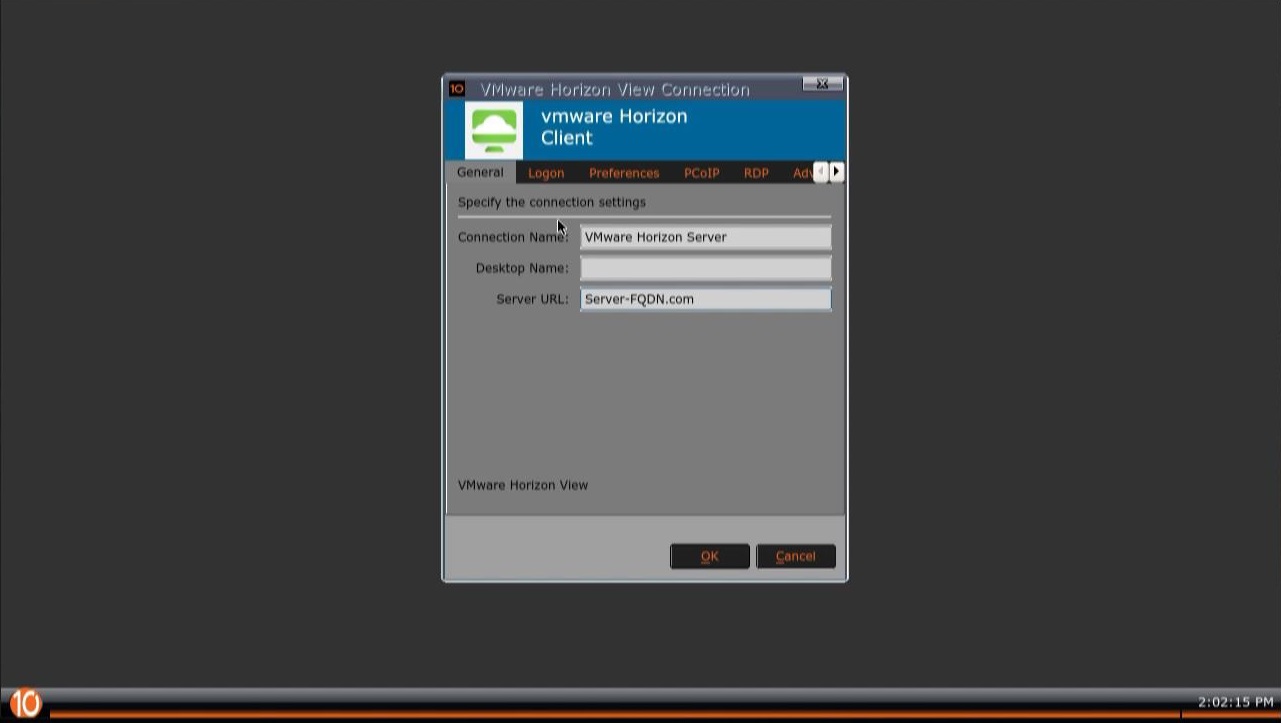
As part of my main template, I have included SSL certificates for my VMware Horizon View connection server, so we’ll be able to test a VDI connection using BLAST.
Using the guides for the 10ZiG Manager above, you could fully configure the RPOS the way you want (for mass deployment), and then create a template and deploy it to a large batch of RPOS PCs. Or you could do all the initial configuration directly from the 10ZiG Manager.
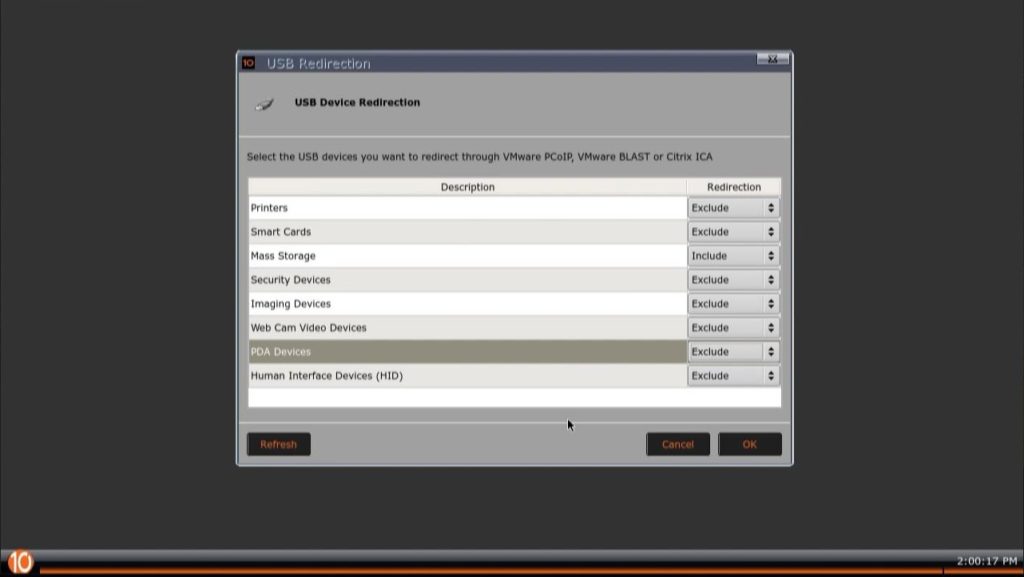
The software supports a number of different protocols and technologies.
10ZiG RepurpOS (RPOS) Programs List
The list of applications and programs on 10ZiG RepurpOS (RPOS)
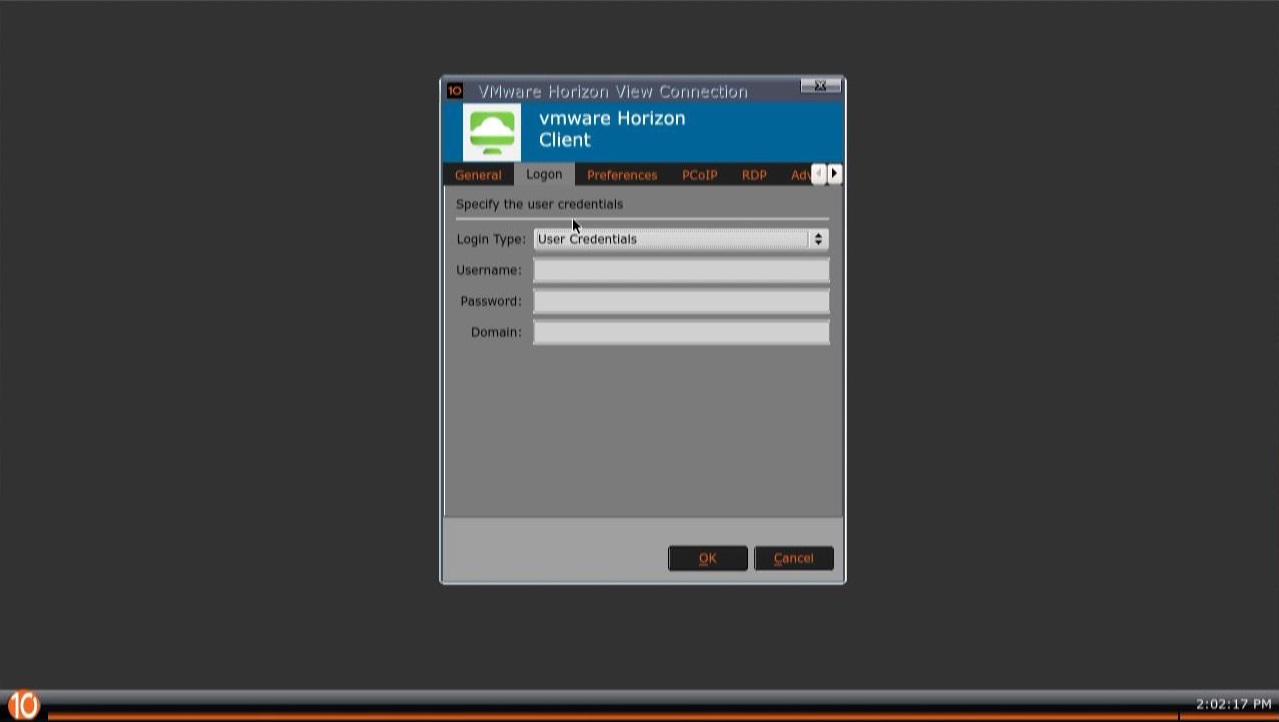
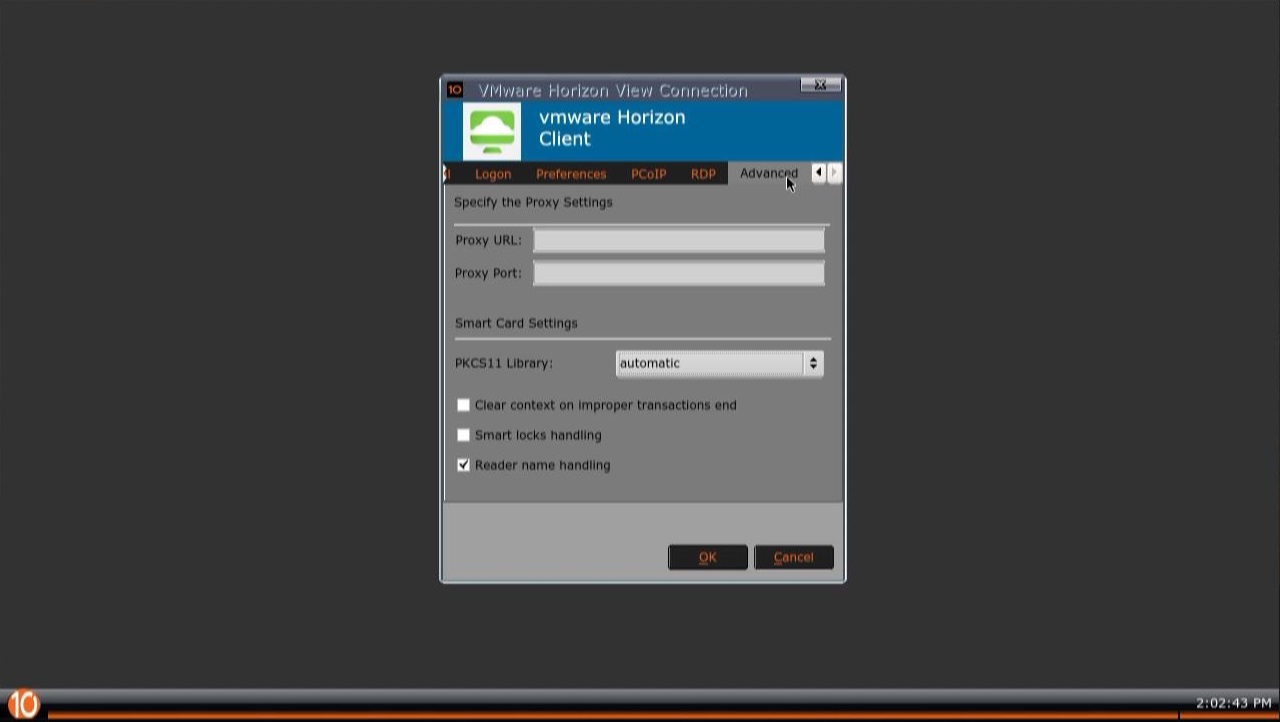
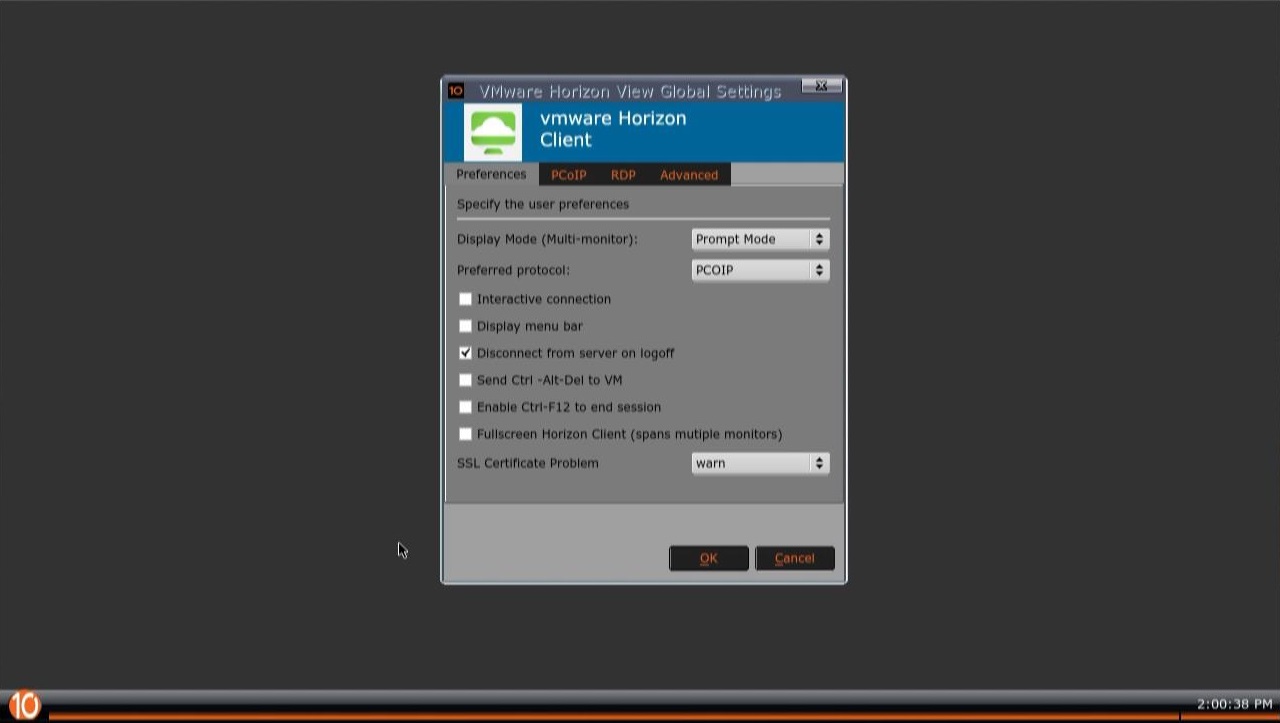
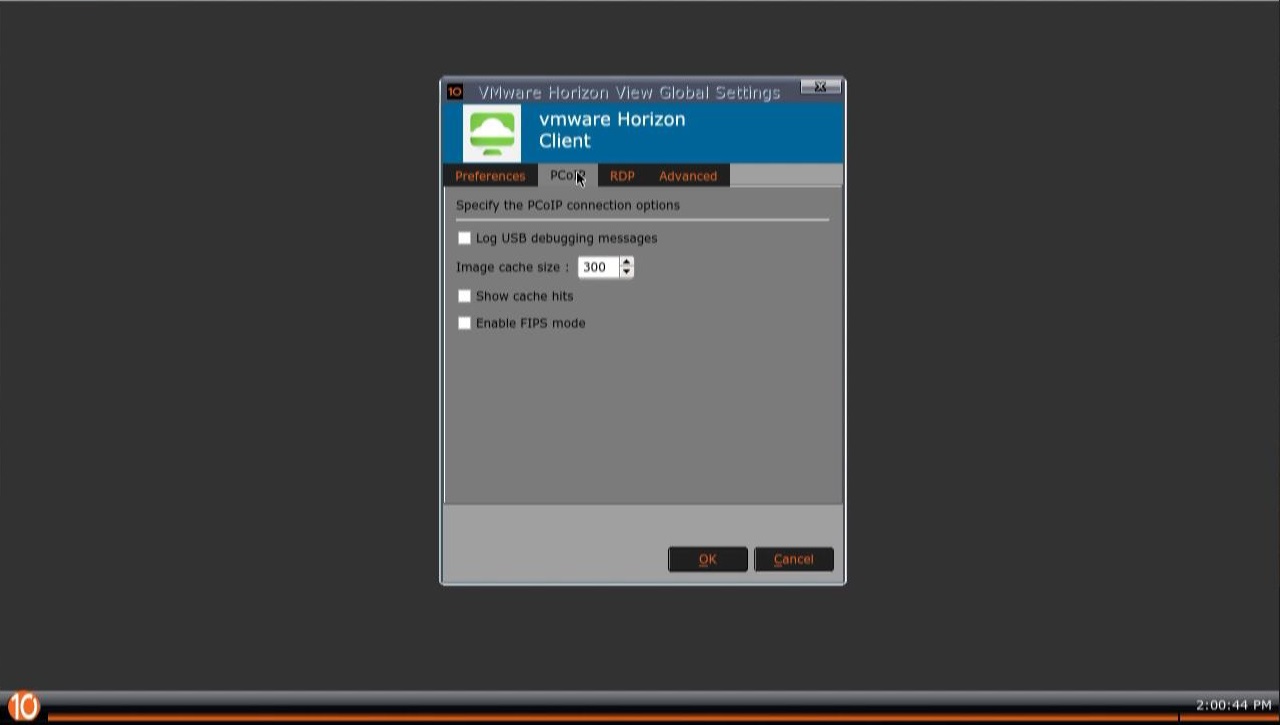
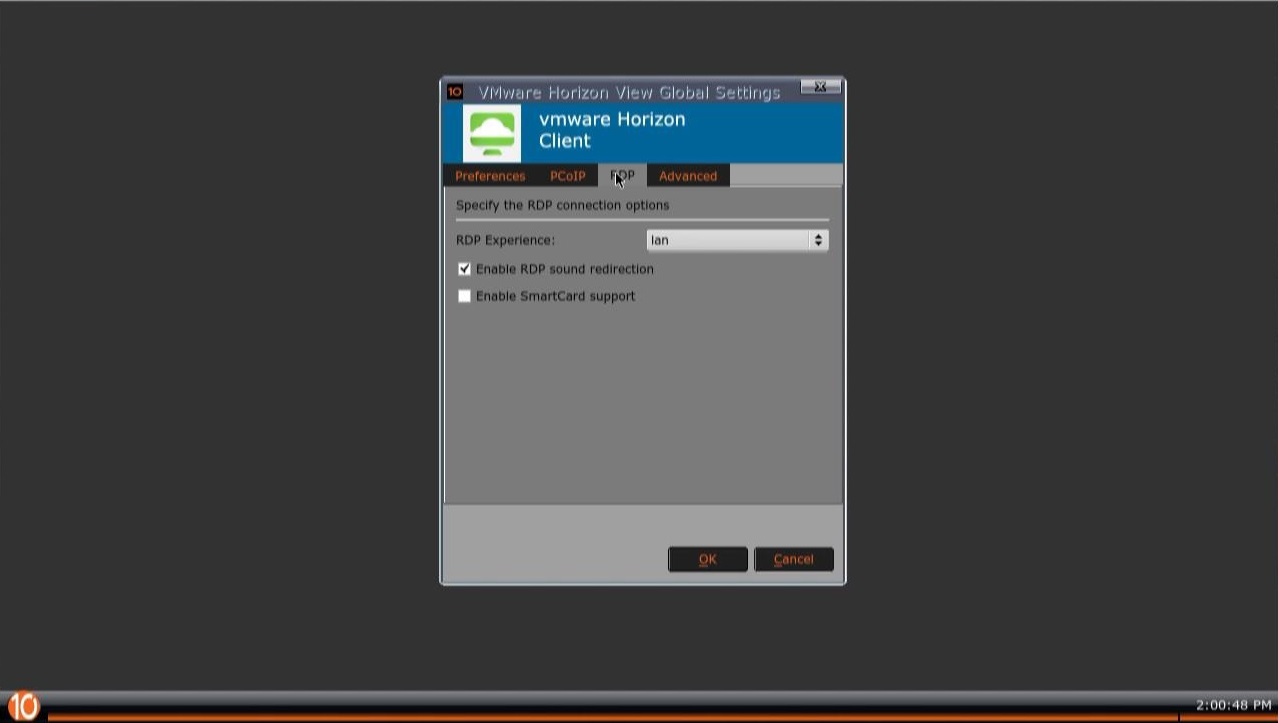
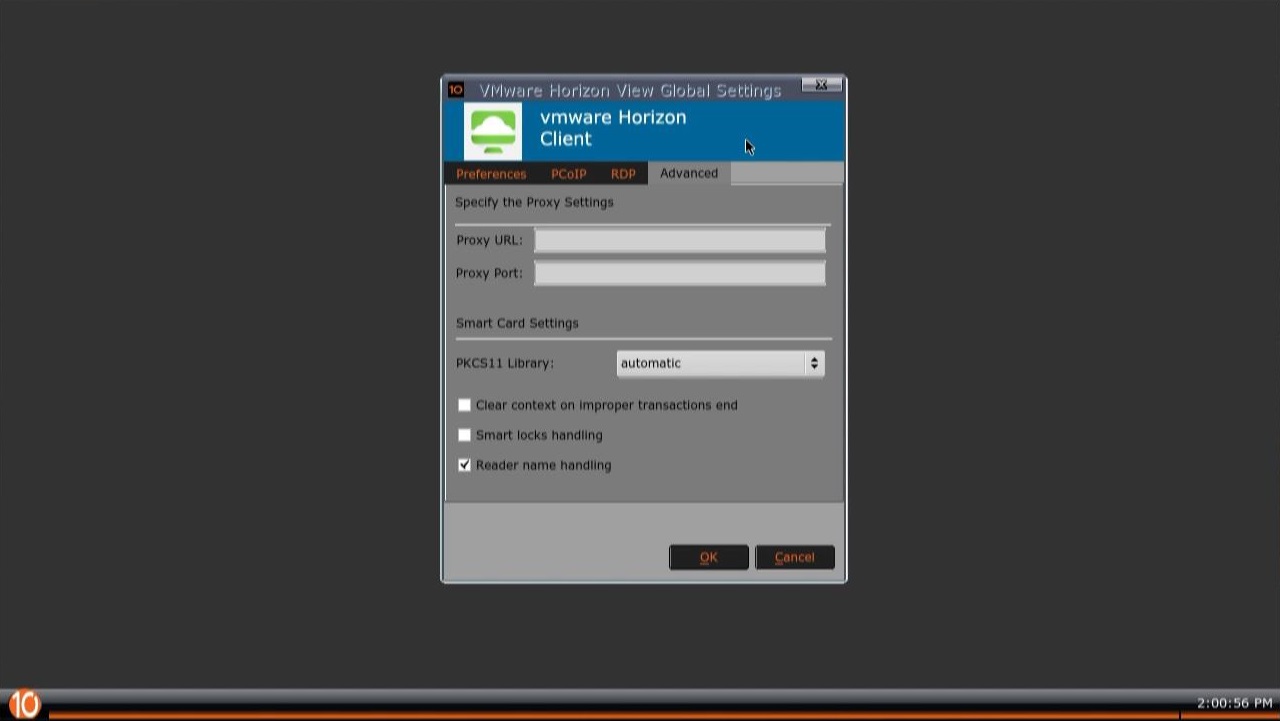
And below we have the VMware Global Settings window.
10ZiG RepurpOS (RPOS) VMware Global Preferences10ZiG RepurpOS (RPOS) VMware Global PCoIP Settings10ZiG RepurpOS (RPOS) VMware Global RDP Settings10ZiG RepurpOS (RPOS) VMware Global Advanced Settings10ZiG RepurpOS (RPOS) VMware Global Settings
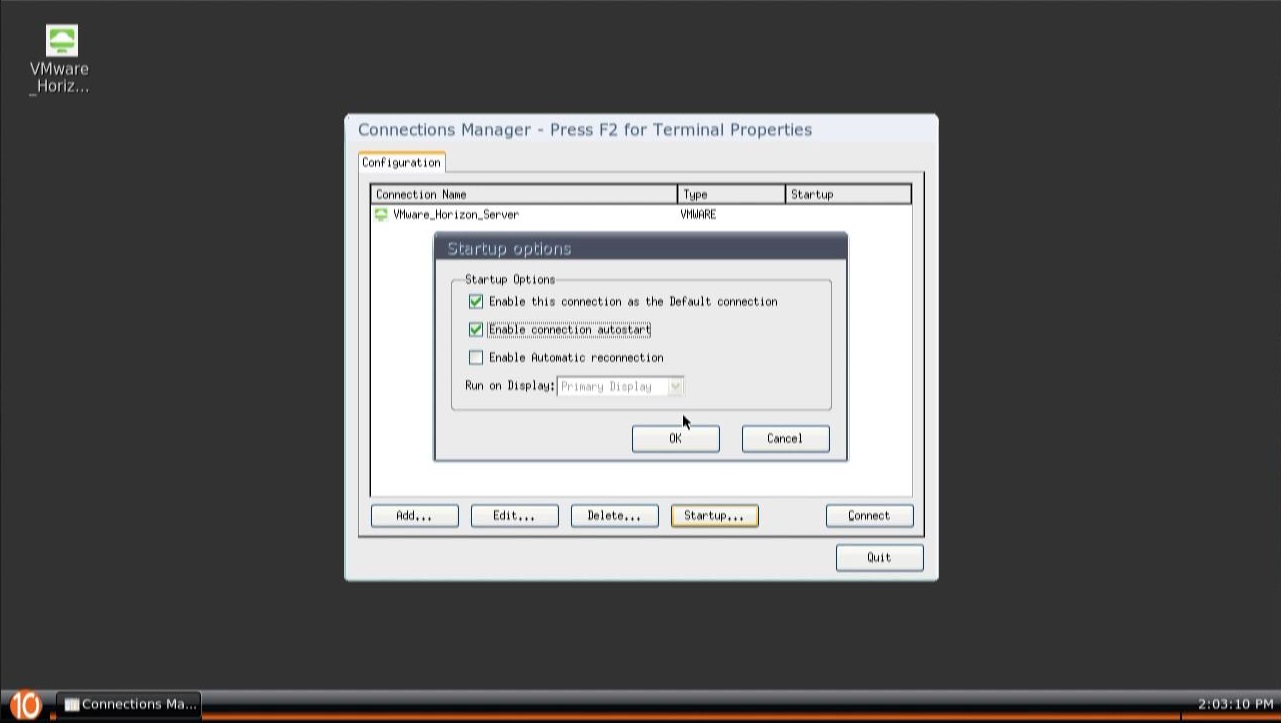
We also have the ability to configure the default connection from the Connection Manager. We can also configure whether we want auto-start a connection and enable automatic reconnection.
10ZiG RepurpOS (RPOS) Connections Manager and Startup options
On a final note, you can see there is multi-display support built in. This is more apparent when browsing through other sections of the UI on the 10ZiG RPOS.
VDI Connection Testing
It’s time to test out the main functionality of the 10ZiG RepurpOS (RPOS) software!
I’ve gone ahead and created a connection profile for my company “Digitally Accurate Inc.” to access our VDI environment.
10ZiG RepurpOS (RPOS) with Connection Profile to Digitally Accurate Inc.
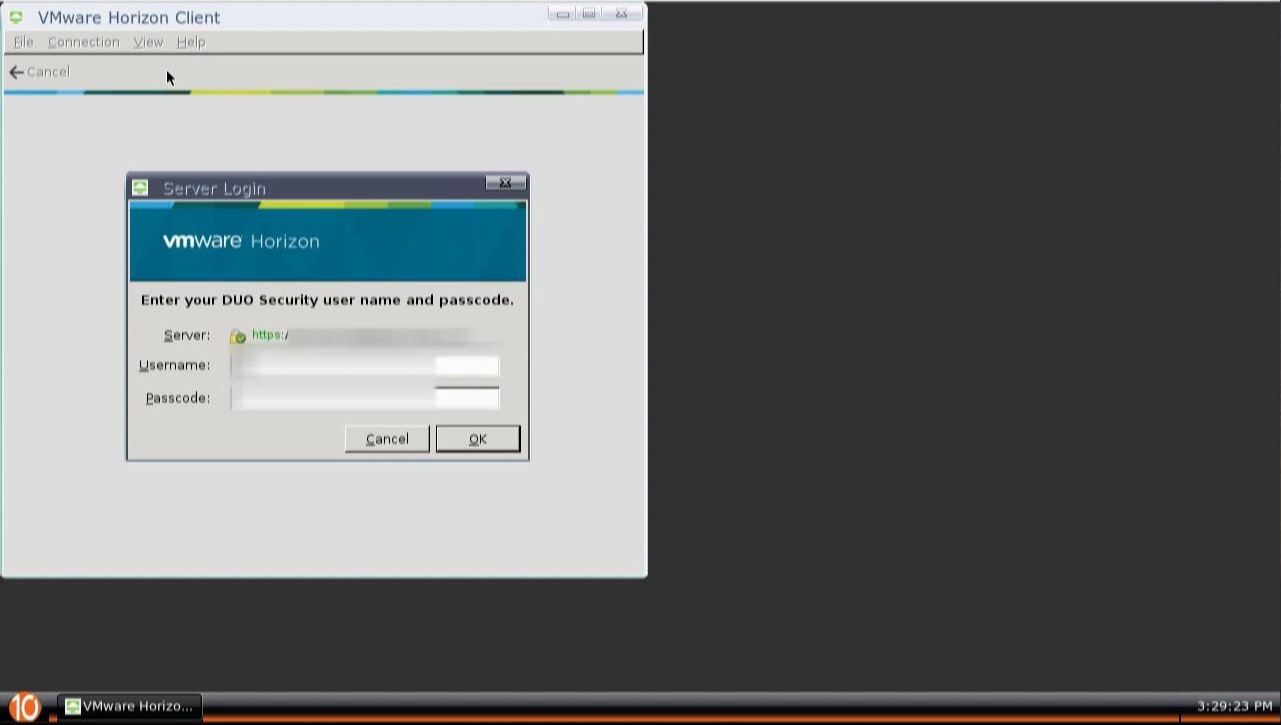
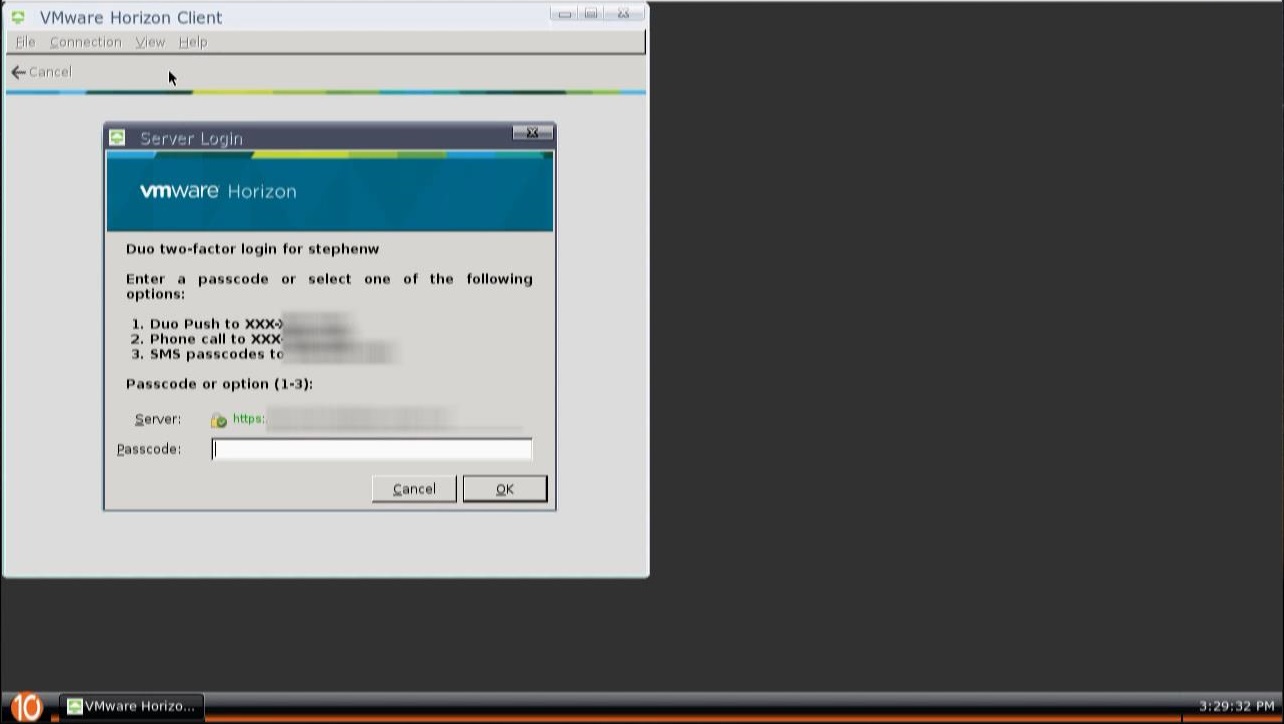
Double clicking that icon, initiates the session. We login with my credentials.
10ZiG Horizon DUO Login10ZiG Horizon DUO Challenge10ZiG RepurpOS (RPOS) Horizon View with DUO MFA Login
And here we are presented with the available desktop pools. Please note, that you can configure it to automatically connect to a chosen desktop pool, or if only one is available it will automatically connect.
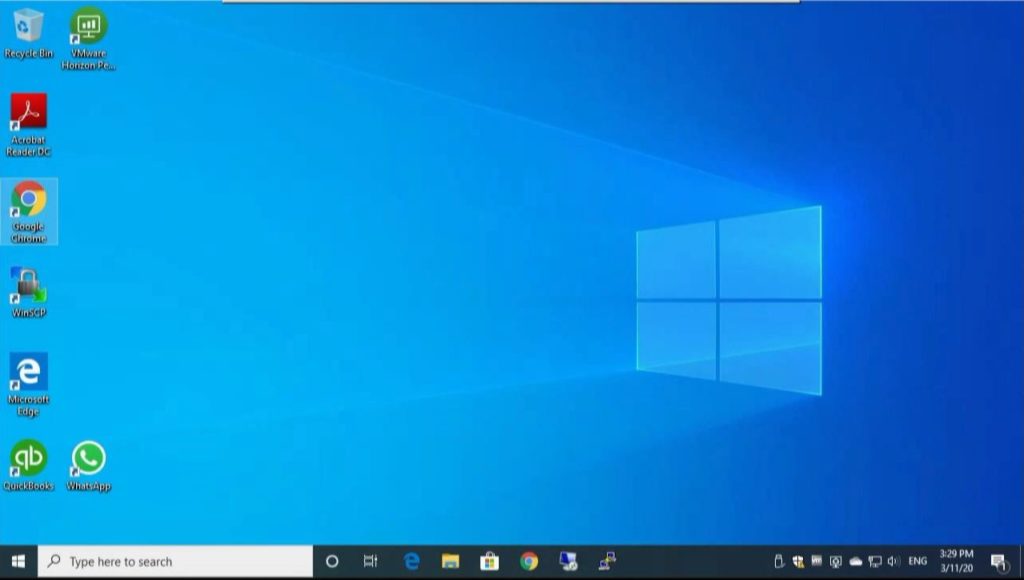
And finally, we have a fully functional connection to our VDI environment on our VMware Horizon View environment using the 10ZiG repurposing software.
10ZiG RepurpOS (RPOS) with active VDI session on VMware Horizon View
Again, please note that the screenshots may be a little fuzzy due to the capture from video, the interface in reality is sharp and clear.
Conclusion
In conclusion, the 10ZiG RepurpOS (RPOS) software is a great way to bring life to old or existing hardware, reduce spending during a VDI rollout, and bring value to your investment.
Further backing up that investment, is the ability to use the 10ZiG Manager which is free, and can be used to manage a large number of devices.
I’d highly recommend this software and I look forward to using it more!
It’s official, VMware vSphere 7 is here. VMware has put together tons of content for the launch of the new version.
First and foremost, check out their blog at https://blogs.vmware.com/vsphere/vsphere-7. This page will have tons of information on the launch and will host some important materials in one place for you to access.
This website uses cookies to improve your experience. We'll assume you're ok with this, but you can opt-out if you wish.
Do you accept the use of cookies and accept our privacy policy? AcceptRejectCookie and Privacy Policy
Privacy & Cookies Policy
Privacy Overview
This website uses cookies to improve your experience while you navigate through the website. Out of these cookies, the cookies that are categorized as necessary are stored on your browser as they are essential for the working of basic functionalities of the website. We also use third-party cookies that help us analyze and understand how you use this website. These cookies will be stored in your browser only with your consent. You also have the option to opt-out of these cookies. But opting out of some of these cookies may have an effect on your browsing experience.