Aug 212018
 
Microsoft .NET Framework

You may notice on Windows Server 2012 R2, when applying Windows Updates that one or more .NET updates may fail with error code 0x80092004. This issue may affect all, or only some of your Windows Server 2012 R2 servers.

When troubleshooting this, you may notice numerous specific errors such as “Couldn’t find the hash of component: NetFx4-PenIMC”, or errors with a CAB file. These errors will probably come from update KB4054566 and KB4340558.

The Fix

To resolve this, we are going to download the updates MSU files from the Microsoft Update Catalog, and fully uninstall, then re-install the problematic updates.

Please Note: Always make sure you have a full backup before making modifications to your servers.

Please follow the instructions below:

  1. Create a folder called “updatefix” on the root of your C drive on the server
  2. Navigate to the Windows Update catalog at: https://www.catalog.update.microsoft.com/
  3. Search for KB4054566 and download the file for “Windows Server 2012 R2”, save it to the folder you created above called “updatefix” on the root of your C Drive. There should be one file in the download.
  4. Search for KB4340558 and download the files for “Windows Server 2012 R2”, save it to the folder you created above called “updatefix” on the root of your C Drive. There should be a total of 3 files in this download.
  5. Create a folder in the “updatefix” folder called “expanded”.
  6. Open an elevated command prompt, and run the following commands to extract the updates CAB files:
    expand -f:* "C:\updatefix\windows8.1-kb4338415-x64_cc34d1c48e0cc2a92f3c340ad9a0c927eb3ec2d1.msu" C:\updatefix\expanded\
    expand -f:* "C:\updatefix\windows8.1-kb4338419-x64_4d257a38e38b6b8e3d9e4763dba2ae7506b2754d.msu" C:\updatefix\expanded\
    expand -f:* "C:\updatefix\windows8.1-kb4338424-x64_e3d28f90c6b9dd7e80217b6fb0869e7b6dfe6738.msu" C:\updatefix\expanded\
    expand -f:* "C:\updatefix\windows8.1-kb4054566-x64_e780e6efac612bd0fcaf9cccfe15d6d05c9cc419.msu" C:\updatefix\expanded\
  7. Now let’s uninstall the problematic updates. Some of these commands may fail depending on which updates you have successfully installed. Run the following commands individually to remove the updates:
    dism /online /remove-package /packagepath:C:\updatefix\expanded\Windows8.1-KB4338424-x64.cab
    dism /online /remove-package /packagepath:C:\updatefix\expanded\Windows8.1-KB4338419-x64.cab
    dism /online /remove-package /packagepath:C:\updatefix\expanded\Windows8.1-KB4338415-x64.cab
    dism /online /remove-package /packagepath:C:\updatefix\expanded\Windows8.1-KB4054566-x64.cab
  8. Reboot your server.
  9. Now let’s cleanly install the updates. All of these commands should be successful when running. Run the following commands individually to install the updates:
    dism /online /add-package /packagepath:C:\updatefix\expanded\Windows8.1-KB4054566-x64.cab
    dism /online /add-package /packagepath:C:\updatefix\expanded\Windows8.1-KB4338415-x64.cab
    dism /online /add-package /packagepath:C:\updatefix\expanded\Windows8.1-KB4338419-x64.cab
    dism /online /add-package /packagepath:C:\updatefix\expanded\Windows8.1-KB4338424-x64.cab
  10. Reboot your server.
  11. You have now fixed the issue and all updates should now be cleanly installing via Windows Updates!

Leave a comment and let me know if this worked for you!

Aug 212018
 
VMware Horizon View Logo

Well, after using the VMware Horizon Client mobile app (for Android) for a year, I finally decided to do a little write up and review. I use the android client regularly on my Samsung Tab E LTE tablet, and somewhat infrequently on my Samsung Galaxy S9+ mobile phone (due to the smaller screen).

Let’s start off by briefly explaining what VMware Horizon View is, what the client does, and finally the review. I’ll be including a couple screenshots as well to give an idea as to how the interface and resolution looks on the tablet itself.

The VMware Horizon Client mobile app for android is available at: https://play.google.com/store/apps/details?id=com.vmware.view.client.android

What is VMware Horizon View

VMware Hoirzon View is a product and solution that enables VDI technology for a business. VDI stands for Virtual Desktop Infrastructure. When a business uses VDI, they virtualize their desktops and use either thin clients, zero clients, or the view client to access these virtualized desktops. This allows the business to utilize all the awesome technologies that virtualization brings (DRS, High Availability, Backup/DR, high performance, reduced hardware costs) and provide rich computing environments to their users. The technology is also particularly interesting in the fact that it provides amazing remote access capabilities as one can access their desktop very easily with the VMware View Client.

When you tie this on to an advanced security technology such as Duo’s MFA product, you can’t go wrong!

In special case or large environments, enormous cost savings can be realized when implementing VDI.

What is the VMware Horizon View Mobile client for Android

As mentioned above, to access one’s virtualized desktop a client is needed. While a thin client or zero client can be used, this is beyond the scope of this post as here we are only discussing the VMware View client for Android.

You can download the VMware View client for Android from the App store (link here).

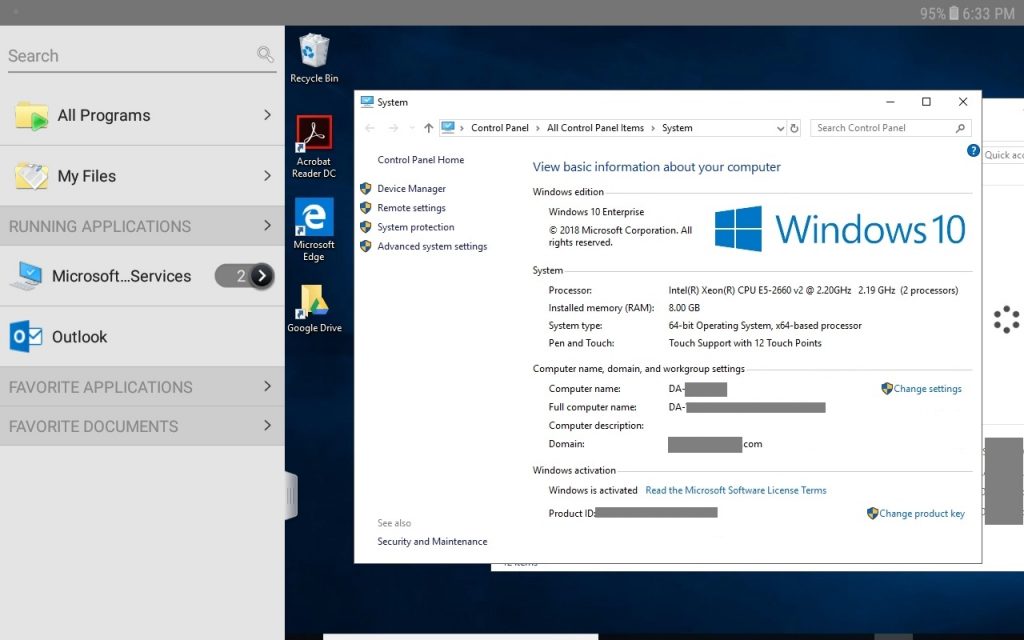
The VMware Horizon View Mobile client for Android allows you to connect to your VDI desktop remotely using your Android based phone or tablet. Below is a screenshot I took with my Samsung Tab E LTE tablet (with the side bar expanded):

VMware Horizon View Client on Android Tablet

VMware Horizon View Client on Android Tablet

VMware Horizon View Mobile Client for Android Experience

Please Note: There is more of the review below the screenshots. Scroll down for more!

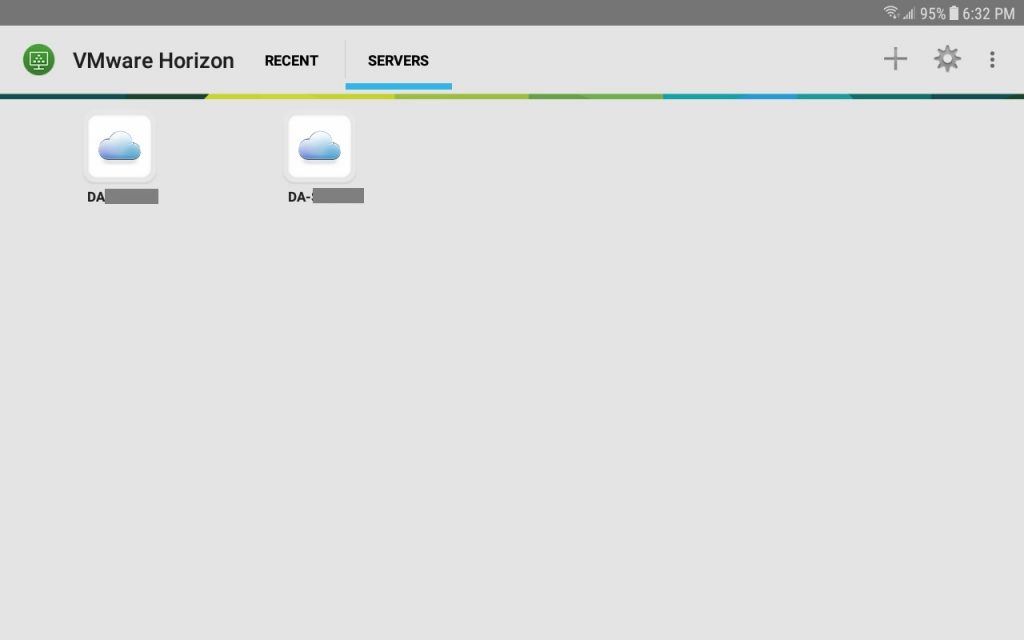
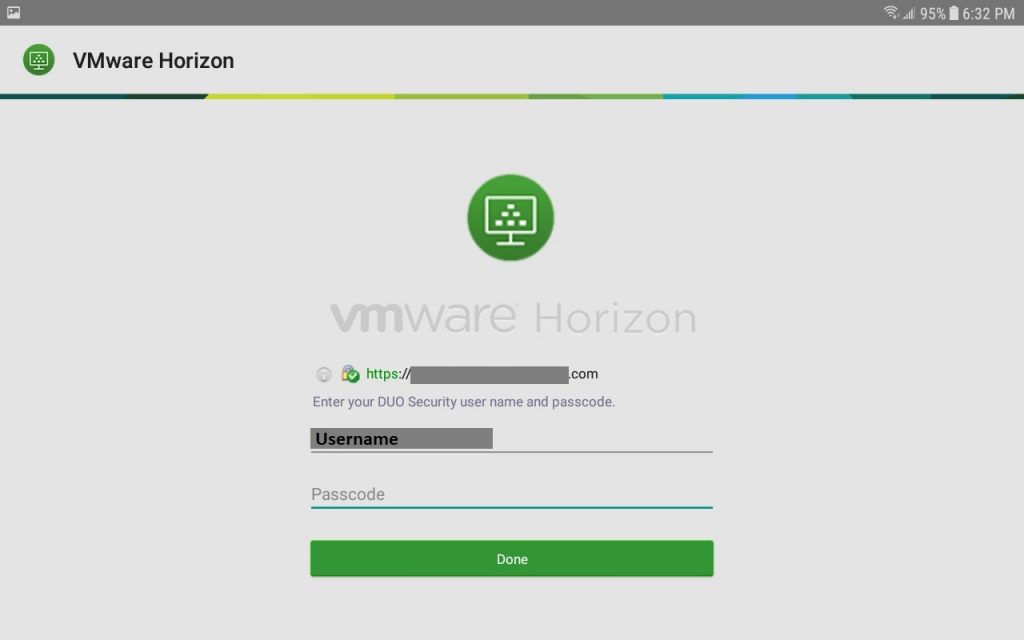
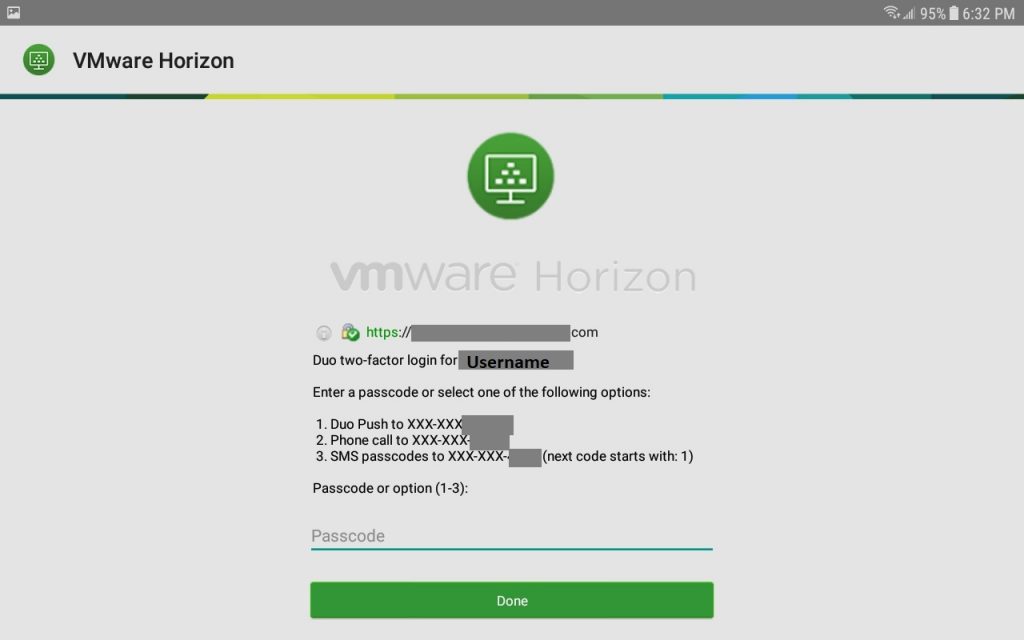
The app appears to be very lightweight, with an easy interface. Configuration of View Connections Servers, or UAG’s (Unified Access Gateways) is very simple. The login process performs with RADIUS and/or MFA as the desktop client would. In the examples below, you’ll notice I use Duo’s MFA/2FA authentication solution in combination with AD logins.

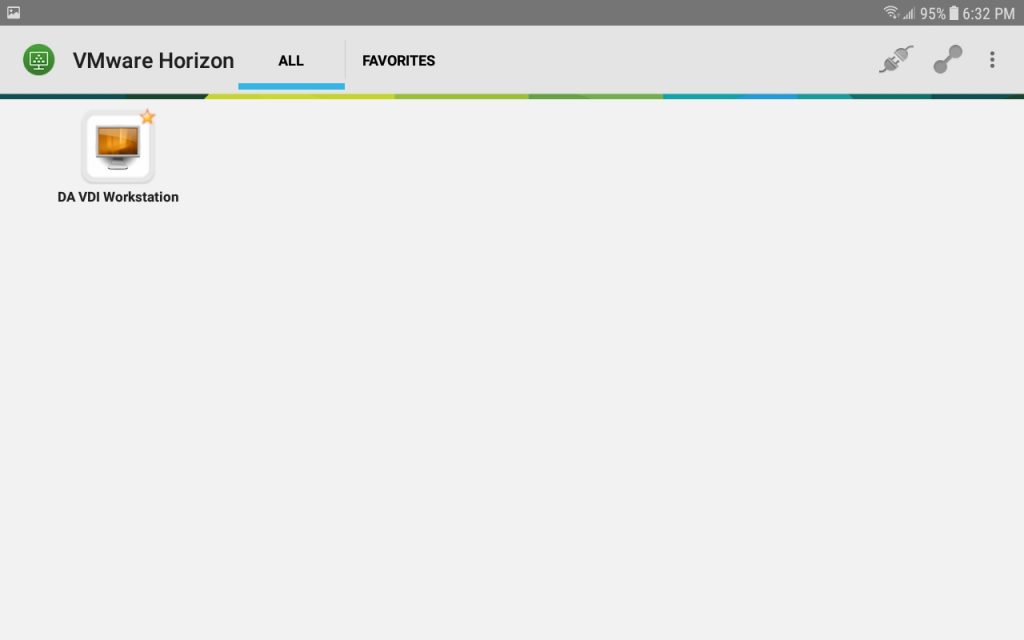
VMware Horizon View Mobile Client Android Server List

VMware Horizon View Mobile Client Android Server List

The interface is almost identical to the desktop client with very little differences. The configuration options are also very similar and allow customization of the app, with options for connection quality as an example.

VMware Horizon View Mobile Client Android Server Login

VMware Horizon View Mobile Client Android Server Login

VMware Horizon View Mobile Client Android Login Duo MFA

VMware Horizon View Mobile Client Android Login Duo MFA

As you can see above, the RADIUS and Duo Security Login prompts are fully functional.

VMware Horizon View Mobile Client Android Server List

VMware Horizon View Mobile Client Android Server List

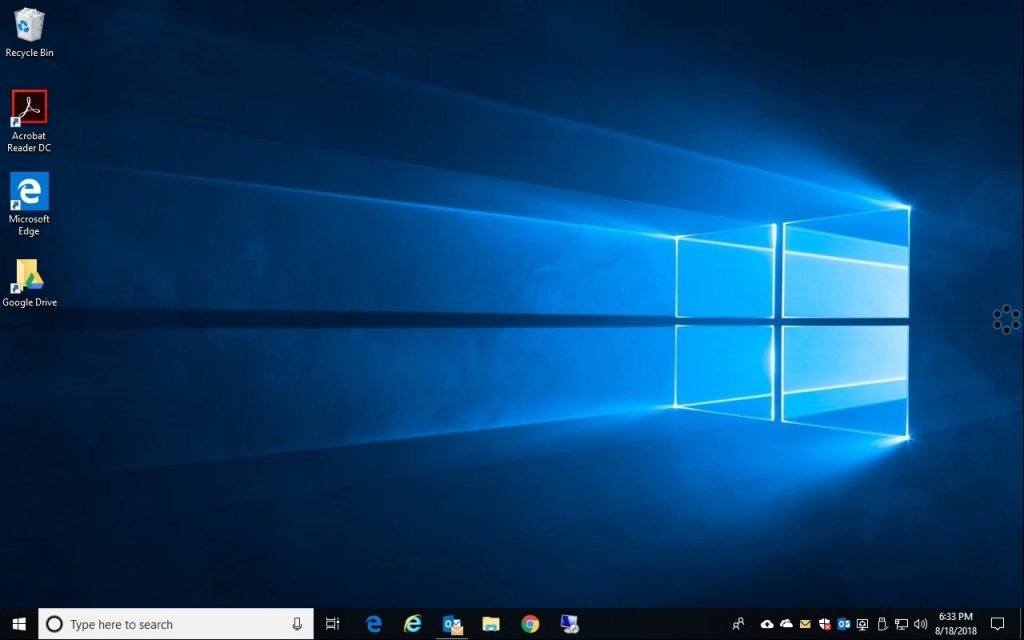
VMware Horizon View Mobile Client Android Windows 10 VDI Desktop

VMware Horizon View Mobile Client Android Windows 10 VDI Desktop

The resolution is perfect for the tablet, and is very usable. The touch interface works extremely well, and text input works as good as it can. While this wouldn’t be used as a replacement for the desktop client, or a thin/zero client, it is a valuable tool for the mobile power user.

With how lightweight and cheap tablets are now, you could almost leave your tablet in your vehicle (although I wouldn’t recommend it), so that in the event of an emergency where you need to access your desktop, you’d be able to using the app.

Pros:

  • Fluid interface
  • Windows 10 touch functionality works great
  • Resolution Support
  • Samsung Dex is fully supported
  • Webcam redirection works
  • Works on Airplanes using in flight WiFi

Cons:

  • Bandwidth usage
  • Saving credentials via Fingerprint Scanner would be nice (on the S8+ and S9+)

My Usage

Being in IT, I’ve had to use this many times to log in and manage my vSphere cluster, servers, HPE iLo, check temperatures, and log in to customer environments (I prefer to log in using my VDI desktop, instead of saving client information on the device I’m carrying with me). It’s perfect for these uses.

I also regularly use VDI over LTE. Using VDI over mobile LTE connections works fantastic, however you’ll want to make sure you have an adequate data plan as the H.264 video stream uses a lot of bandwidth. Using this regularly over LTE could cause you to go over your data limits and incur additional charges.

Additional Information

Samsung Dex

The VMware Horizon View Mobile Client for Android also supports Samsung Dex. This means that if you have a Dex dock or the Dex pad, you can use the mobile client to provide a full desktop experience to a monitor/keyboard/mouse using your Samsung Galaxy phone. I’ll be doing a write up later to demo this (it works great).

VMware Horizon Client for Chrome OS

VMware also has a client for Chrome OS, so that you can use your Chromebook to connect to your VDI desktop. You can download VMware Horizon Client for Chrome OS here: https://chrome.google.com/webstore/detail/vmware-horizon-client-for/ppkfnjlimknmjoaemnpidmdlfchhehel

Aug 202018
 

An all too common problem is when users report e-mail delays ranging from 5 to 15 minutes. When troubleshing these types of issues, you’ll notice this commonly occurs when receiving e-mails from organizations that use Office 365. Specifically this occurs due to greylisting.

Why does this happen

You’re organization is using greylisting on your e-mail proxy/SMTP relay to reduce spam. Greylisting temporarily rejects the first send of an e-mail and waits for the sending server to re-transmit the message. This process usually takes around 5-15 minutes to complete. Greylisting is used because spammers won’t re-transmit the message, which leads to a massive reduction of spam messages coming through.

Once the sending server retransmits, the sending server IP address is added to your firewalls “safe senders” whitelist. From this point on the IP address (or server) will not be subject to greylisting (and any subsequent e-mails).

Office 365 has hundreds, if not thousands (possibly 10’s of thousands) of servers they use to transmit e-mail. The chance of multiple e-mails being sent from a single server is very slim, therefor greylisting is applied to every IP (server) that is sending e-mail because it’s different. Each e-mail from an Office 365 user can take 5-15 minutes, since a new server is used every time.

How to resolve

You’ll need to configure and add an exception to your e-mail proxy/SMTP relay/firewall. This exception can be based off domain, DNS name of sending server, or IP address ranges.

Scroll down for instructions on how to create an exception on a Sophos UTM.

Domain Exception

If you use domain based exceptions, you’ll need to configure these manually for each sending domain that you want your firewall to skip greylist checking. This is a very manual process, which requires lots of human intervention to continuously update your greylist exception.

DNS FQDN of MX Server

This method is the easiest, however most firewall or UTM’s will now allow these types of exceptions since a number of DNS queries will be needed everytime an e-mail comes in. One DNS query on the MX record, and then another DNS query on the DNS host contained in the MX record. If you can configure this type of exception, you’ll want to configure it as below:

*-com.mail.protection.outlook.com

IP Address Range

This is the best method. To create an IP address range exception, we’ll need a copy of all the IP address ranges or IP address spaces that Office 365 uses to send mail. This list can be found at: https://docs.microsoft.com/en-us/microsoft-365/enterprise/urls-and-ip-address-ranges?view=o365-worldwide.

We’ll need to create an exception that skips greylist checking on the IP addresses outlined in the above link. This will stop any greylist checking on e-mails from Office 365 servers.

In my case, I use a Sophos UTM firewall, and to create an exception I had to do the following:

  1. Log on to the Webmin interface.
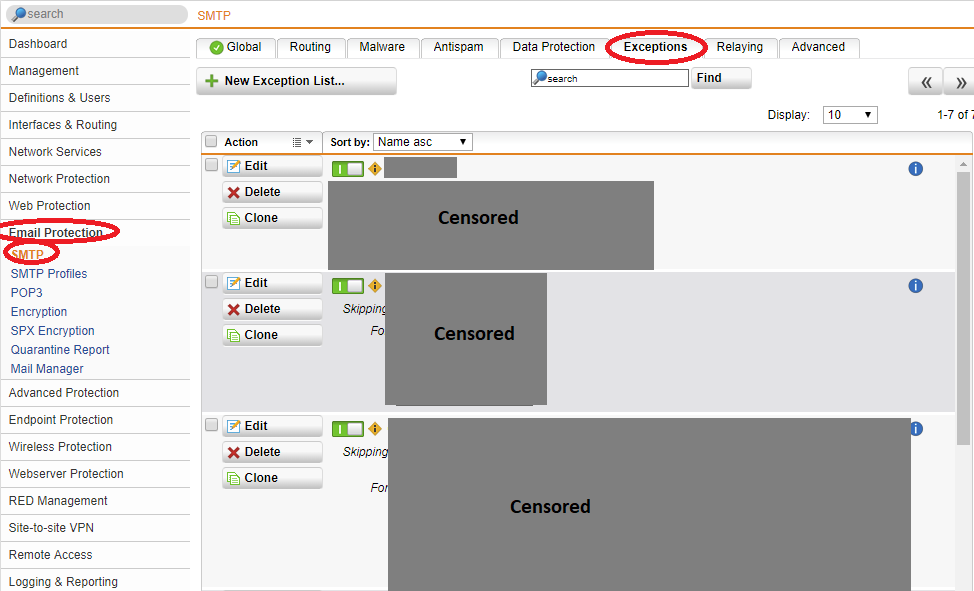
  2. Select “Email Protection”, then “STMP” on the left hand side, then “Exceptions” tab at the top.

    Sophos UTM E-Mail and SMTP Exception List

    Sophos UTM E-Mail and SMTP Exception List

  3. Create a “New Exception List” and call it “Office 365 GreylistWhitelist”.
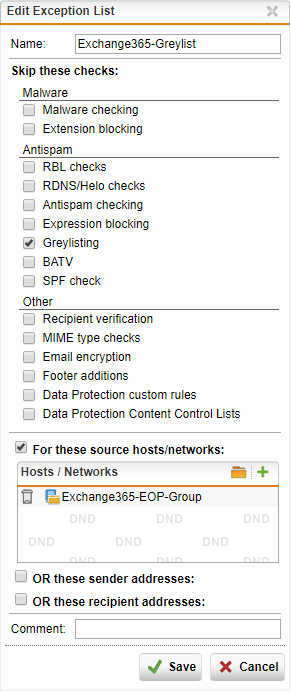
  4. Check the “Greylisting” box under “Antispam”, and then check the “For these source hosts/networks”.

    Sophos UTM SMTP Create Exception

    Sophos UTM SMTP Create Exception

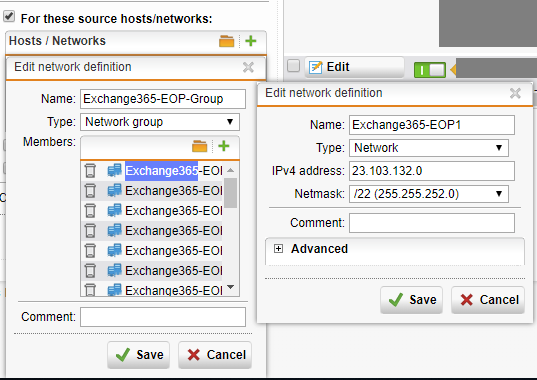
  5. Click the “+” button, and call the Network Definition “Exchange365-EOP-Group”. Change the type to “Network Group”.
  6. Click the “+” button in the members section, and start adding the IP spaces. Repeat this for each IP space (in total I added 23). Each network name (IP address space) requires a unique name, I named mine “Exchange365-EOP1” through “Exchange365-EOP23”.

    Sophos UTM SMTP Configure Exception

    Sophos UTM SMTP Configure Exception

  7. Click Save on the Network Group, and click Save on the exception.
  8. Enable the Exception

    Sophos UTM SMTP Exception Rule

    Sophos UTM SMTP Exception Rule

  9. Completed! You’ve now made the exception and delays should no longer occur.
Aug 192018
 

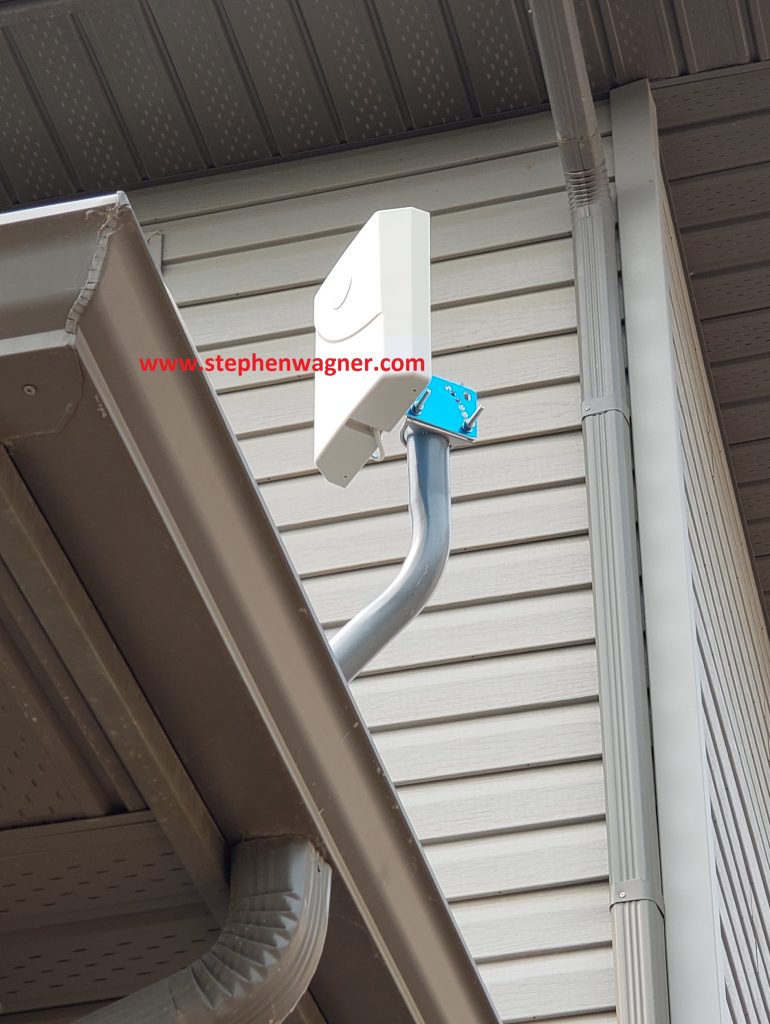
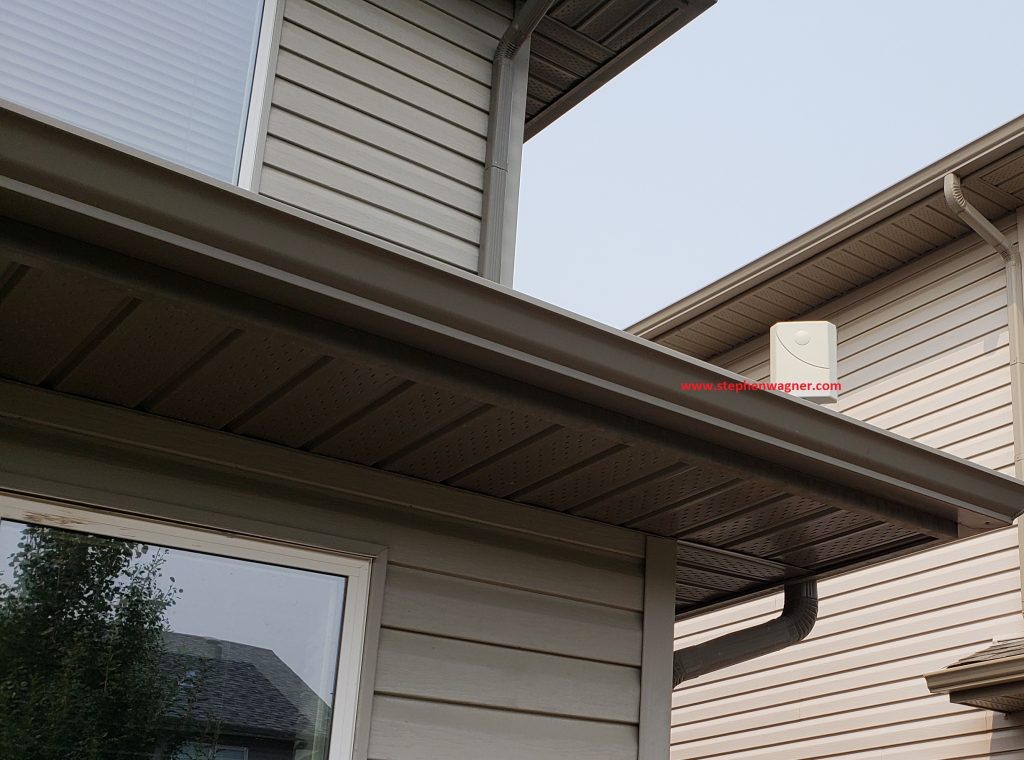
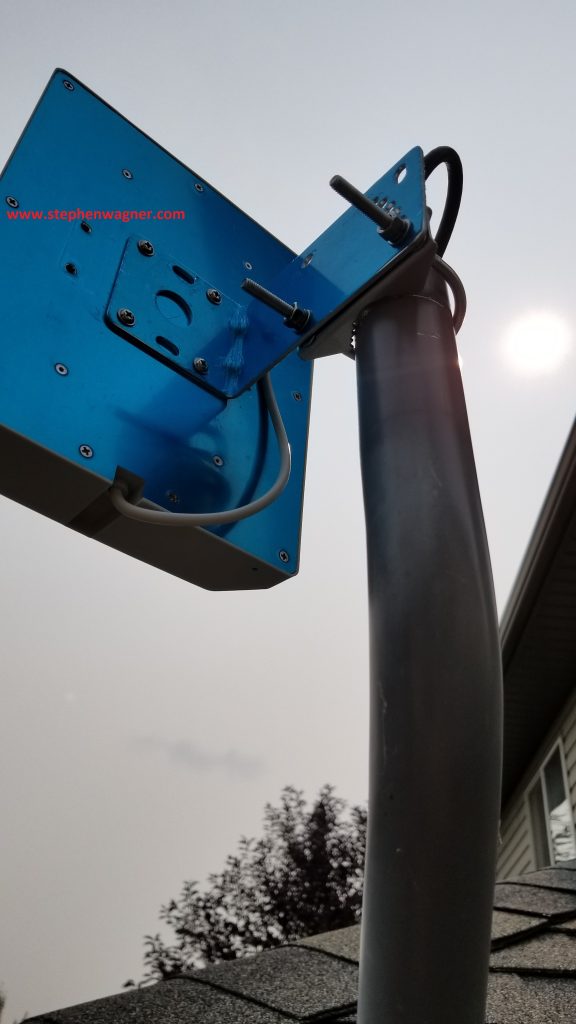
I finally got around to mounting my Wilson weBoost Home 4G Cell Phone Booster Antenna on the roof. Here’s some pictures of the completed install. I’ve had this booster for a while and it’s worked great, however some new cell towers went up in the area, and I wanted to stop using the window mount and re aim the antenna.

Wilson weBoost Home 4G Cell Phone Booster Roof Outdoor Antenna

Wilson weBoost Home 4G Cell Phone Booster Roof Outdoor Antenna

For those of you wanting to read my original post on the Wilson weBoost Home 4G Cell Phone Booster Kit, installation, and a review, you can find it at https://www.stephenwagner.com/2017/06/01/cellmobile-phone-reception-issues-resolve-with-a-wilson-amplifier-cell-booster/.

The house that I live in, actually had a roof mounted satellite dish that was no longer in use (used before the provider ran coax in the area). The dish, roof mount, and coax were all in place, however the coax was cut so I couldn’t re-use it.

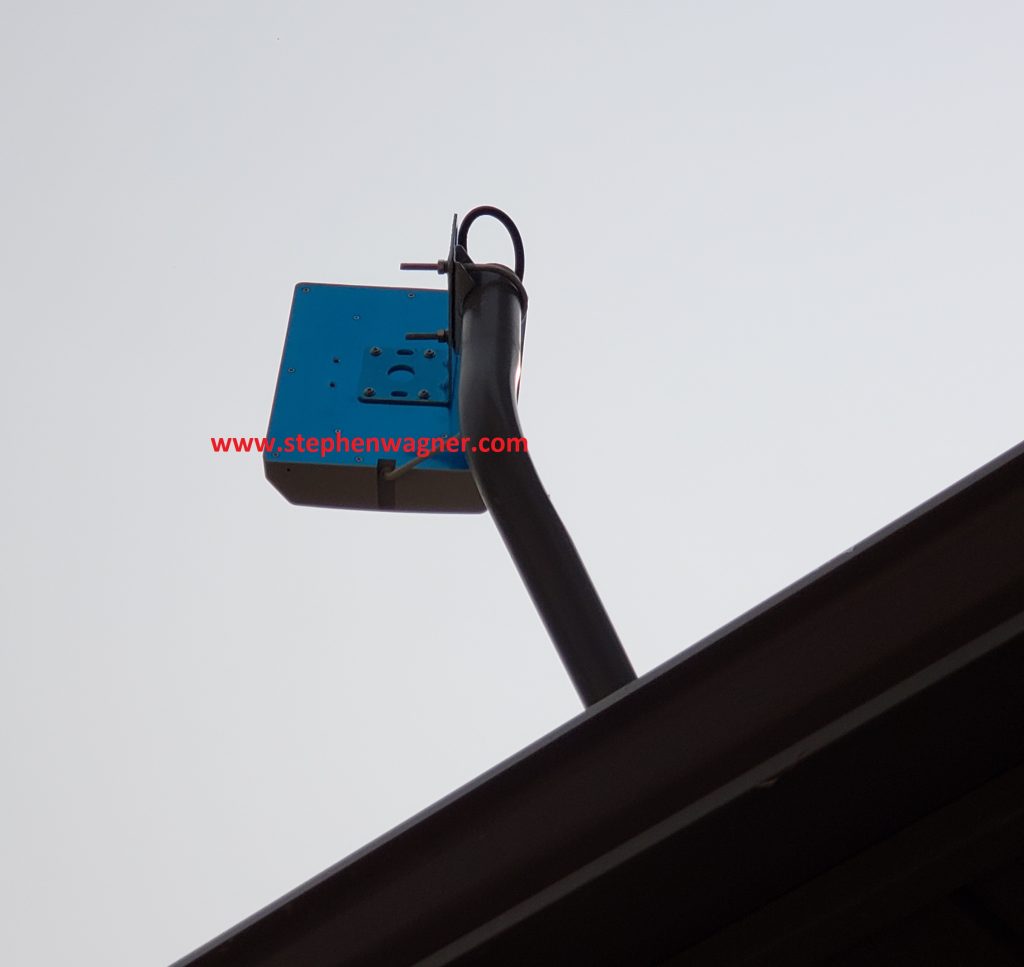
I was able to remove 2 of the bolts on the satelite dish to remove it from the pole mount, and proceeded to install the antenna on the pole using the outdoor mounting kit included with the cell booster. I was extremely pleased with the install.

See below for more pics:

Roof mounted Wilson weBoost Home 4G Cell Phone Booster Kit

Roof mounted Wilson weBoost Home 4G Cell Phone Booster Kit

Roof mounted Wilson weBoost Home 4G Cell Phone Booster Kit Cabling

Roof mounted Wilson weBoost Home 4G Cell Phone Booster Kit Cabling

Roof mounted Antenna pole mount

Roof mounted Antenna pole mount

The cabling goes through the pole, down to the eavestrough where I have it zip-stripped (yet elevated) along the roof until I get to the house’s siding. I was able to tuck it in the corner siding down to the wiring access panel for the house, then into the house through the hole.

After mounting it, it took around 30 minutes to aim it with the assistance of the “LTE Discover” Android app (available at https://play.google.com/store/apps/details?id=net.simplyadvanced.ltediscovery). Remember, when aiming your antenna, it’s important to unplug your booster for 5-10 seconds for it to fully reset for it to function with the new antenna position.

Again, make sure you check out my original post and review at https://www.stephenwagner.com/2017/06/01/cellmobile-phone-reception-issues-resolve-with-a-wilson-amplifier-cell-booster/!

Update – July 28th, 2019 – So here I am two years later. I live and swear by this signal booster. Since the original post, new towers have been erected in the area, however the coverage is still minimal and non-existant in the house. The roof mount (as discussed in the update above), as well as the signal booster provides me 100% full reception. The only issue I had is the power adapter (transformer) fried one day during a lightning storm. Replacing the power adapter resolved the issue and was an easy fix. For the 2 days I waited for the power adapter, I had no reception.

Aug 182018
 
CentOS Logo

Let’s say that you’re hosting someone’s equipment and they start to abuse their connection speed. Let’s say that you’re limited in your bandwidth, and you want to control your own bandwidth to make sure you don’t max out your own internet connection. You can take care of both of these problems by building your own traffic shaping network control device using CentOS and using the “tc” linux command.

In this post I’m going to explain what traffic shaping is, why you’d want to use traffic shaping, and how to build a very basic traffic shaping device to control bandwidth on your network.

What is traffic shaping

Traffic shaping is when one attempts to control a connection in their network to prioritize, control, or shape traffic. This can be used to control either bandwidth or packets. In this example we are using it to control bandwidth such as upload and download speeds.

Why traffic shaping

For service providers, when hosting customer’s equipment, the customer may abuse their connection or even max it out legitimately. This can put a halt on the internet connection if you share it with them, or cause bigger issues if it’s shared with other customers. In this example, you would want to implement traffic shaping to allot only a certain amount of bandwidth so they wouldn’t bring the internet connection or network to a halt.

For normal people (or a single business), as fast as the internet is today, it’s still very easy to max your connection out. When this happens you can experience packet loss, slow speeds, and interruption of services. If you host your own servers this can cause even a bigger issue with interruption of those services as well. You may want to limit your own bandwidth to make sure that you don’t bring your internet to a halt, and save some for other devices and/or users.

Another reason is just to implement basic QoS (Quality of Service) across your network, to keep usage and services in harmony and eliminate any from hogging the network connections up.

How to build your own basic traffic shaping device with CentOS and tc

In this post we will build a very simple traffic shaping device that limits and throttles an internet connection to a defined upload and download speed that we set.

You can do this with a computer with multiple NICs (preferably one NIC for management, one NIC for internet, and one NIC for network and/or the hosts to be throttled). If you want to get creative, there are also a number of physical network/firewall appliances that are x86 based, that you can install Linux on. These are very handy as they come with many NICs.

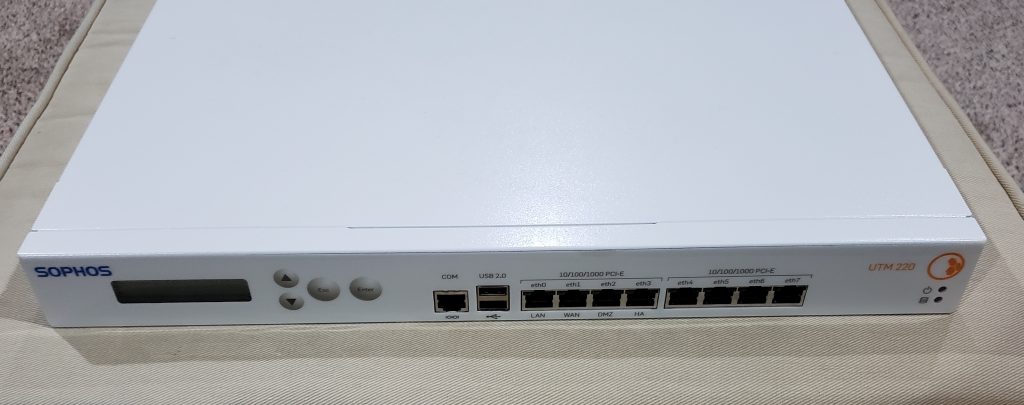
When I set this up, I used an old decommissioned Sophos UTM 220 that I’ve had sitting around doing nothing for a couple years (pic below). The UTM 220 provides 8 NICs, and is very easy to install Linux on to.

Sophos UTM 220 Running CentOS Linux

Sophos UTM 220 Running CentOS Linux

Please Note: The Sophos UTM 220 is just a fancy computer in a 1U rack mounted case with 8 NICs. All I did was install CentOS on it like a normal computer.

Essentially, all we’ll be doing is installing CentOS Linux, installing “tc”, configuring the network adapters, and then configuring a startup script. In my example my ISP provides me 174Mbps download, and 15Mbps upload. My target is to throttle the connection to 70Mbps download, and 8Mbps upload. I will allow the connection to burst to 80Mbps down, and 10Mbps up.

To get started:

  1. Install CentOS on the computer or device. The specifics of this are beyond the scope of this document, however you’ll want to perform a minimal install. This device is strictly acting as a network device, so no packages are required other than the minimal install option.
  2. During the CentOS install, only configure your main management NIC. This is the NIC you will use to SSH to, control the device, and update the device. No other traffic will pass through this NIC.
  3. After the install is complete, run the following command to enable ssh on boot:
    chkconfig sshd on
  4. Install “tc” by running the command:
    yum install tc
  5. Next, we’ll need to locate the NIC startup scripts for the 2 adapters that will perform the traffic shaping. These adapters are the internet NIC, and the NIC for the throttled network/hosts. Below is an example of one of the network startup scripts. You’re NIC device names will probably be different.
    /etc/sysconfig/network-scripts/ifcfg-enp2s0
  6. Now you’ll need to open the file using your favorite text editor and locate and set ONBOOT to no as shown below. You can ignore all the other variables. You’ll need to repeat this for the 2nd NIC as well.
    TYPE=Ethernet
    PROXY_METHOD=none
    BROWSER_ONLY=no
    BOOTPROTO=dhcp
    DEFROUTE=yes
    IPV4_FAILURE_FATAL=no
    IPV6INIT=yes
    IPV6_AUTOCONF=yes
    IPV6_DEFROUTE=yes
    IPV6_FAILURE_FATAL=no
    IPV6_ADDR_GEN_MODE=stable-privacy
    NAME=enp2s0
    UUID=xxxxxxxx-xxxx-xxx-xxxx-xxxxxxxxxxxx
    DEVICE=enp2s0
    ONBOOT=no
  7. Now we can configure the linux startup script to configure a network bridge between the two NICs above, and then configure the traffic shaping rules with tc. Locate and open the following file for editing:
    /etc/rc.d/rc.local
  8. Append the following text to the rc.local file:
    # Lets make that bridge
    brctl addbr bridge0
    
    # Lets add those NICs to the bridge
    brctl addif bridge0 enp5s0
    brctl addif bridge0 enp2s0
    
    # Confirm no IP set to NICs that are shaping
    ifconfig enp5s0 0.0.0.0
    ifconfig enp2s0 0.0.0.0
    
    # Bring the bridge online
    ifconfig bridge0 up
    
    # Clear out any existing tc policies
    tc qdisc del dev enp2s0 root
    tc qdisc del dev enp5s0 root
    
    # Configure new traffic shaping policies on the NICs
    # Set the upload to 8Mbps and burstable to 10mbps
    tc qdisc add dev enp2s0 root tbf rate 8mbit burst 10mbit latency 50ms
    # Set the download to 70Mbps and burstable to 80Mbps
    tc qdisc add dev enp5s0 root tbf rate 70mbit burst 80mbit latency 50ms
    
  9. Restart the linux box:
    shutdown -r now
  10. You now have a traffic shaping network device!

Final Thoughts

Please note that normally you would not place the script in the rc.local file, however we wanted something quick and simple. The script may not survive in the rc.local file when updates/upgrades are applied against on the Linux install, so keep this in mind. You’ll also need to test to make sure that you are throttling in the correct direction with the 2 NICs. Make sure you test this setup and allow time to confirm it’s working before putting it in a production network.