Update – January 8th 2018: After upgrading from Exchange 2016 CU7 to Exchange 2016 CU8 and restarting the server, the password prompt was occurring again on internal/external domain joined computers. Stay posted for more information.
Update – January 13th 2018: If you upgrade to any new CU versions (CU8 or higher), I would recommend resetting all your virtual directories to REVERSE the configuration advised below. On CU8, new issues arose and were resolved by fully resetting (restoring to default) the virtualdirectory configuration, and then re configuring them with the appropriate URL values. The fix below was NOT applied and is NOT needed on CU8 or later.
Update – January 14th 2018: If you still receive password prompts, you Outlook 2016 client may be trying to autoconfigure with Office365 instead of your on-premise Exchange deployment. This is due to the autodiscover order being skewed on a new Outlook 2016 update. Please see https://www.stephenwagner.com/2018/01/14/cannot-create-exchange-2016-account-office-2016-due-repeated-password-prompts/ for more information and a fix for this.
Original Article:
Today I came across an issue that I experienced with Microsoft Exchange 2013, and Microsoft Exchange 2016. The issue relates to using MAPI over HTTP with Microsoft Outlook 2016 (however I’m sure this affects earlier versions) clients.
MAPI over HTTP is used standard on Exchange 2016, or can be enabled manually on Exchange 2013 via running the command:
Set-OrganizationConfig -MapiHttpEnabled $true
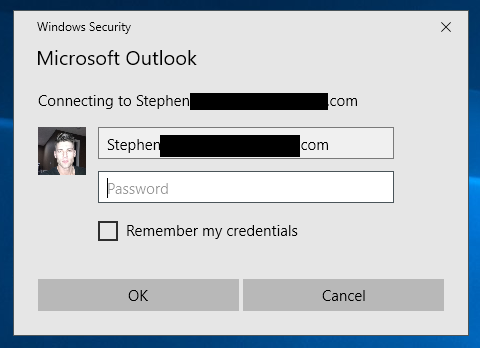
You’ll notice that when domain joined computers are internal to the LAN, they will work fine and there will not be any password prompts coming from Microsoft Outlook. However, when a domain joined user leaves the LAN and is external to the network, they will start to receive password prompts like below:

After spending hours, I found this fix resolves the situation and applies to both Exchange 2013, and Exchange 2016:
Open up Exchange PowerShell and change the authentication methods on the MAPI virtual directory. We will be removing the negotiate authentication mechanism. Use the command below:
Set-MapiVirtualDirectory -Identity “YOURSERVERNAME\mapi (Default Web Site)” -ExternalURL https://YOURSERVERNAME.YOURDOMAIN.com/mapi -IISAuthenticationMethods NTLM,OAuth
We now need to modify the Authentication settings inside of IIS to remove Negotiate from both the mapi and EWS directories. The command above may have removed it from mapi, but it’s still good to confirm and we still need to change it for EWS. Open IIS Manager, Expand “Default Web Site”. Select “EWS” on the left hand side, and then select “Authentication” on the Right side as shown below:

Select Windows Authentication and then click “Providers” on the right Action Pane. Now remove “Neogiate” from the list so that only NTLM remains, as shown below:

Repeat for the mapi on the left as well (Select “Default Web Site”, select “mapi” on the left hand side, and then select “Authentication” on the right side), and confirm that only NTLM is in the list of providers.
Open up command prompt and type “IISRESET” to reload IIS, or restart your Exchange Server!


